
 Download the App
Knitting Gauge: The Complete Guide to Swatching, Measuring & Getting It Right
10 Sep, 2026
Knitting gauge is the number of stitches and rows per inch your knitting produces with a specific yarn, needle, and tension, and it's the single biggest reason a finished sweater fits or doesn't. This guide covers everything from your first swatch to the actual math, so you can treat gauge as a five-minute check rather than a mystery. If you want the short version of this whole yarn gauge guide: swatch, measure, adjust your needle size if needed, then knit.
Never guess you Gauge Again
 Download Yarnzy
What Is Knitting Gauge?
Gauge is simply a ratio: how many stitches and rows fit into a set measurement, almost always 4 inches (or 10cm) in knitting patterns. It exists because everyone knits differently. Hand two knitters the same yarn and the same needles, and one will produce noticeably tighter fabric than the other, purely from personal tension. Gauge in knitting is how a pattern accounts for that variation: match the pattern's gauge, and your finished piece comes out the size the designer intended, regardless of how tightly or loosely you personally knit.
Two related numbers make up your stitch gauge and row gauge together, and both matter, even though most knitters only think about the first one.
Stitch Gauge vs. Row Gauge
Stitch gauge is the number of stitches per inch, measured horizontally across your knitting. Row gauge is the number of rows per inch, measured vertically. Stitch gauge gets far more attention because it's what determines the width of a garment, but row gauge matters just as much for anything with length-based shaping, sleeve caps, raglan increases, or a sweater body worked to a specific length before shaping starts. If your row gauge is off, your shaping will land in the wrong place even if your stitch count is perfect.
How Gauge Is Written in a Knitting Pattern
You'll usually see gauge written as something like "18 sts + 24 rows = 4 in. in St st." Read left to right: 18 stitches and 24 rows, measured over a 4-inch square, worked in stockinette stitch. Some knitting gauge charts list the measurement over 10cm instead of 4 inches, which is roughly the same distance (4 inches is actually 10.16cm, close enough that patterns treat them as equivalent). The stitch pattern named matters too. Stockinette, garter, and ribbing all produce different gauges even with identical yarn and needles, so a gauge given "in St st" only applies if you're actually swatching in stockinette.
Why Gauge Matters for Fit
Here's how small a gauge mismatch has to be before it becomes a real problem. Say a pattern calls for a 40-inch sweater at a gauge of 4 stitches per inch, meaning you'd cast on 160 stitches (4 × 40). If your actual gauge comes out at 4.5 stitches per inch instead, a difference that can feel almost invisible while you're knitting, those same 160 stitches now only measure 35.5 inches around (160 ÷ 4.5). That's a 4.5-inch difference in finished size from a gauge gap most knitters wouldn't even notice by eye. This is why gauge matters more for fitted garments than for anything where exact size is flexible, like a scarf or a blanket.

Turn your gauge into exact numbers Use the stitch calculator to turn your gauge into exact cast-on numbers.
How to Knit and Measure a Gauge Swatch
A gauge swatch is a small practice piece, knit with your actual project yarn and needles, that lets you check your gauge before committing to the full project. Here's the full process.
What You Need Before You Swatch
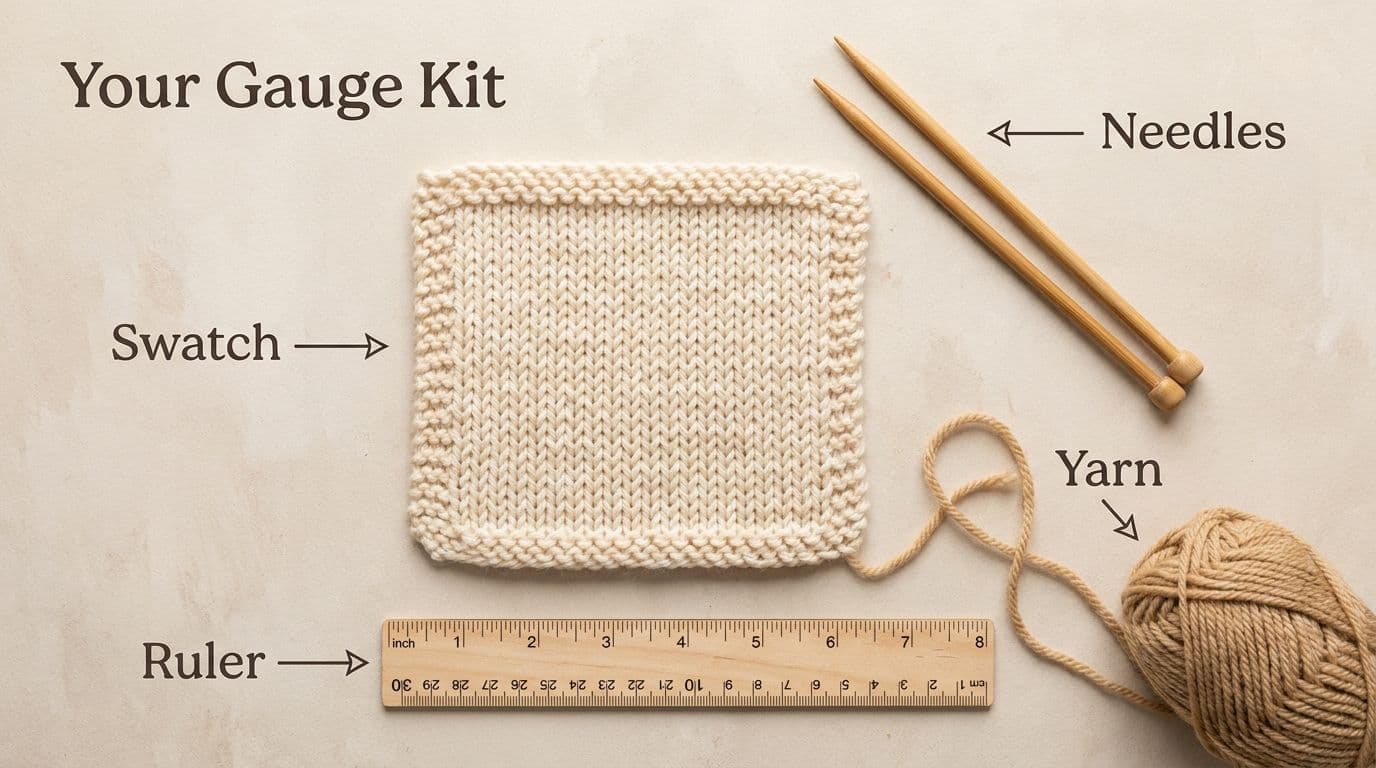
You'll need the same yarn you're using for your project, the same needles the pattern calls for (or your best guess at the right size), and a ruler or gauge ruler for measuring. A gauge ruler, a small rigid ruler with a window cut out for counting stitches, makes counting easier than a standard tape measure, though either works.
How to Cast On and Knit the Swatch
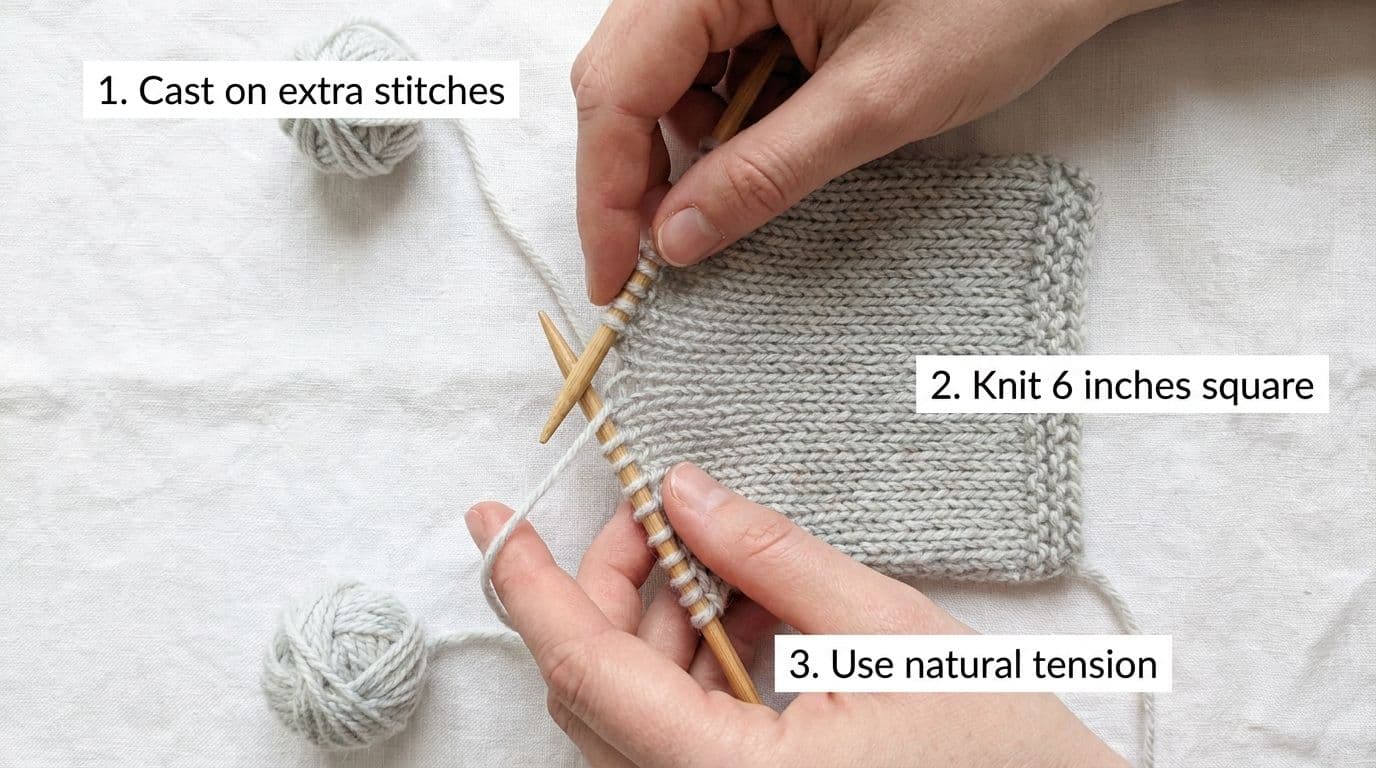
Cast on more stitches than the pattern's gauge count over 4 inches, roughly 1.5 times the number, so you have enough fabric to measure a clean section without the edges interfering. If a pattern's gauge is 16 stitches over 4 inches, cast on at least 24. Knit until your swatch measures at least 6 inches square, using your normal, natural tension rather than consciously trying to knit tighter or looser than usual, since the whole point is measuring how you actually knit. Use the same stitch pattern named in the gauge (stockinette, if that's what's specified), since different stitch patterns produce different gauges even on identical yarn and needles.
Should You Block Before You Measure?
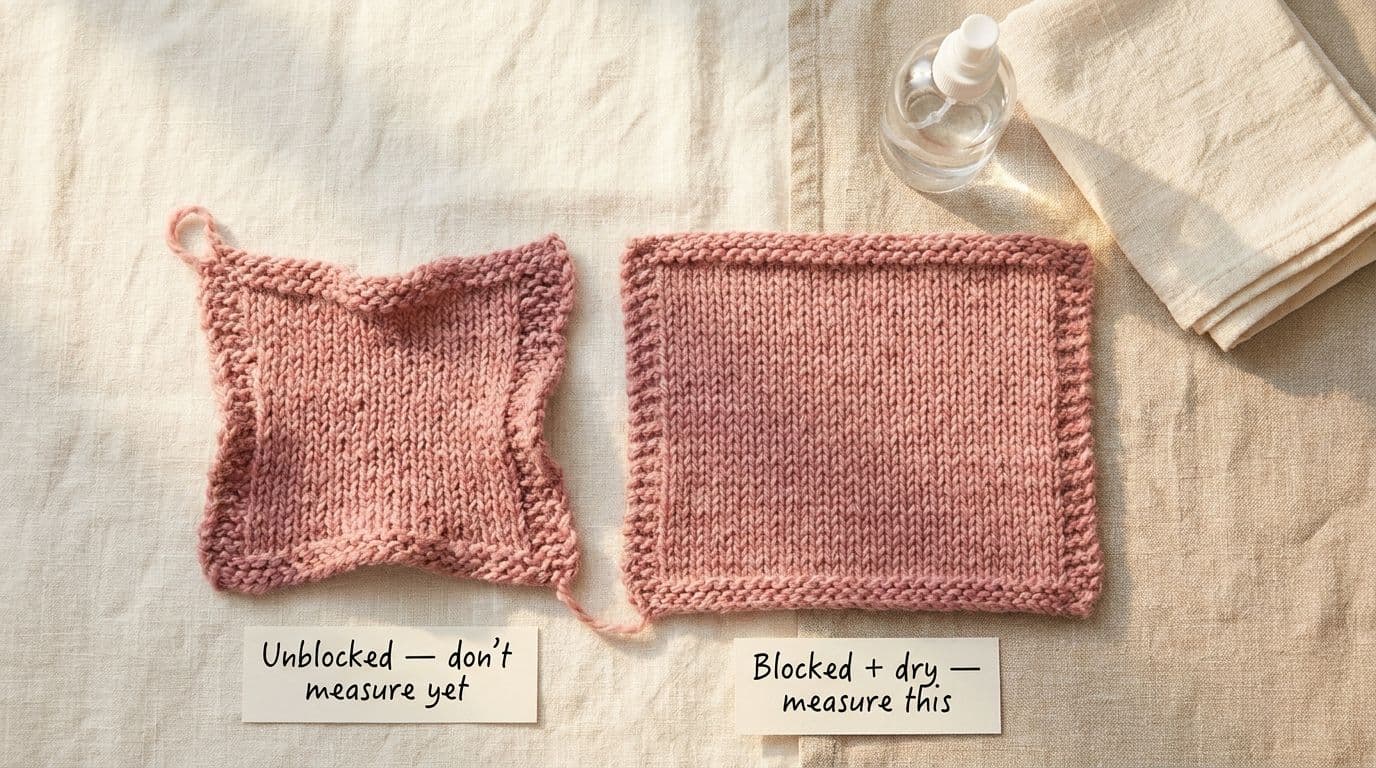
Yes, especially for wool and other natural fibers. Many yarns bloom, relax, or shift slightly in size once washed and blocked, which means an unblocked swatch can measure differently than your actual worn or finished project will. Wash and block your swatch exactly the way you plan to treat the finished piece: if you'll hand wash the sweater, hand wash the swatch the same way, and let it dry flat before measuring. Skipping this step is the most common reason a swatch measures correctly but the finished garment still comes out the wrong size.
How to Measure Accurately
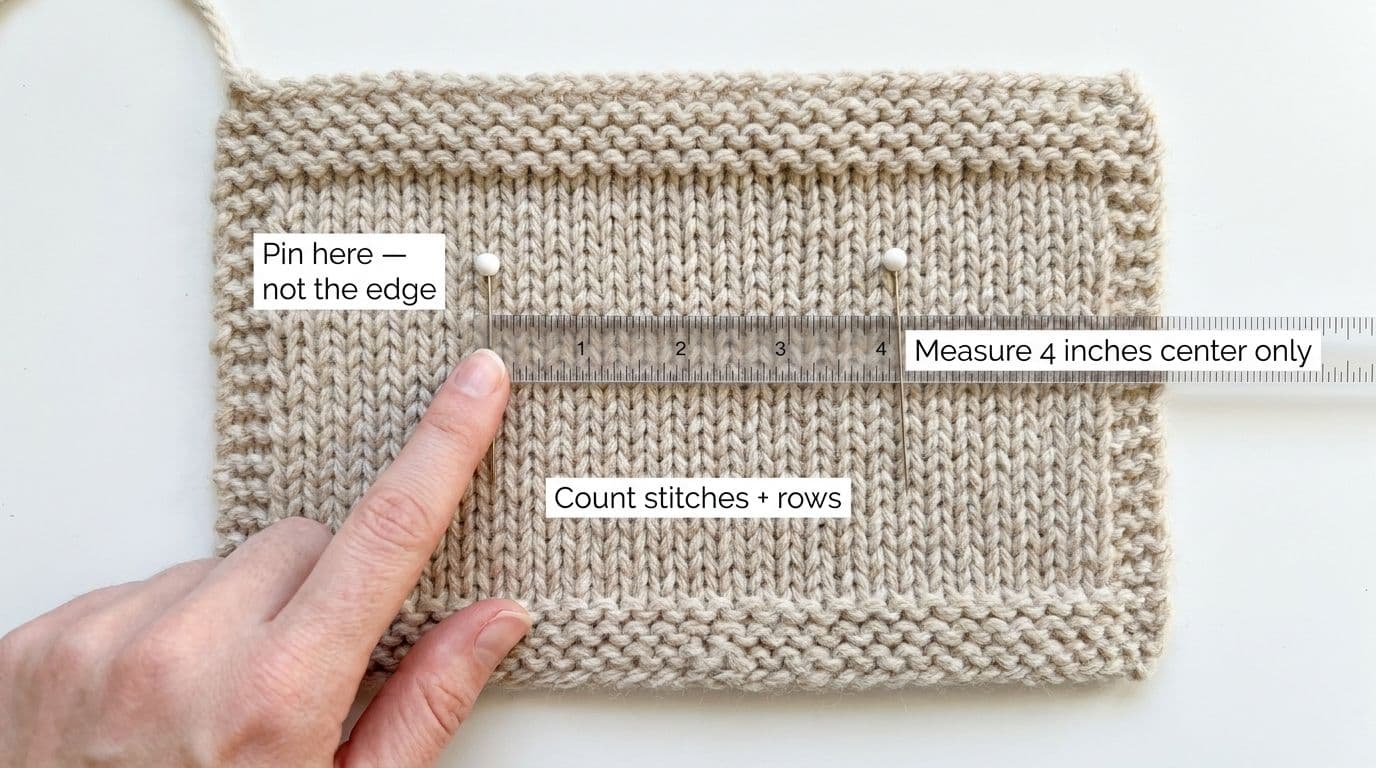
Lay your blocked, dry swatch flat without stretching it. Rather than measuring from the very edge, mark a 4-inch section in the center of the swatch using pins, since edge stitches are almost always looser than the rest of the fabric and will throw off your count. Count the stitches within that marked section, including any half-stitches, then do the same for rows. Compare both numbers to the pattern's stated gauge.
Flat vs. In the Round: Does It Change Your Gauge?
Yes, and this is a detail most gauge guides skip entirely. If you knit flat, you alternate knit and purl rows, and most knitters' purl stitches sit at a very slightly different tension than their knit stitches. Knitting in the round means every row is a knit stitch, with no purl rows to introduce that tension shift. The practical result: your gauge knit flat and your gauge knit in the round on the exact same yarn and needles can come out slightly different. If your actual project will be knit in the round (a hat, a sweater body worked circularly), swatch in the round too, not flat, even though a flat swatch is faster to knit. Swatching in the wrong format is a quiet, common reason a swatch checks out but the real project still comes out off.

Not sure which needle size to start with? Check the hook & needle chart for your yarn weight.
How Needle Size and Yarn Weight Affect Gauge
Gauge isn't random. It's the direct result of three variables working together, and understanding them is what lets you actually fix a gauge problem instead of guessing.
The Three Variables That Control Your Gauge
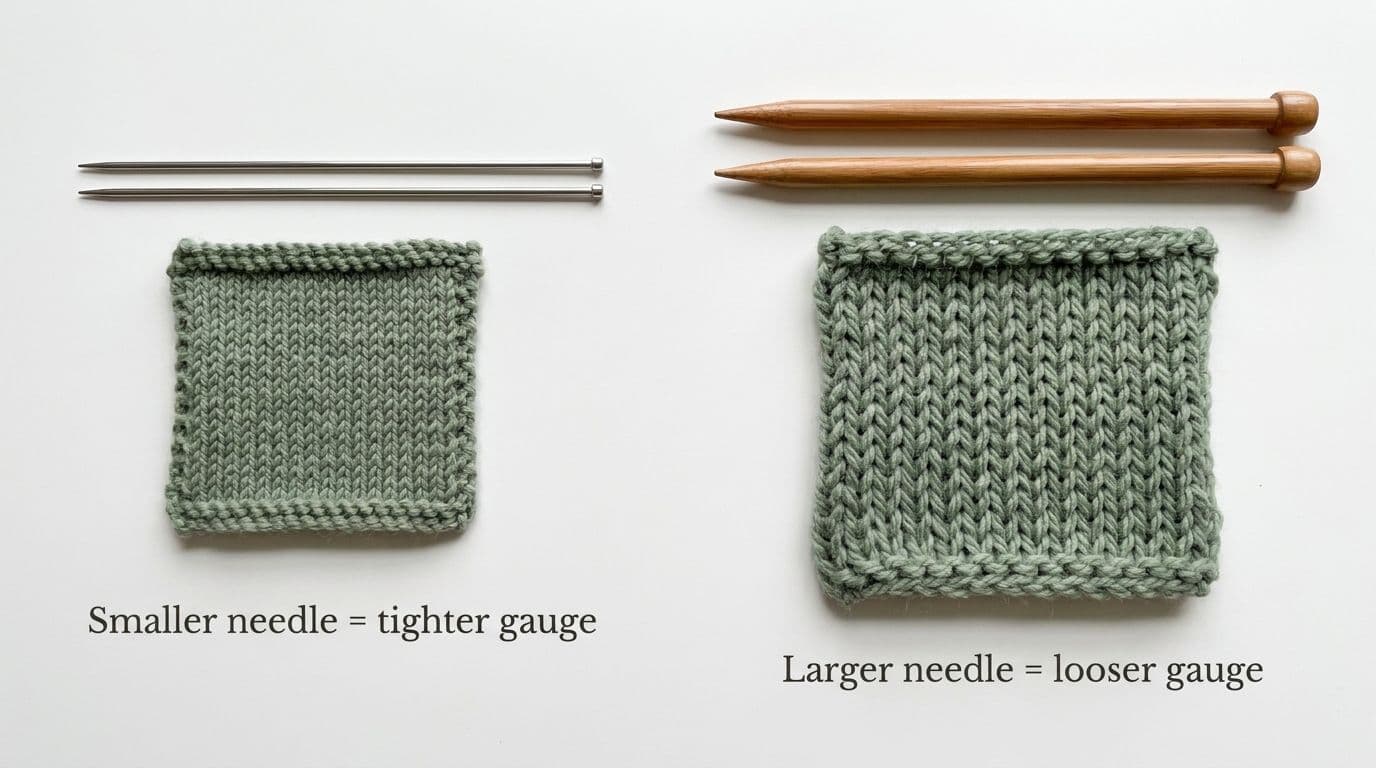
Yarn weight sets the baseline: thicker yarn naturally produces bigger stitches and a looser gauge, thinner yarn produces smaller stitches and a tighter gauge. Needle size adjusts within that baseline: bigger needles stretch each stitch larger, smaller needles pull each stitch tighter, using the identical yarn. Your personal tension is the variable you can't easily change: how tightly or loosely you naturally wrap yarn around the needle as you knit. Of the three, tension is essentially fixed for a given knitter, which is exactly why needle size becomes your main adjustment tool. If your gauge doesn't match a pattern, you're not usually changing your yarn or your hands, you're changing your needle size to compensate for your tension.
What Gauge Should I Expect for Each Yarn Weight?
As a general reference, typical stitch gauges (stockinette, per 4 inches) by yarn weight run roughly:
• Lace: 33 to 40 stitches
• Super fine (sock/fingering): 27 to 32 stitches
• Fine (sport): 23 to 26 stitches
• Light (DK): 21 to 24 stitches
• Medium (worsted): 16 to 20 stitches
• Bulky: 12 to 15 stitches
• Super bulky: 7 to 11 stitches
• Jumbo: 6 stitches or fewer
These are general ranges, not fixed rules. Actual gauge varies by brand, fiber content, and your own tension, so treat this as a starting expectation rather than a target to force. If you want the matching needle size range for any of these weights, the hook & needle chart pairs each yarn weight with its typical needle size.
How to Use Your Gauge to Do the Knitting Math
Once you know your actual gauge, you can use it to calculate real numbers for your project, rather than just following a pattern's pre-calculated ones.
Turning Your Gauge into a Cast-On Number
The core formula is simple: stitches per inch × target width in inches = your cast-on number. If your gauge is 4.5 stitches per inch and you want a 20-inch-wide piece, you'd cast on 90 stitches (4.5 × 20). This is the same calculation that lets you resize a pattern to a different width, adjust a pattern written for a different yarn to your own gauge, or design a simple piece from scratch without a pattern at all.
Enter your gauge and target width to get your exact cast-on count with the stitch calculator, rather than doing this math by hand every time.
Metric vs. Imperial: Converting Your Gauge
If your gauge is measured in stitches per inch but a pattern gives gauge in stitches per 10cm (or the reverse), you need to convert before comparing them directly. Since 1 inch equals 2.54cm, the correct conversion is:
Stitches per 10cm = stitches per inch × 3.94
Or in reverse: stitches per inch = stitches per 10cm ÷ 3.94
For example, a gauge of 5 stitches per inch converts to roughly 19.7 stitches per 10cm (5 × 3.94). This conversion trips up a lot of knitters working from patterns written in a different measurement system than they're used to, especially since some sources round the conversion incorrectly. Convert between metric and imperial instantly with the unit conversion tool if you'd rather skip the manual math.
When Your Increase or Decrease Math Changes With Gauge
Here's a downstream consequence of a gauge change that most gauge guides never mention: if your gauge doesn't match a pattern's and you switch needle sizes to fix it, any increases or decreases in the pattern (shaping for a sleeve cap, a raglan line, a fitted waist) may need to be re-spaced. A pattern's shaping instructions are usually written for its specific stitch count; if your total stitch count changes because your gauge did, the spacing between increases or decreases often needs to scale with it, not just the overall stitch count. Re-space your increases and decreases automatically with the increase & decrease calculator rather than recalculating the spacing by hand.
Enter your gauge and target width to get your exact cast-on count with the stitch calculator.
What to Do When Your Gauge Doesn't Match
If your swatch doesn't match the pattern's stated gauge, here's how to fix it.
Too Many Stitches Per Inch (Gauge Too Tight)
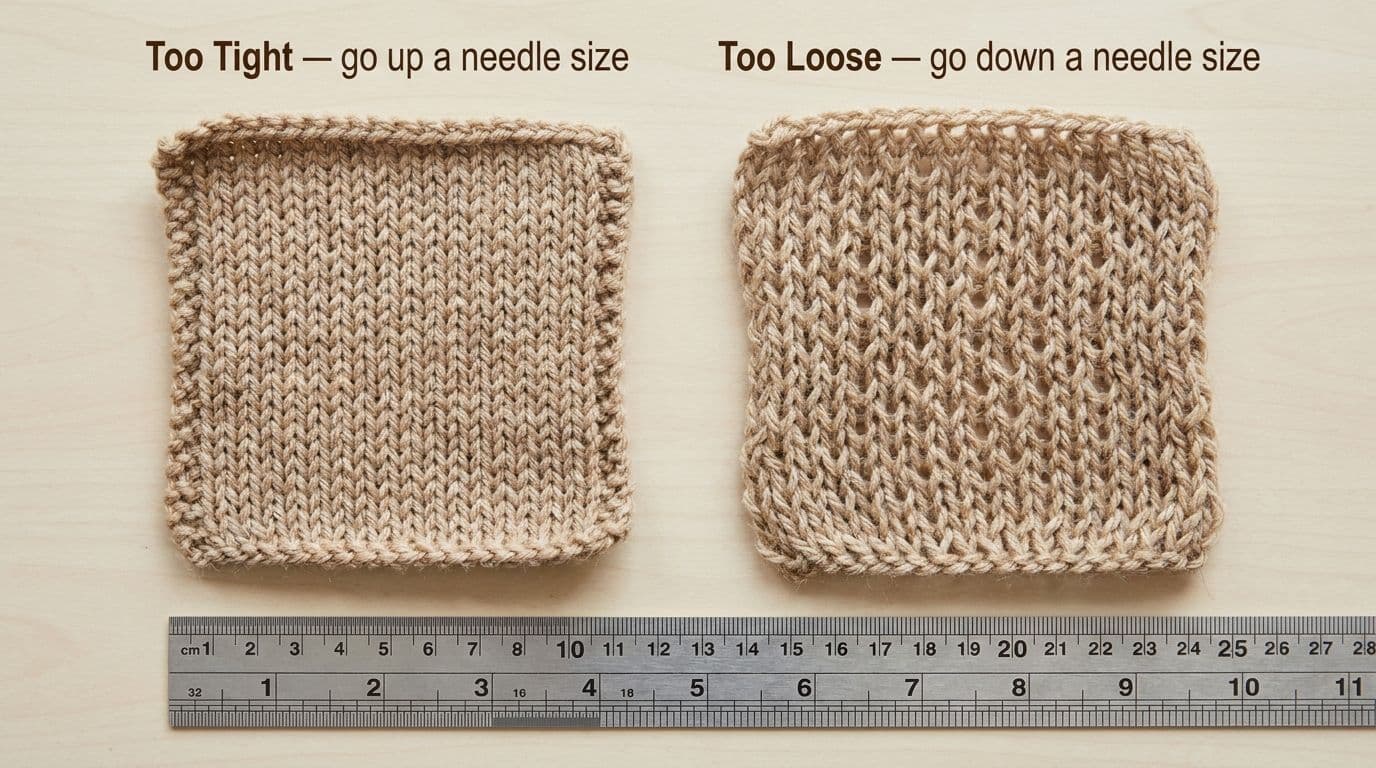
Too many stitches per inch means your gauge is tighter than the pattern's. The fix is a larger needle, which stretches each stitch slightly wider and brings your stitch count down toward the pattern's target. Reswatch after switching, rather than assuming a single size change will land exactly right.
Too Few Stitches Per Inch (Gauge Too Loose)
The mirror problem: too few stitches per inch means your gauge is looser than the pattern's, and the fix is a smaller needle, which tightens each stitch and increases your stitch count per inch. As with a too-tight gauge, reswatch to confirm rather than assuming.
When Changing Needles Isn't Enough
Occasionally, several needle-size changes still won't close the gap, your gauge stays off even a size or two up or down from what feels reasonable for the yarn. When that happens, the yarn itself is usually the real mismatch, not your needle choice. A yarn that's meaningfully thicker or thinner than the pattern's intended weight may not reach the target gauge at any reasonable needle size without producing fabric that's uncomfortably stiff or unreasonably loose. Find a substitute yarn with matching gauge using the yarn substitution tool rather than continuing to force the wrong yarn onto smaller or larger needles.
Can You Just Adjust the Pattern Instead?
Sometimes, but not always. For simple patterns with no shaping, a garter stitch scarf, a basic dishcloth, you can often just change your stitch count to hit your target dimensions without touching your gauge at all. For anything with shaping (increases, decreases, cables, fitted sections), adjusting the pattern instead of your gauge is riskier, since changing the stitch count can throw off where shaping lands or distort a stitch pattern that depends on a specific repeat count. If the project has any real shaping, it's generally safer to fix your gauge than to reverse-engineer the pattern's math around a gauge you didn't hit.
Common Gauge Mistakes and How to Avoid Them
A few mistakes account for most gauge problems that aren't actually about tension at all:
• Measuring an unblocked swatch when the yarn is one that blooms or relaxes with washing, wool especially. Always block before your final measurement.
• Measuring from the edge of the swatch instead of the center, which picks up looser edge stitches and skews your count.
• Swatching flat when the project is worked in the round, or the reverse, which can produce a swatch that checks out but doesn't match your actual project's gauge.
• Ignoring row gauge entirely and only checking stitch count, which causes shaping and length-based sections to land in the wrong place even when the width comes out correct.
• Giving up after one needle change instead of reswatching to confirm the adjustment actually worked, rather than assuming it did.
Conclusion
Gauge isn't really about being a "precise" knitter. It's a five-minute check that saves you from an entire project coming out the wrong size. Swatch in your actual yarn and stitch pattern, block it the way you'll treat the finished piece, measure from the center rather than the edge, and adjust your needle size if the numbers don't match. Once you've got your real gauge, the same numbers let you calculate cast-on counts, convert between measurement systems, and adjust shaping, not just follow a pattern's pre-done math.
Frequently Asked Questions
Knitting gauge is the number of stitches and rows your knitting produces per inch (or per 4 inches) with a specific yarn, needle, and tension. It matters because matching a pattern's gauge is what makes a finished project come out the size the designer intended, rather than noticeably too large or too small.
Share this page
 X / Twitter
 Facebook
 Reddit
Related articles
Bernat Yarn Substitutes: What to Use Instead of Blanket, Maker, Pipsqueak & Bundle Up

How to Crochet a Pumpkin: Free Patterns for Fall & Halloween Decor
How to Read Crochet Patterns: A Beginner's Guide

Yarnzy: #1 Crochet & Knitting App
Track knitting and crochet projects with a timer & row counter, Import Patterns from Anywhere, Manage Stash & more all in one place.


Free to start · iOS, Android & Web
Scan to Download the App

Start your next project with confidence