
 Download the App
How to Crochet a Pumpkin: Free Patterns for Fall & Halloween Decor
8 Oct, 2026
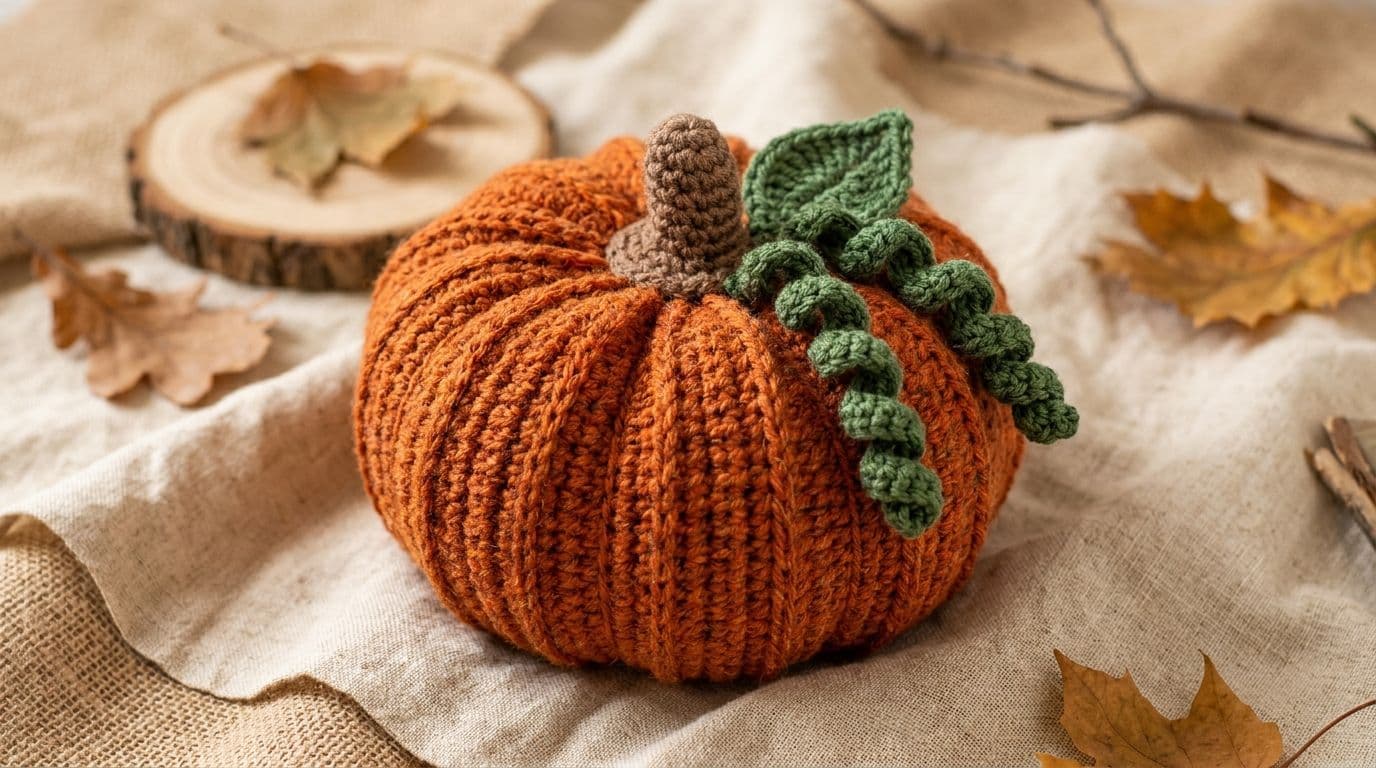
To crochet a pumpkin, work a round ball of orange yarn in a single crochet, stuff it with fiberfill, and close the top. Wrap a long strand of yarn around the outside to form the ribbed segments, then sew on a stem and leaves. A basic pumpkin takes roughly one to two hours and needs only a hook, worsted yarn and stuffing.
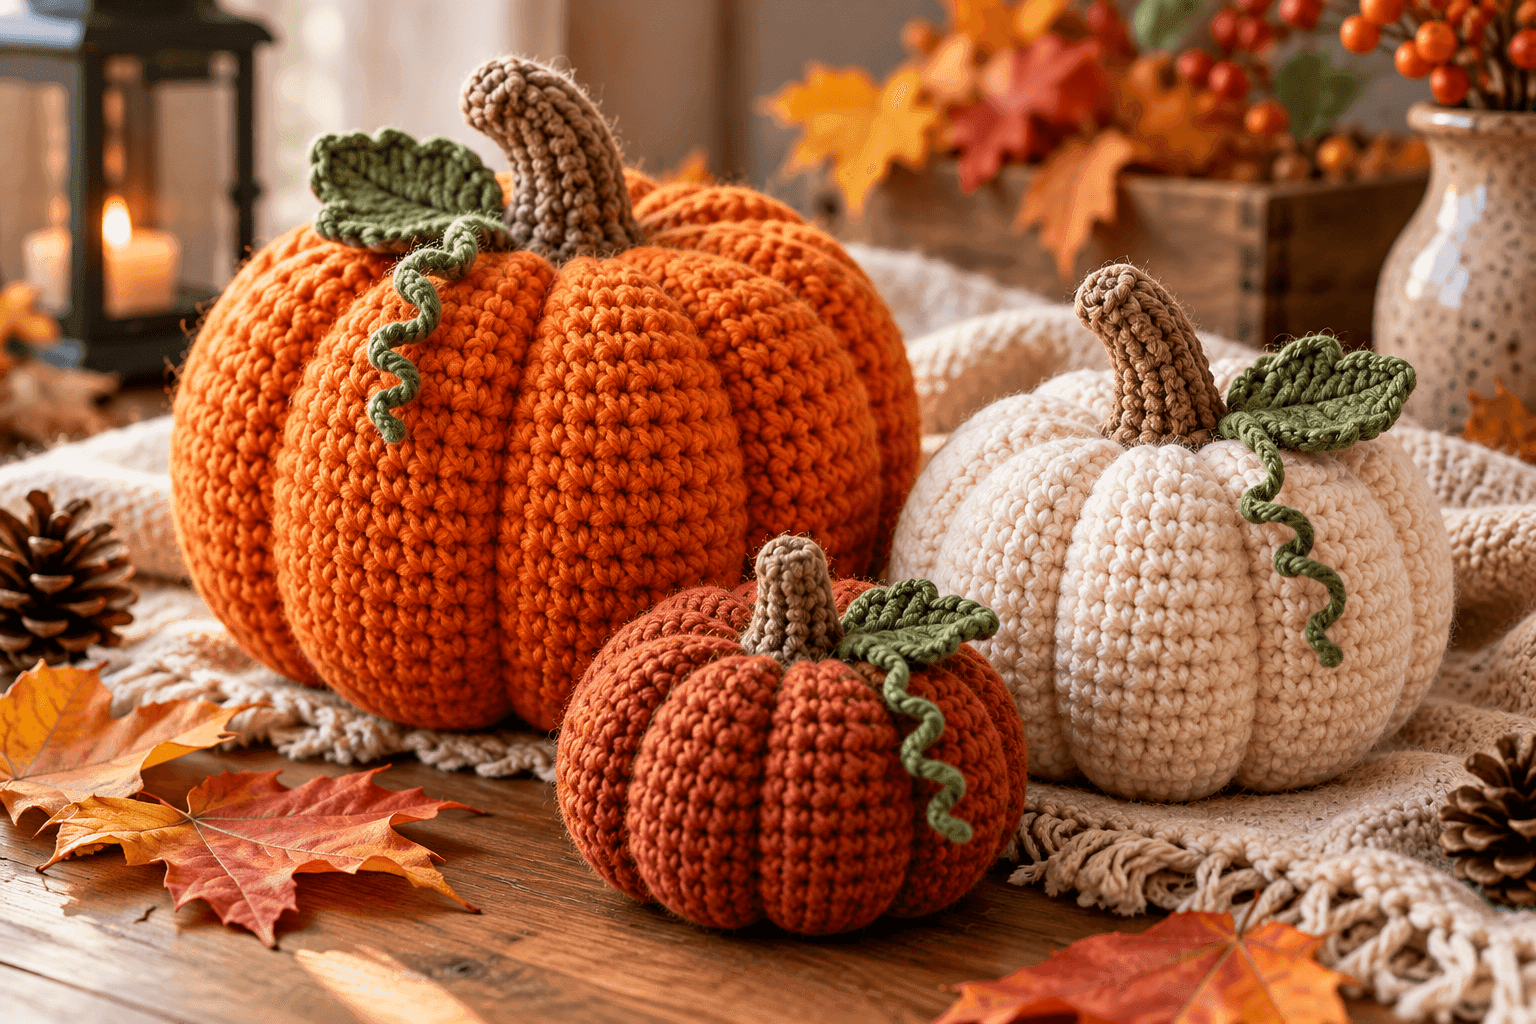
This guide gives you one complete free pattern. It also shows how the same idea changes with texture, size and construction, so you can make a crochet pumpkin for a porch, a mantel or a Halloween party.
Make Your Halloween Extra Cozy
 Browse Free Patterns
Pumpkin Styles at a Glance
A crochet pumpkin is a stuffed fabric shape cinched into segments. The five main styles differ in how the body is built.
| Style | How it's made | Stitches used | Difficulty | Time |
|---|---|---|---|---|
| Basic stuffed | Worked in a spiral from a magic ring | sc, inc, dec | Beginner | 1–2 hrs |
| Flat (rectangle) | Worked in rows, seamed into a tube, gathered | sc, hdc (back loops) | Beginner | 1.5–2 hrs |
| Textured | Flat rows with puff or colorwork stitches, then seamed | puff, sc, tapestry | Intermediate | 2–3 hrs |
| Large / pillow | Chunky yarn or a bigger stitch count | sc, hdc | Beginner | 1.5–3 hrs |
| Mini / garland | Fine yarn, small stitch count | sc, inc, dec | Beginner | 30–45 min |
Times are estimates and vary with speed and yarn.
Which Pumpkin Pattern Is Right for You?
• First pumpkin: choose the basic stuffed style. It has no seams, only three stitches, and the pattern below uses it.
• Fast gift or craft-fair batch: the flat method uses simple rows with no shaping, so it suits batches.
• Texture lovers: try the textured style once you've made a basic one.
• A tiny decoration: go mini. A beginner can finish one in under an hour.
Basic Pumpkin Pattern: 5-Step Tutorial
This is an easy crochet pumpkin worked in a continuous spiral. That means you do not join rounds or chain up. Keep going around, and mark the first stitch of each round with a stitch marker. Written in US terms.
Abbreviations: sc = single crochet, inc = 2 sc in the same stitch, dec = single crochet 2 together, st = stitch.
Materials & Hook Sizes
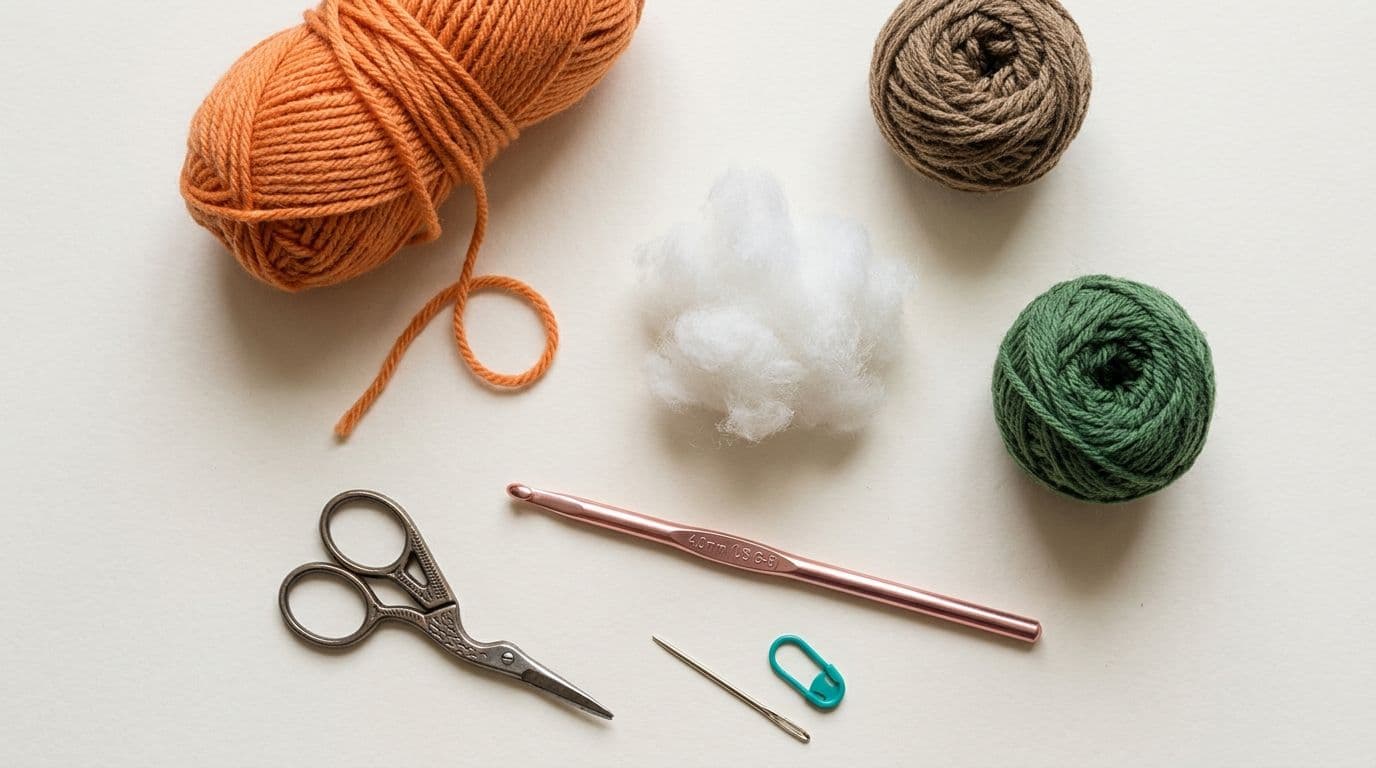
• Yarn: about 2 oz (roughly 100 yards) of worsted-weight (#4) orange yarn, plus scraps of brown and green
• Hook: 4.0 mm (US G-6), or one to two sizes smaller than your yarn label suggests. A tighter fabric keeps the stuffing from showing.
• Notions: fiberfill, stitch marker, tapestry needle, scissors
Finished size: about 4 inches wide with this yarn and hook. Your tension and stuffing will change this a little.

Not sure what a stitch abbreviation means? Look up any stitch in the Yarnzy Stitch Dictionary.
Basic Pumpkin Pattern: Step-by-Step for Beginners
Before you start: 4 things to know
1. Stitches used in this pattern
• sc (single crochet): insert the hook into the stitch, yarn over and pull up a loop (2 loops on the hook). Yarn over again and pull through both loops.
• inc (increase): make 2 sc in the same stitch. This adds one stitch and makes the circle grow wider.
• dec (decrease): this joins two stitches into one so the shape gets smaller. Insert the hook into the next stitch and pull up a loop (2 loops on the hook). Insert the hook into the following stitch and pull up a loop (3 loops on the hook). Yarn over and pull through all 3 loops.
• Magic ring: a adjustable loop you make at the start. You crochet into it, then pull the tail to close the center hole.
2. How to read "(sc 2, inc) × 6"
Everything inside the brackets is one repeat. "(sc 2, inc) × 6" means: make 2 single crochets, then 1 increase. Do that whole sequence 6 times around the round.
The number in brackets at the end, like (24), is your stitch count. Count your stitches at the end of each round. If the number is wrong, fix it now, not later.
3. Use a stitch marker
This pattern is worked in a spiral. You do not join rounds and you do not chain at the start of a round. Put a stitch marker in the first stitch of each round. When you get back to it, move the marker up into your newest stitch and keep going.
4. Work tightly
Use a hook one or two sizes smaller than your yarn label says. Tight stitches keep the stuffing from showing.
Step 1: Make the base (Rounds 1–8)
The base is a flat circle that gets bigger every round. You add stitches evenly so it stays flat.
1. Make a magic ring.
2. R1: Work 6 sc into the ring. Pull the tail to close the hole. (6 stitches)
3. R2: Work an increase in every stitch (2 sc in each). (12)
4. R3: Repeat (1 sc, 1 inc) 6 times. (18)
5. R4: Repeat (2 sc, 1 inc) 6 times. (24)
6. R5: Repeat (3 sc, 1 inc) 6 times. (30)
7. R6: Repeat (4 sc, 1 inc) 6 times. (36)
8. R7: Repeat (5 sc, 1 inc) 6 times. (42)
9. R8: Repeat (6 sc, 1 inc) 6 times. (48)
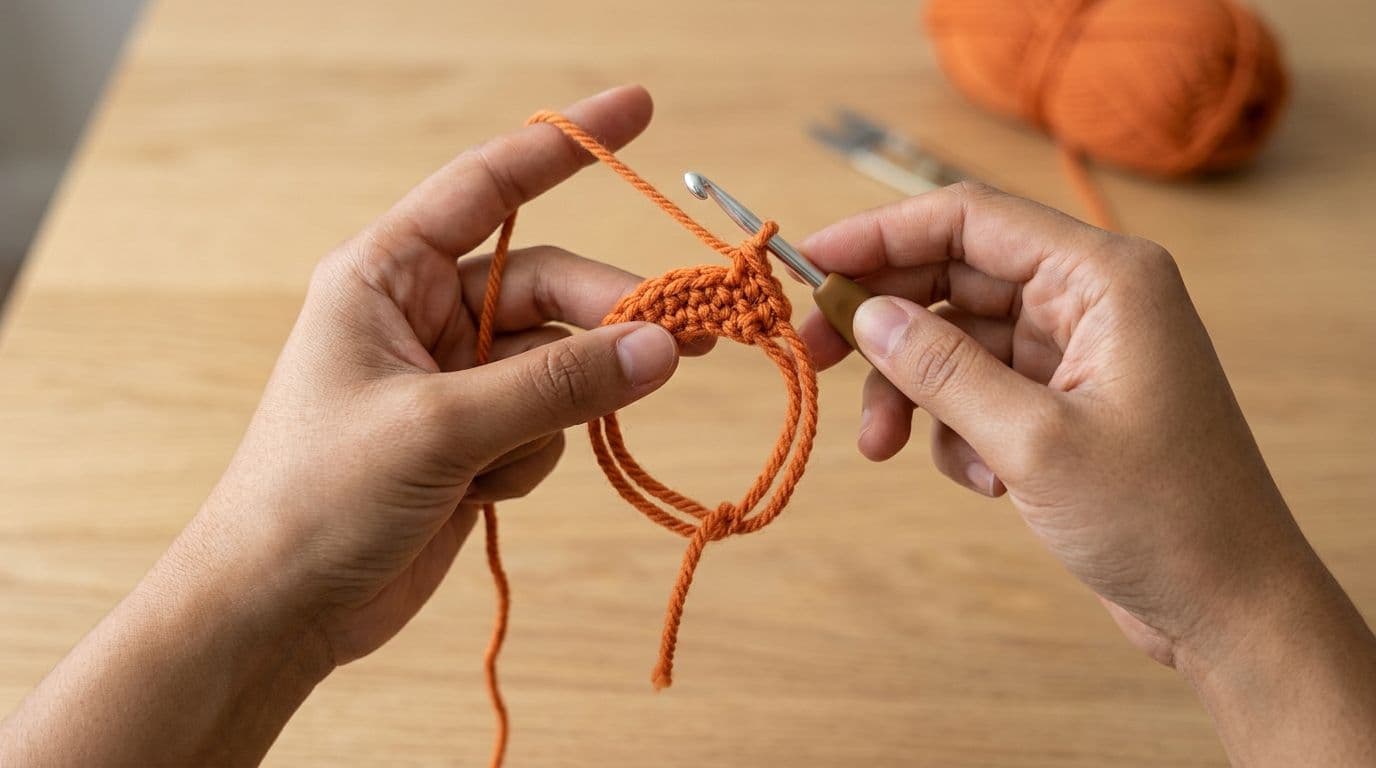
Pattern to notice: each round has one more plain sc between the increases than the round before. That keeps the circle flat.
Check: the piece should lie flat like a small plate. If it ripples or looks like a hat, you probably missed or added a stitch. Count again.
Step 2: Build the sides (Rounds 9–16)
Now you stop increasing, so the circle turns into the wall of the pumpkin.
• R9-R16: Work 1 sc in every stitch around. (48 stitches each round)
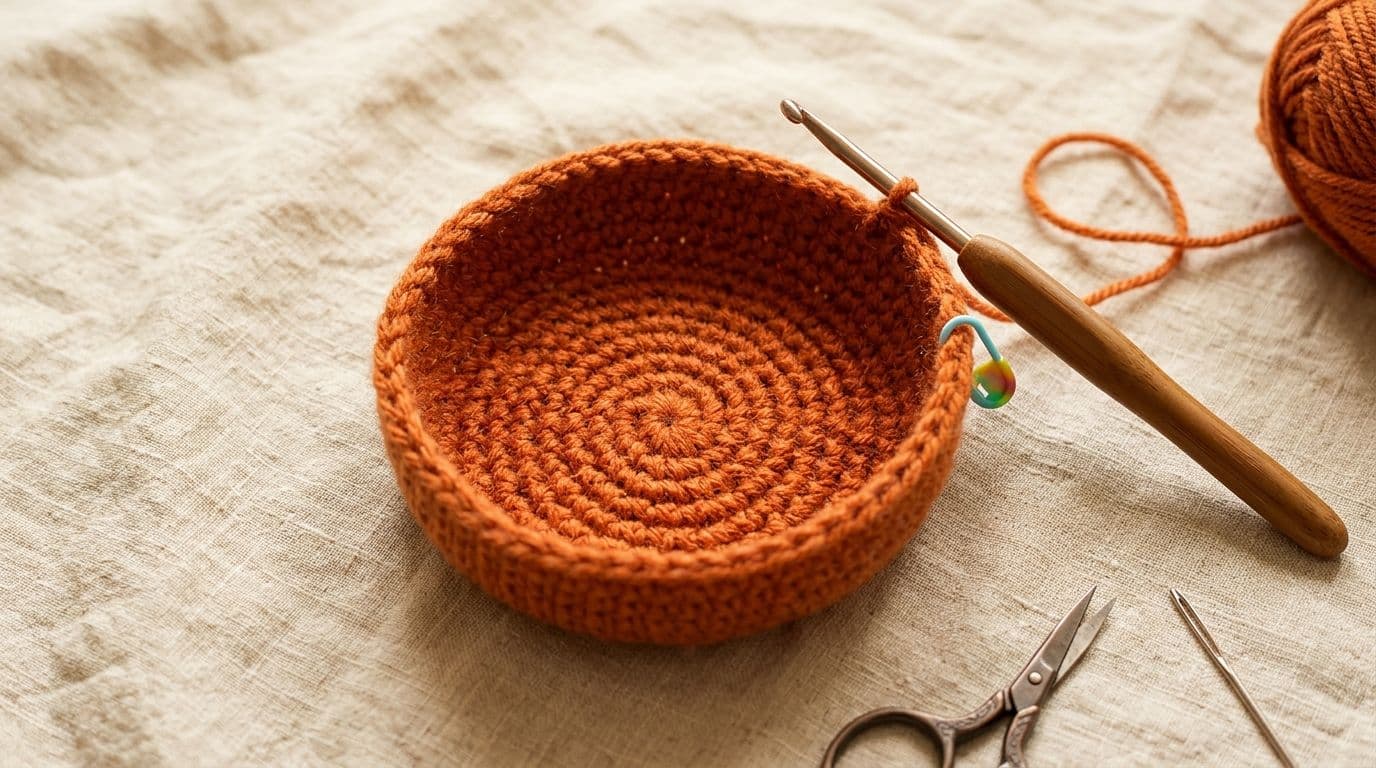
That is 8 rounds with no shaping. For a taller pumpkin, add a round or two. For a flatter one, remove a round or two.
Check: the piece now looks like a small bowl or cup. You should still have 48 stitches. Count every few rounds.
Step 3: Shrink and stuff (Rounds 17–23)
Now you decrease to close the top, the same way you increased to open the base.
• R17: Repeat (6 sc, 1 dec) 6 times. (42)
• R18: Repeat (5 sc, 1 dec) 6 times. (36)
• R19: Repeat (4 sc, 1 dec) 6 times. (30)
• R20: Repeat (3 sc, 1 dec) 6 times. (24)
Stop and stuff now. The opening is still big enough to get fiberfill in. Wait until after round 20 and it gets hard.
• R21: Repeat (2 sc, 1 dec) 6 times. (18)
• R22: Repeat (1 sc, 1 dec) 6 times. (12)
• R23: Work 1 dec six times. (6)
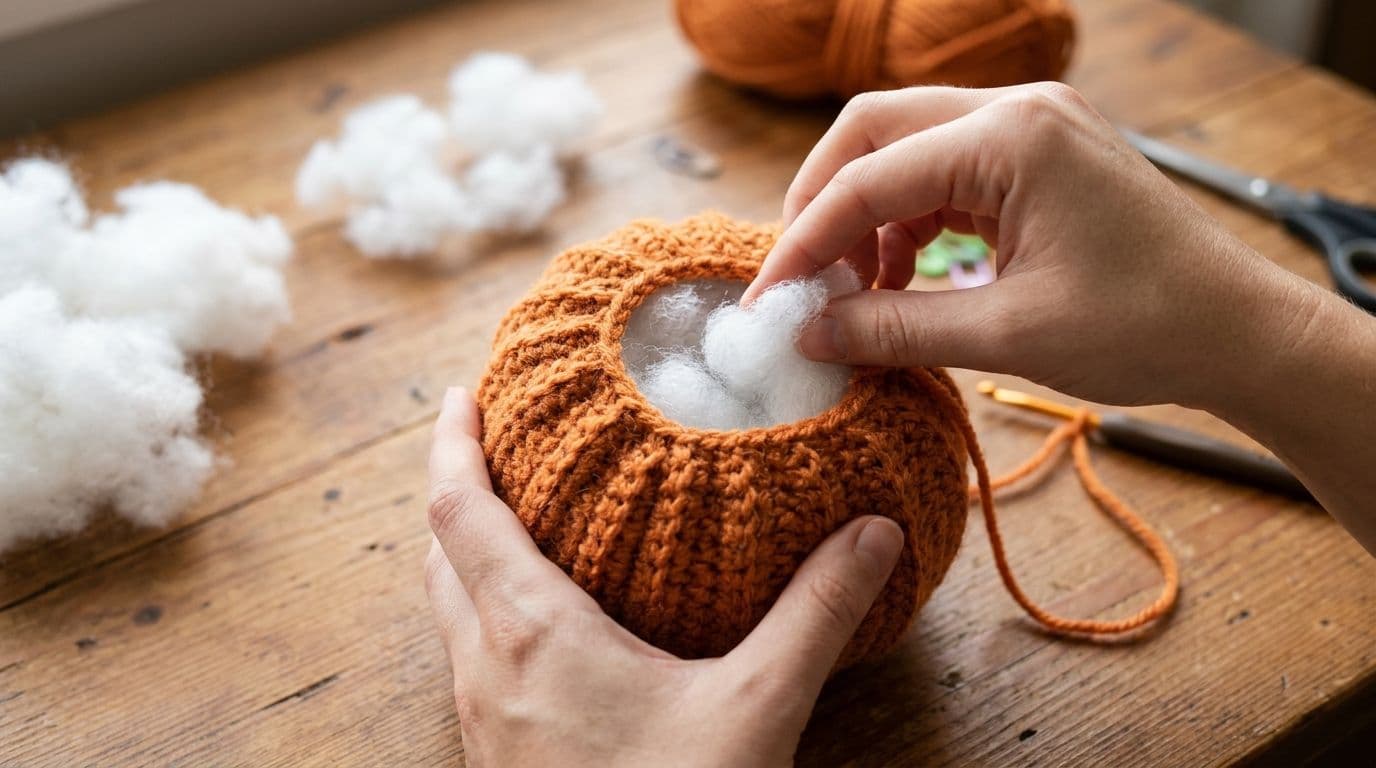
Close the top: cut the yarn, leaving a 24-inch tail. Pull the end through the last loop to fasten off. Thread the tail onto a tapestry needle, then pass it through the front loop of each of the last 6 stitches. Pull tight to close the hole, then push the needle into the pumpkin.
A "decrease" does not add stitches. In "(6 sc, 1 dec)" the dec uses two stitches and turns them into one, which is why the count goes down by 6 each round.
How to stuff your pumpkin
• Pull the fiberfill into small, fluffy pieces instead of one big lump.
• Push it into the sides and corners first, then fill the middle.
• It should feel firm but squishy, like a stuffed toy.
• If you can see white fiberfill through the stitches, you have stretched the stitches too much. Remove some stuffing, or next time use a smaller hook.
Step 4: Shape the segments (the pumpkin ribs)
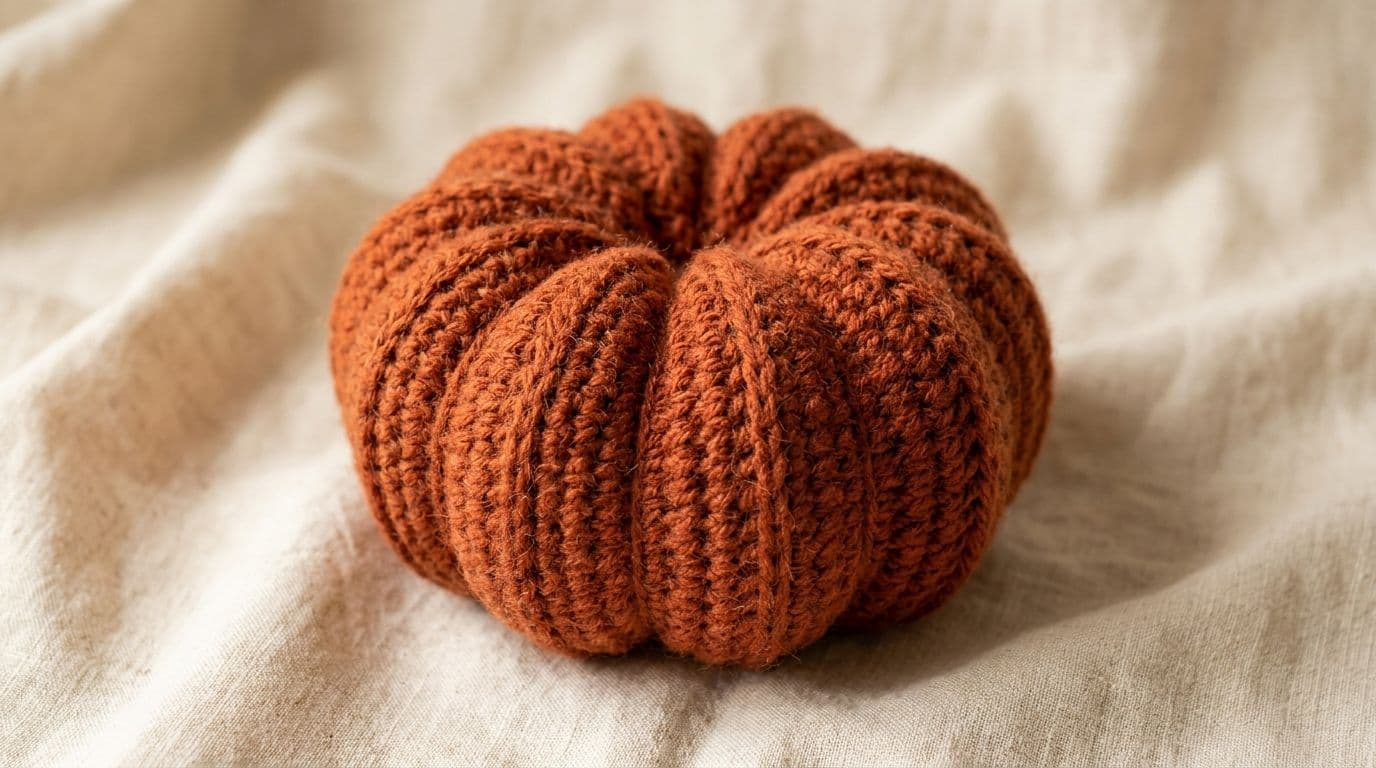
This step turns a ball into a pumpkin. You use your 24-inch tail to pull the yarn tight around the outside, like lines on a pumpkin.
A pumpkin has two flat-ish ends: one where the magic ring was (the bottom) and one where you closed it (the top). The yarn passes from one end to the other.
1. Thread the long tail onto your needle. It comes out at the top center.
2. Push the needle down through the pumpkin and out at the bottom center (the magic ring side).
3. Bring the yarn up the outside of the pumpkin back to the top center. Do not go through the pumpkin this time.
4. Push the needle through the pumpkin to the bottom again.
5. Pull the yarn snug. It will press a groove into the pumpkin.
6. Repeat so the grooves are evenly spaced around. Do 6 wraps for a rounder pumpkin and 8 for more segments.
7. Finish at the bottom. Tie a knot, pass the needle into the pumpkin, and bring it out somewhere else. Trim the end.
Tips:
• Pull a little harder for deeper, squashier ribs.
• Place the first wrap, then the opposite wrap, then fill in between. It is easier to space evenly.
• If the ribs are uneven, undo the last wrap and redo it.
Step 5: Add the stem and leaves
Make the stem and leaf (next two sections), then sew them to the top center with a tapestry needle. A few small stitches around the base of each piece is enough.
Adding a Crochet Pumpkin Stem
The stem is a small tube, made the same way as the pumpkin: a magic ring and then plain rounds.
1. With brown yarn, make a magic ring.
2. R1: Work 6 sc into the ring. (6)
3. R2–R5: Work 1 sc in every stitch around. (6 each round) You will see it grow into a little tube.
4. Cut the yarn, leaving a long tail, and fasten off.
5. Put a little stuffing inside, just enough to make it stand up.
6. Use the tail to sew the open end to the center of the pumpkin top.
Size changes: for a thicker stem (large pumpkin), start with 8 sc in the ring. For a thinner stem (mini), start with 5.
No-crochet option: glue on a cinnamon stick, a small twig or a wine cork with hot glue
Crocheting Pumpkin Leaves & Vines
Simple Leaf
With green yarn, chain 9.
Starting in the 2nd chain from the hook: sl st, sc, hdc, dc, dc, hdc, sc, sl st. Fasten off, leaving a tail to sew it on. Make two or three.
If your leaf looks stubby, add one more chain at the start. If it looks too pointy, replace one dc with an hdc.
Curly Vine (No Wire)
Chain 25. Work 2 sc into the back bump of each chain, starting in the 2nd chain from the hook. The extra stitches force the strip to coil on its own. Sew one end under the stem.

Plan your yarn before you start Not sure how much green and brown you need for a whole pumpkin patch?
Yarn Colors & Stitch Variations
Pumpkins don't have to be orange. Cream, sage, dusty rose, rust and gray all work. Any worsted yarn gives a similar shape, but acrylic holds its form best, and chenille gives a plush look.
For a cute crochet pumpkin, pick two or three yarn shades and group them. A mix of sizes and tones looks more natural than a matching set.
Textured Pumpkins (Houndstooth & Bumpy Stitches)
Texture comes from the stitch, not the shape. Two approaches are popular:
• Puff stitch (the wheat stitch family): bumpy, three-dimensional ridges. Work flat in rows, seam into a tube and gather, as in the flat method.
• Houndstooth or plaid: two-color tapestry crochet. Carry the unused color along the back.
Both are best attempted after you've made a basic pumpkin.
Flat vs. 3D: Which Is Easier?
| Spiral (3D) | Flat (rectangle) | |
|---|---|---|
| Seams | None | One |
| Shape control | Excellent | Depends on gathering |
| Best for | Smooth pumpkins | Ribbed or textured pumpkins |
| Easiest to count | Yes, with a marker | Yes, row by row |
For the flat method, chain 26 and work hdc in the back loops only across 25 stitches. Repeat until the piece is about twice as long as it is wide, roughly 38 rows. Seam the short ends, run a gathering thread around the top, stuff, and gather the bottom. If you are choosing between the two, spiral pumpkins look more rounded, and flat ones look more ribbed.
Size Variations: Mini to Large Pumpkins
You do not need a new pattern for a different size. Change the yarn and hook.
| Size | Yarn | Hook | Approx. width |
|---|---|---|---|
| Mini | Sport or DK | 3.0–3.5 mm | 2.5–3 in |
| Standard | Worsted | 4.0 mm | ~4 in |
| Large | Chunky | 5.5–6.0 mm | ~6 in |
| Extra large | Super bulky | 8.0 mm | 8 in+ |
Estimates only. Always make one and measure.
For a small crochet pumpkin pattern, stop increasing at 36 stitches (round 6) and scale the decreases to match. For a large crochet pumpkin, use chunky yarn with the same stitch counts. A larger pumpkin needs more stuffing and a thicker stem.
Halloween & Fall Décor Ideas
• Mantel or table cluster: group three in different sizes.
• Garland: thread minis onto a long chain or twine.
• Halloween colors: make black, white, purple or green pumpkins.
• Jack-o'-lanterns: embroider a face with yarn. For anything near young children, embroider rather than using plastic eyes.
• Bowl filler or porch display: mix pumpkins with real gourds.
• Gifts: add a ribbon, a tag and a cinnamon-stick stem.
Common Mistakes & Troubleshooting
The pumpkin is rippling or flaring while you work. This is normal during the increase rounds. It usually evens out once stuffed.
The top hole will not close. Run the gathering thread around twice, or weave through the front loops only, then pull.
Gaps appear where you decreased. Try an invisible decrease. Work through the front loops only of the next two stitches, then pull through all three loops.
Stuffing shows through. Drop to a smaller hook, or use a darker lining of the same yarn.
The shape looks lumpy. Remove the stuffing and redistribute it in small pieces, filling the sides first.
You are not sure whether to join the rounds. Don't. Work in a continuous spiral and use a marker.
The leaf looks wrong. Count again. The leaf is one row of mixed-height stitches, so a missed stitch changes the whole shape.
Conclusion: Your First Crochet Pumpkin Awaits
A crochet pumpkin is one of the easiest ways to learn shaping, stuffing and finishing. Start with the basic spiral pattern, add a stem and a leaf, and you will have a decoration you can display every fall. Once it works, change the yarn, hook or stitch and make a whole patch.
Need a stitch refresher? Keep the Yarnzy Stitch Dictionary open while you crochet.
Frequently Asked Questions
Start with the basic spiral pattern above, which uses only a single crochet, increases and decreases. Stuff it, wrap the yarn around it to make segments, then add a stem and leaf.
Share this page
 X / Twitter
 Facebook
 Reddit
Related articles
Bernat Yarn Substitutes: What to Use Instead of Blanket, Maker, Pipsqueak & Bundle Up

How to Read Crochet Patterns: A Beginner's Guide
Temperature Blanket Crochet: The Complete Beginner's Guide to Planning Your Year in Yarn

Yarnzy: #1 Crochet & Knitting App
Track knitting and crochet projects with a timer & row counter, Import Patterns from Anywhere, Manage Stash & more all in one place.


Free to start · iOS, Android & Web
Scan to Download the App

Start your next project with confidence