
 Download the App
Temperature Blanket Crochet: The Complete Beginner's Guide to Planning Your Year in Yarn
2 Oct, 2026
A temperature blanket is a crocheted record of a year, made one row at a time, in a color that matches each day's temperature. You track the weather, assign a color to each range, and crochet a single row per day. By December, you have a blanket that's really a woven diary of the year, and by far the most common way to make one is crochet, since it's more forgiving of tension changes than knitting when you're switching colors constantly.
This guide covers everything you need to plan a temperature blanket crochet project: how many colors to use, which stitch to pick, how much yarn to buy, and how to avoid the mistakes that trip up most first-timers.
Not sure how big your temperature blanket will end up?
 Try the Square Planner
What Is a Temperature Blanket?
A temperature blanket, sometimes called a weather blanket or weatherghan, is a crocheted or knitted project where each row or block represents one day, worked in a color assigned to that day's temperature. Most people crochet one row a day for 365 days (366 in a leap year), though some use weekly or monthly averages instead.
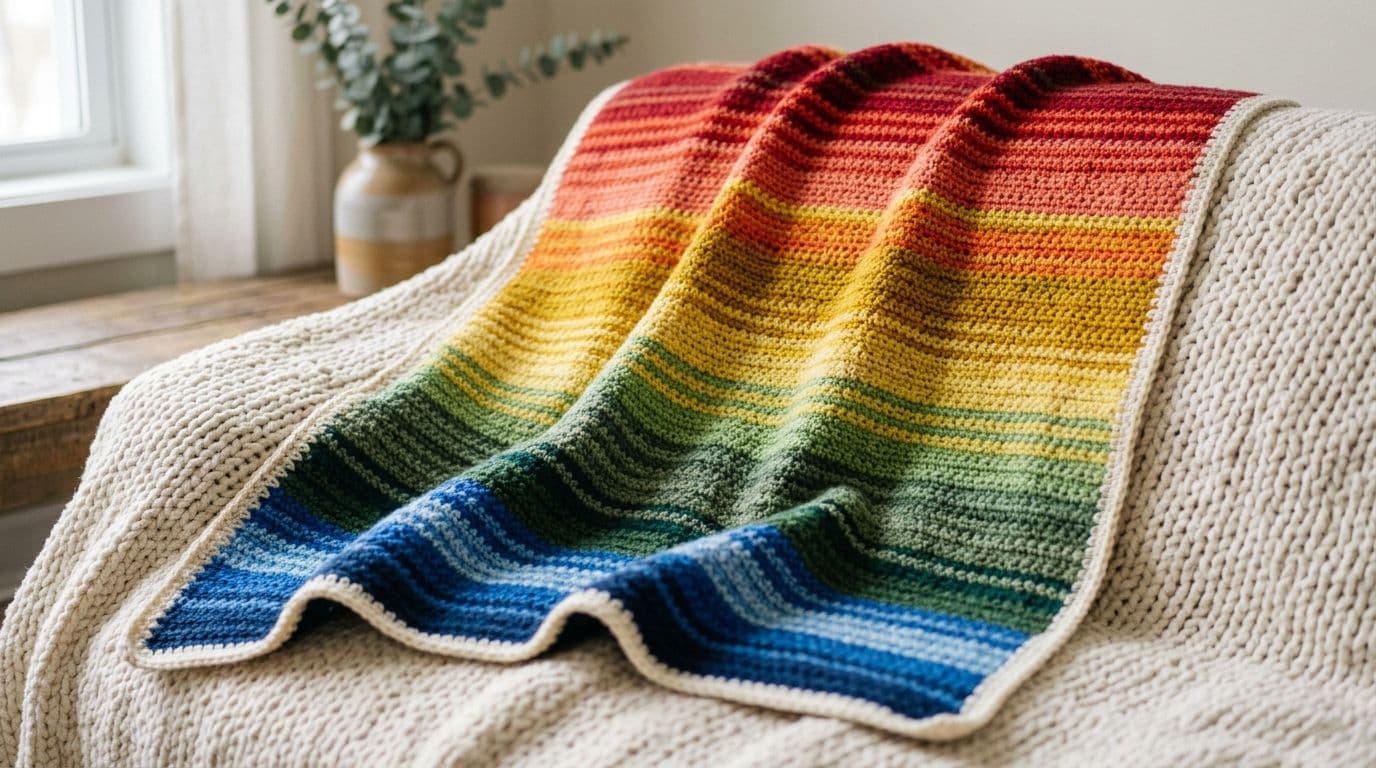
The concept isn't limited to blankets. Crocheters have made temperature scarves, shawls, pillows, and even granny-square versions using the same color-per-day logic on a smaller scale. What makes it different from an ordinary striped project is that the color sequence isn't decided in advance. It's dictated by real weather data, so no two temperature blankets ever turn out the same, even with identical color charts.
What You Need Before You Start
Before you touch a hook, decide four things: your yarn weight, how many colors you'll use, your hook size, and roughly how big you want the finished piece. Getting these settled first prevents the single biggest problem temperature blanket makers run into, which is starting to crochet before the math is done and ending up with a blanket that's the wrong shape entirely.
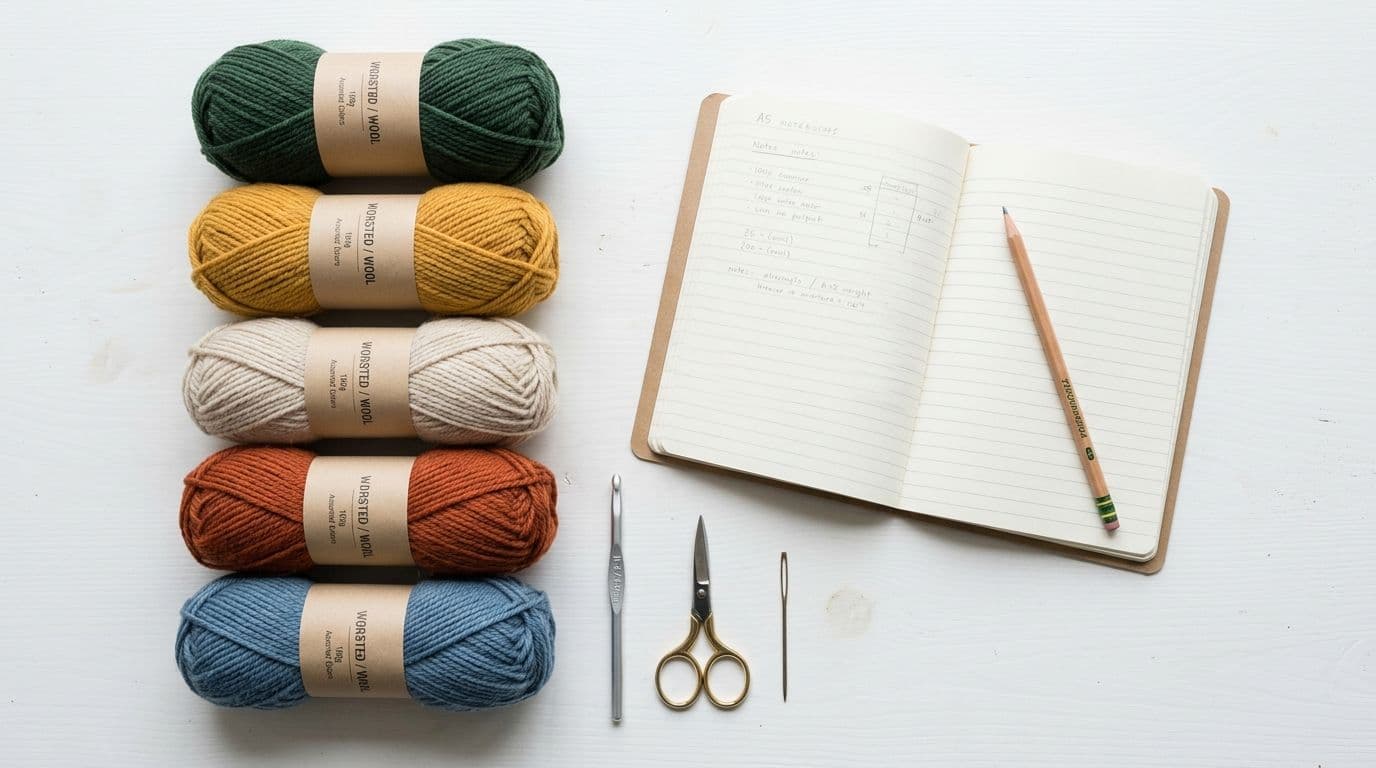
Materials checklist:
• Yarn in your chosen colors (worsted weight #4 is the most common choice)
• A crochet hook sized to your yarn (typically H/5.0mm–I/5.5mm for worsted)
• A way to track daily temperatures (calendar, spreadsheet, or app)
• A tapestry needle and scissors for weaving in ends
• Optional: stitch markers to mark the start of each week or month
Yarn Weight and How Many Colors to Use
Worsted weight (category 4) yarn is the standard choice for temperature blanket crochet because it's widely available, affordable, and keeps a year-long project manageable in size. A finer DK or fingering weight works too, and produces a lighter, smaller blanket, but it means more stitches per row and more time per session.
How many colors do I need for a temperature blanket? Most guides recommend 8 to 14 colors, with 9 as a practical minimum. Fewer than 8 and your blanket won't show much variation; more than 14 and the color chart gets hard to read at a glance while you're crocheting. The right number depends on your climate:
• Narrow yearly range (mild coastal or desert climates): 8–10 colors in tighter 5°F increments
• Moderate range (most of the US): 10–12 colors in 7–10°F increments
• Wide range (continental climates with real winters and summers): 12–14+ colors in 10°F increments
Hook Size and Blanket Size
Your hook size and stitch choice together determine your final blanket dimensions, so this isn't a step to guess at. A size H (5.0mm) or I (5.5mm) hook is standard for worsted weight. Going up a hook size loosens your gauge and makes the blanket bigger for the same number of stitches; going down tightens it and can make the fabric stiff.
Before committing to a width, check Yarnzy's Hook & Needle Chart to confirm your hook matches your yarn weight, and see Standard Sizes if you want your finished blanket to match a specific bed or throw size.
How to Plan Your Temperature Blanket in 5 Steps
Planning a temperature blanket well takes about an hour, and it saves you from having to frog rows later. Here's the order that works, based on what trips people up when they skip steps or do them out of sequence.
Step 1: Choose Your Time Period and Location
You don't have to start on January 1st. A temperature blanket can track any 12-month stretch, a specific year that matters to you (a birth year, a wedding year), or even a year you spent somewhere else. Decide first whose weather you're tracking: your current city, or somewhere you lived or visited during that period. There's no wrong answer, but pick before you start your color chart, since your temperature range depends entirely on the location.
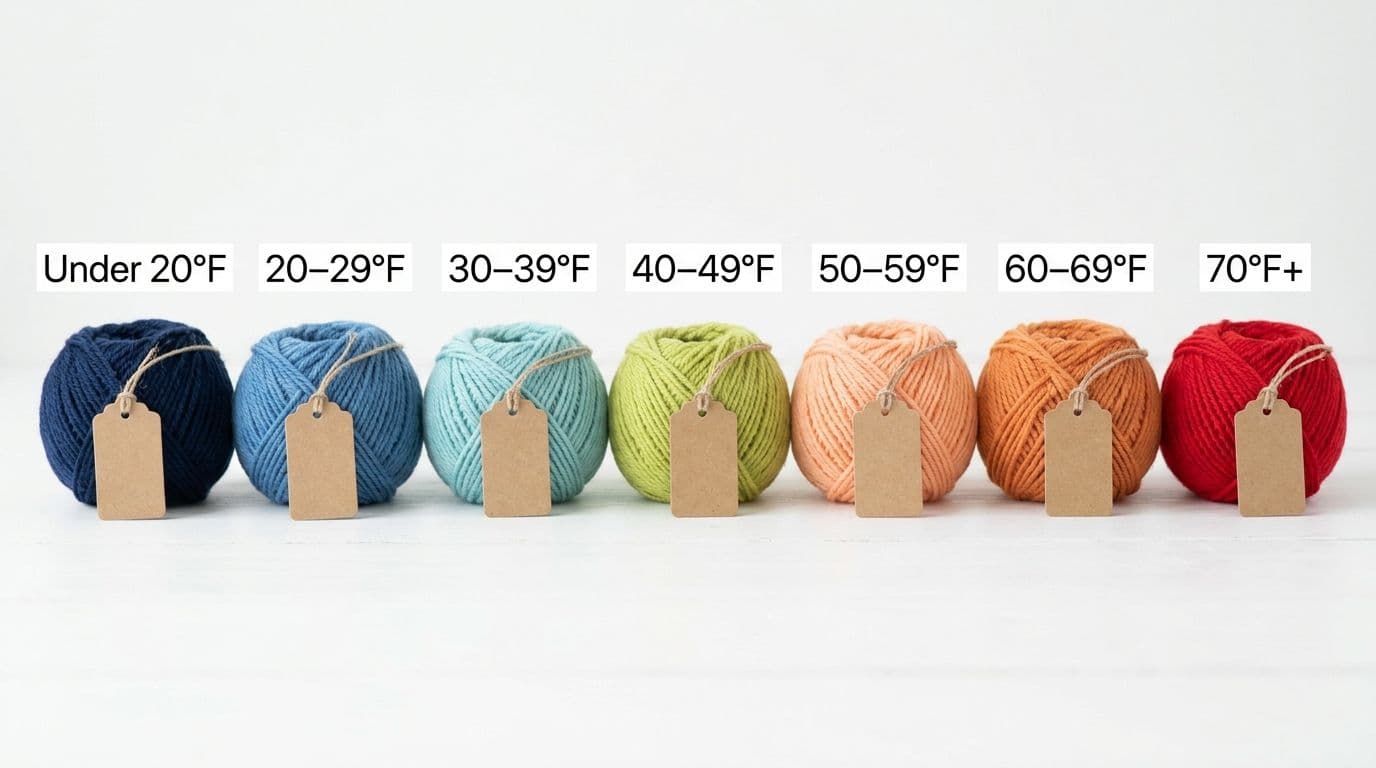
Step 2: Set Your Temperature Ranges
Look up your location's typical yearly high and low (a quick weather-site search for your city's average will do), then divide that span across your chosen number of colors. If your area swings from -10°F to 100°F and you're using 11 colors, that's roughly a 10-degree range per color.
Also decide now whether you're tracking the daily high, daily low, or an average. This single decision changes your entire range, since basing your chart on both highs and lows (a common early mistake) wastes colors on temperatures you'll rarely use.
Step 3: Pick Your Colors
This is where the project becomes yours. Classic temperature blankets run a rainbow from cool blues and purples through to warm reds and oranges, but neutral, pastel, and monochrome palettes are just as popular, and easier to match to home decor.
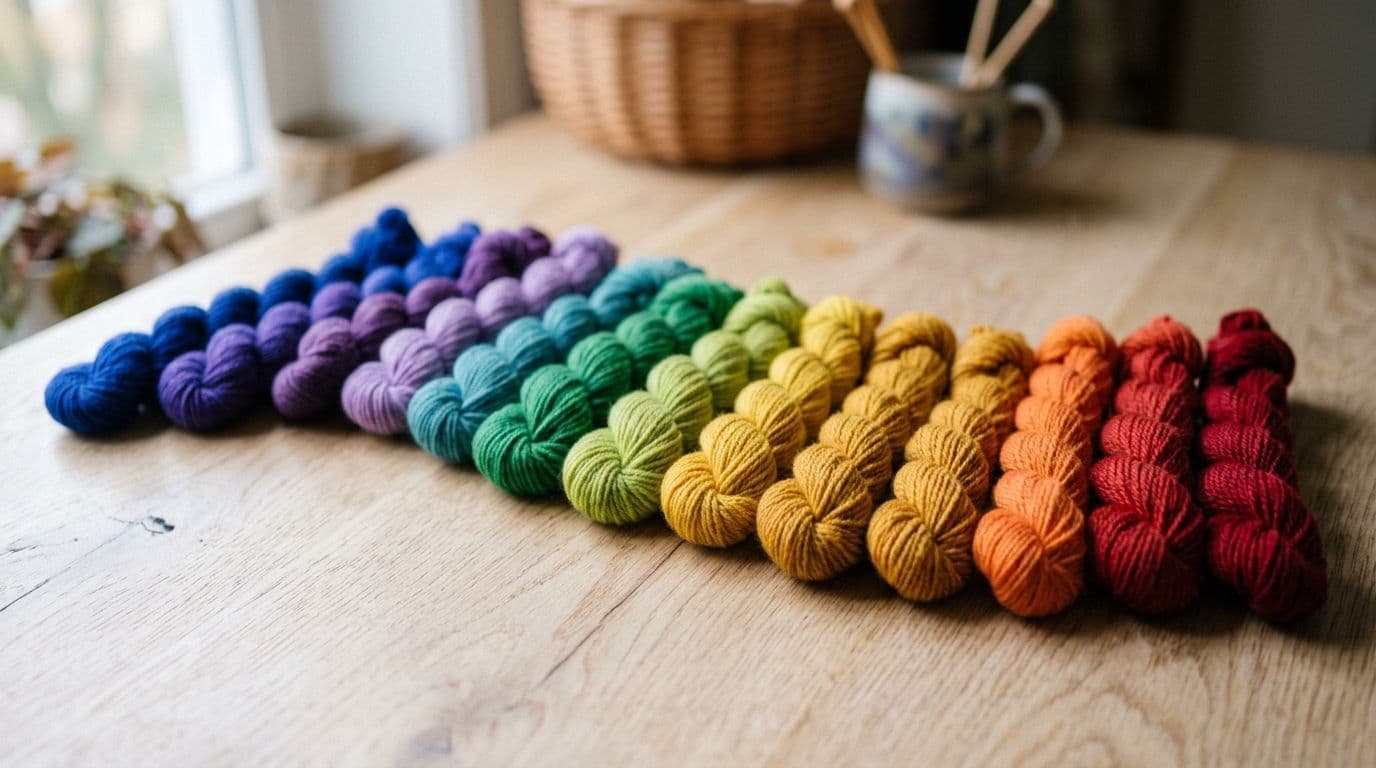
Whatever palette you choose, order your colors so they read as a visual gradient: coldest to hottest should flow smoothly, not jump around. Test combinations before you buy yarn using Yarnzy's Color Palette tool, or browse ready-made combinations in Curated Palettes and match real yarn shades with Yarn Colors.
Step 4: Estimate Yarn for Each Color
This is the step every competitor guide admits is hard to answer precisely, because you won't know exactly how many days fall in each range until the year is over. But you can get a solid starting estimate, and it's far better than guessing at the yarn store.
As a rough benchmark: a worsted-weight, 70"×90" moss-stitch blanket with 10–12 colors typically uses about 2 skeins per color (around 200–220 yards each) as a safe starting point, with your most-used colors (the ones covering your area's typical daily range) needing more.
| Color Type | Starting Skein Estimate | Notes |
|---|---|---|
| Most common temperature range | 3–4 skeins | Covers the bulk of an average season |
| Moderate range colors | 2 skeins | Your buffer amount |
| Extreme high/low colors | 1 skein | Rarely used, but keep on hand |
Buy from a dye lot or yarn line you can reorder easily, since you will likely need to top up a color mid-year. Get a precise starting point based on your gauge and blanket size with Yarnzy's Yarn Calculator.
Step 5: Plan Your Layout
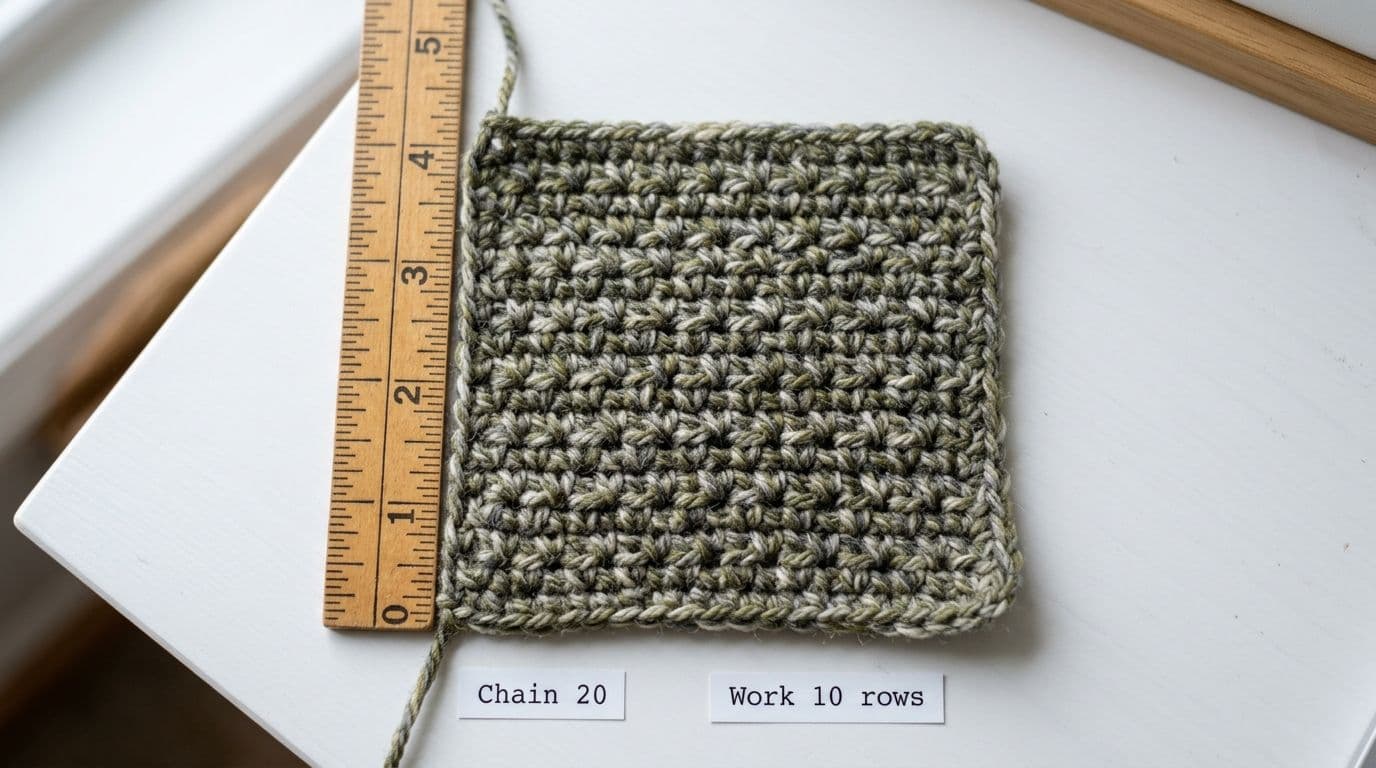
Decide your stitch pattern, chain count, and orientation (portrait, landscape, or square) before you cast on. A gauge swatch is the fastest way to avoid the most common beginner mistake in this entire project: guessing your starting chain and ending up with a blanket that's the wrong shape.
To test your gauge: chain 20, work 10 rows in your chosen stitch, then measure the swatch's height in inches and multiply by 3 (since 10 rows is roughly 1/36th of a 365-row blanket, and this shortcut approximates the full year's length in feet). Use that measurement to decide your final chain count and adjust your stitch or hook if the projected size is off. Map your whole layout, from starting chain to expected finished dimensions, in Yarnzy's Square Planner before you buy your yarn.

Not Sure How Much Yarn Each Color Needs? Get a yardage starting point before you shop, so you don't run out of your most-used color mid-project.
Temperature Blanket Color Chart Ideas
Your color chart (also called a temperature gauge or temperature key) is the two-column reference you'll check every single day: temperature range on one side, yarn color on the other. Pin it up, keep it on your phone, or print it, because you will use it constantly for a year.
A few proven color chart directions:
• Classic rainbow: Cool blues and purples for the coldest days, moving through greens and yellows, to oranges and reds for the hottest. The most recognizable style, and the easiest to plan since it follows natural color-temperature associations.
• Muted or neutral palette: Taupes, sage, dusty blue, and warm cream instead of saturated brights. Reads as a more cohesive home decor piece and hides temperature swings more subtly.
• Monochrome with accent extremes: One base color family in graduating shades, with a single bold accent reserved for record highs or lows.
• Two-tone gradient: Just two colors (say, a cool blue and a warm coral) blended in varying ratios or intensities rather than a full rainbow.
Whichever direction you choose, build your printable temperature blanket chart around your specific climate's range, not a generic template, since a chart built for a Minnesota winter won't fit a Florida year at all. For color-pairing ideas beyond temperature blankets, Yarnzy's guide to crochet color combination ideas is a useful starting point.
Best Crochet Stitches for a Temperature Blanket
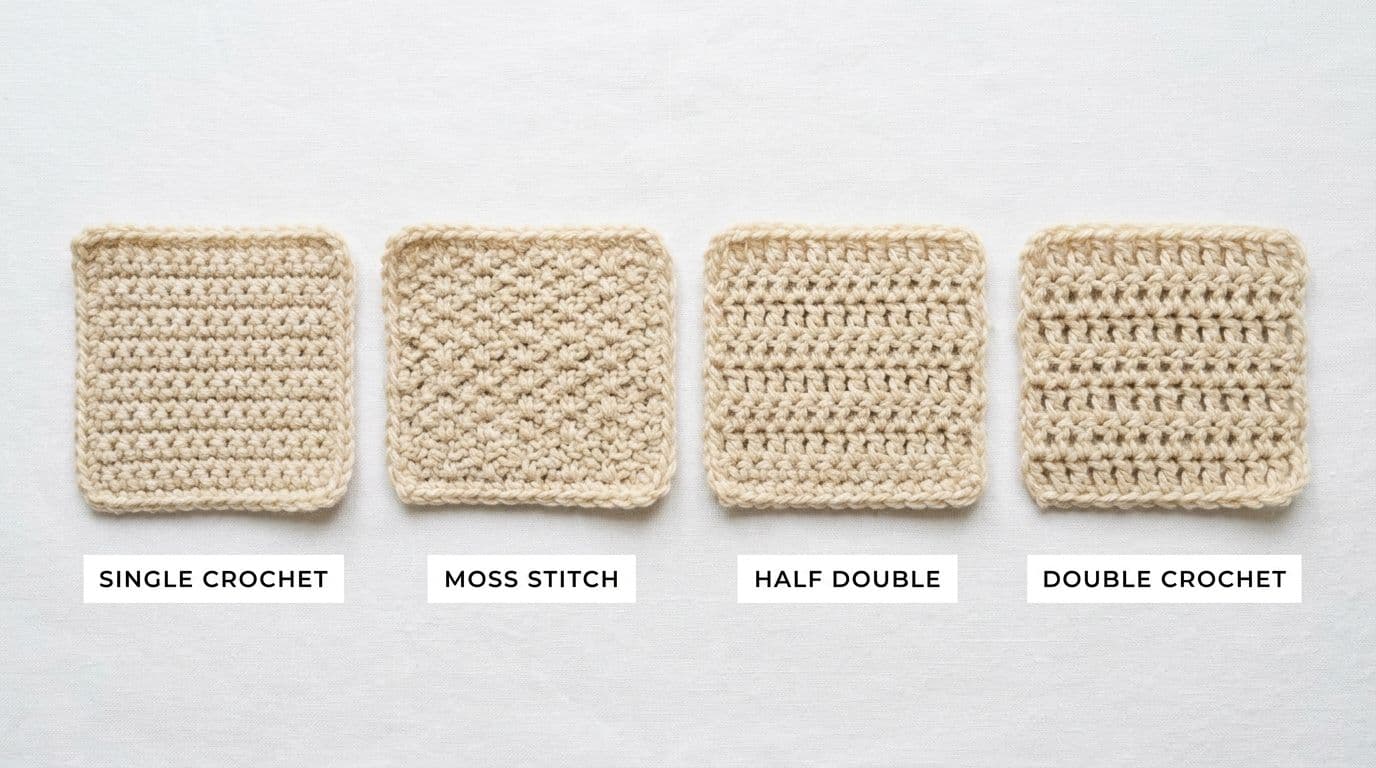
The stitch you pick controls your blanket's finished size more than almost any other decision, because 365 rows of a taller stitch adds up fast. A double crochet row-a-day blanket can end up over 12 feet long; the same 365 rows in moss stitch stays closer to 6 feet.
| Stitch | Row Height | Best For | Beginner-Friendly? |
|---|---|---|---|
| Single Crochet | Short | Simple, dense, sturdy blankets | Yes |
| Moss/Linen Stitch | Very short | Most popular choice; classic drapey texture | Yes |
| Half Double Crochet | Medium | Faster to work, still manageable size | Yes |
| Double Crochet | Tall | Best for a scarf, not a full-year blanket | Yes, but sizing risk |
| Granny Square (one per day) | N/A (block, not row) | Portable, travel-friendly, no gauge math needed | Yes |
Moss stitch (also called linen or granite stitch) is the most common pick for a moss stitch temperature blanket because its short row height keeps a 365-row project to a manageable size, while still giving visible texture between color changes. If you want to compare it against other options before committing, Yarnzy's Stitch Dictionary has quick references for each.
How to Crochet Your Temperature Blanket, Row by Row
Once your chart, yarn, and gauge are settled, the daily process is simple and repeats for the length of the project.
1. Check the day's temperature for your chosen location and reading (high, low, or average).
2. Find the matching color on your temperature chart.
3. Crochet one row in your chosen stitch, switching to the new color if it's different from yesterday's.
4. Leave a 4–5 inch tail at each color change so you have enough to weave in later, or work over the ends as you go to save time.
5. Log the date and color on your calendar or chart before you set the project down, so you always know exactly where you left off.
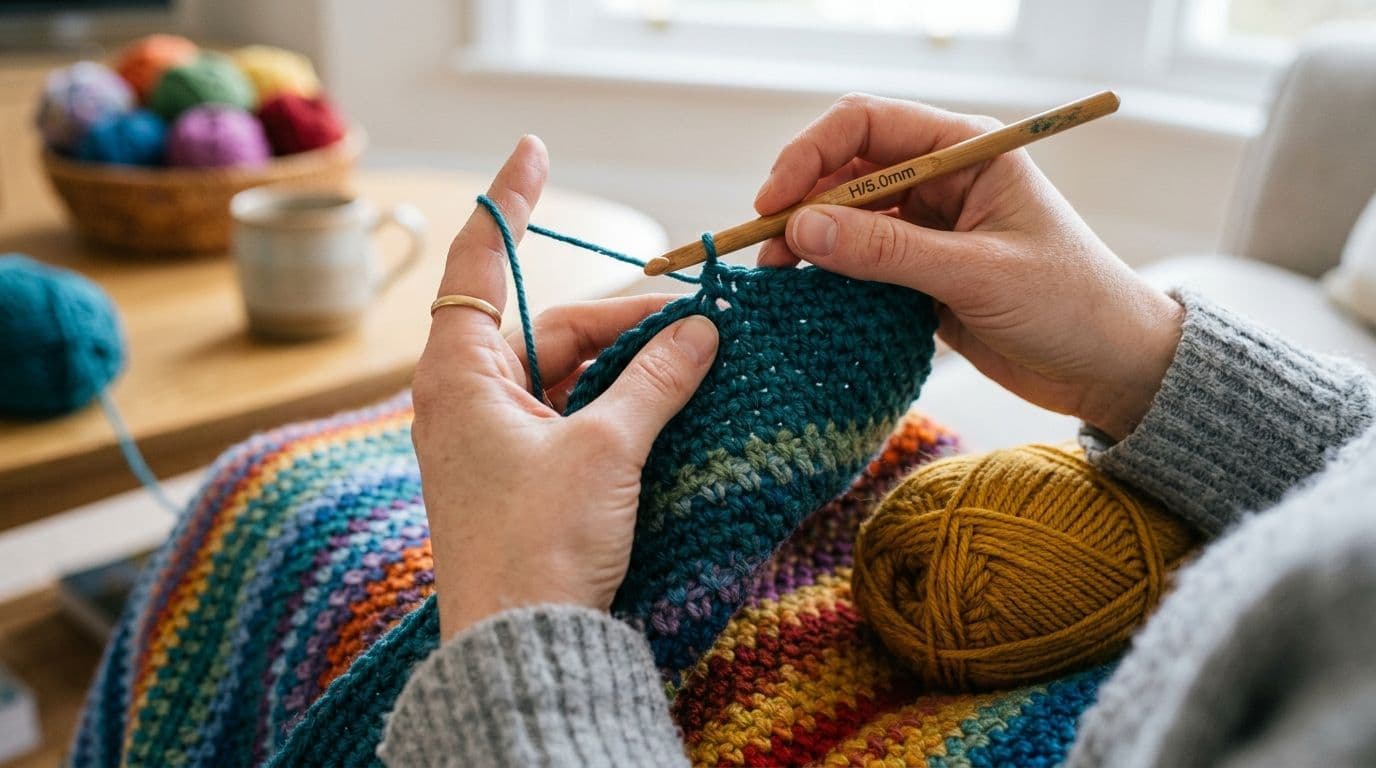
Simple moss stitch pattern (worsted weight, H/5.0mm hook):
• Foundation: Chain to your desired width in an even number, plus 2.
• Row 1: Sc in 2nd ch from hook. *Ch 1, skip 1, sc in next st. Repeat from * to end. Turn.
• Row 2 onward: Ch 2 (counts as first sc + ch1). Sc in next chain space, ch 1. Repeat across, working sc in the final space. Turn.
• Repeat Row 2 for each remaining day of the year.
Most crocheters start with a worsted-weight blanket around 60–70 inches wide chain somewhere between 225 and 260 stitches; check your own gauge swatch first, since chain count varies with hook size and tension.

Stuck Choosing Your Colors? Build a palette that works together first, then match your temperature ranges to it.
Common Mistakes and How to Fix Them
Every temperature blanket maker runs into at least one of these. Catching them early saves the most frustration.
• Gauge miscalculated, blanket comes out the wrong shape. This is the most common mistake by far. Fix it by swatching before you start (see Step 5), and if you're already behind, it's still fixable: rip back to the foundation chain and restart with a corrected chain count, since a wide, short blanket is far more useful than a narrow, tall one.
• Building the color chart from both highs and lows instead of picking one. This wastes colors on temperature extremes you'll rarely log. Fix it by rebuilding your chart around a single, consistent measurement (see Step 2).
• Falling behind on tracking. Life happens, and skipped weeks are normal. Fix it by looking up your city's historical daily temperatures for the missed dates online, most local weather sites keep an archive, and catching up in a batch session.
• Losing stitches while switching colors and weaving in ends simultaneously. This shows up as a wavy or uneven side edge. Fix it by counting your stitches at the end of every row for the first few weeks until the color-change rhythm feels automatic.
• Picking a color you later realize doesn't work with the rest of the palette. It happens even to experienced makers. Fix it by ripping out and reworking just the affected rows in the new color rather than restarting the whole project, most yarns tolerate this without visible seams if you match dye lots.
• Starting mid-year and not knowing how to handle the earlier months. You don't have to start on January 1st. Either begin from today's date and work forward for a full year, or look up the historical temperatures for the months you missed and catch up before continuing in real time.
Shorter Alternatives: Scarves, Mini Blankets, Granny Squares
A full-size temperature blanket crochet project is a real commitment, so if 365 rows feels daunting, several smaller versions use the same color-per-day concept:
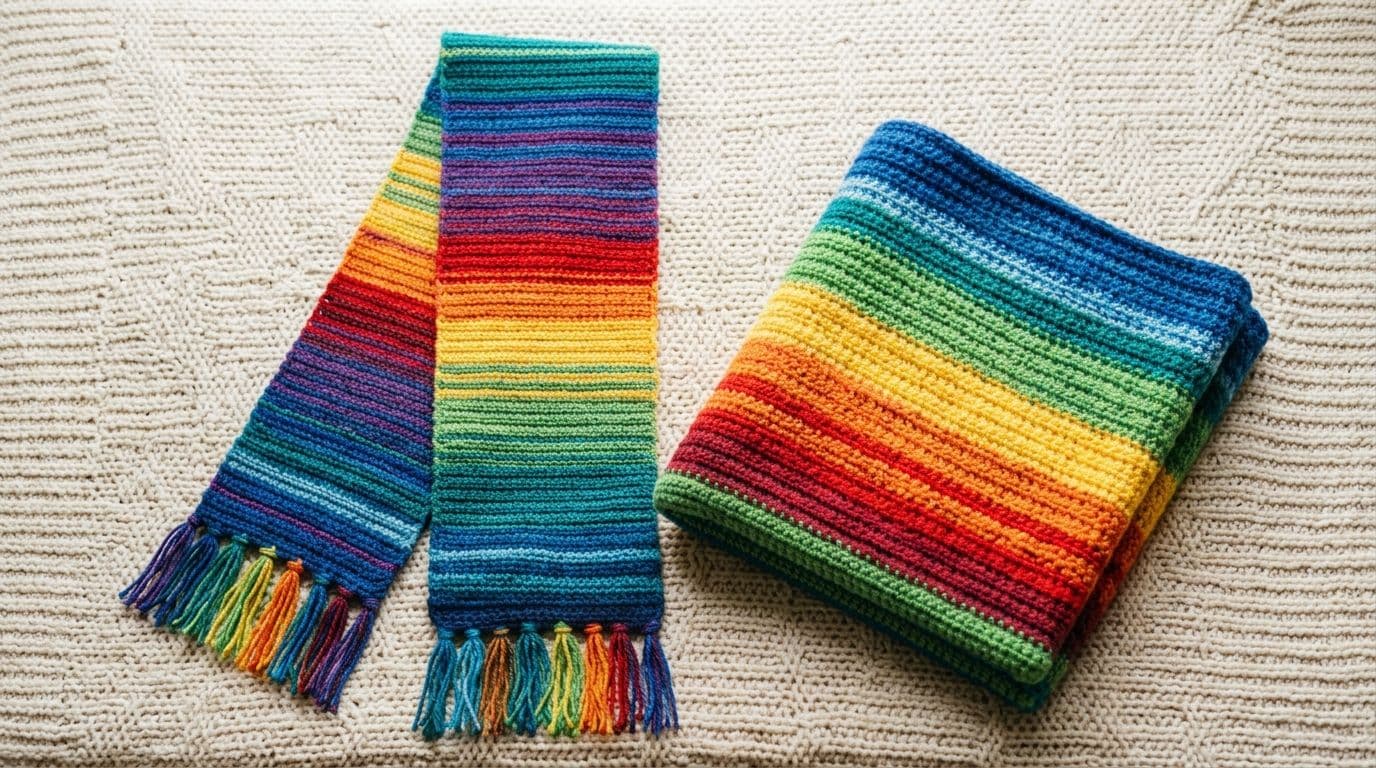
• Temperature scarf crochet: The same one-row-per-day method, just narrower. Finishes in the same timeframe but uses a fraction of the yarn and is far more portable.
• Mini blanket or lap blanket: Track weekly or monthly averages instead of daily temperatures, so you're working far fewer rows for a smaller finished piece.
• Temperature blanket granny square: One granny square per day, week, or month instead of a row. Squares are easy to carry while traveling (pack a bag of half-finished blocks in a suitcase and join them later), and there's no gauge math to get wrong, since each square is self-contained. See Yarnzy's Granny Square Generator for layout help once your squares are ready to join.
Conclusion
A temperature blanket crochet project is as much a planning exercise as a crochet one. Decide your location, temperature ranges, colors, stitch, and rough yarn needs before your first stitch, and the year-long process itself is simple repetition: check the temperature, pick the color, crochet the row. Whatever stitch, palette, or size you land on, plan your layout and yardage first with Yarnzy's free tools, and the finished blanket will be a genuine record of your year, in yarn.
Frequently Asked Questions
A temperature blanket is a crocheted or knitted project where each row or block is worked in a color that matches a specific day's temperature, typically over a full year.
Share this page
 X / Twitter
 Facebook
 Reddit
Related articles
Bernat Yarn Substitutes: What to Use Instead of Blanket, Maker, Pipsqueak & Bundle Up

How to Crochet a Pumpkin: Free Patterns for Fall & Halloween Decor
How to Read Crochet Patterns: A Beginner's Guide

Yarnzy: #1 Crochet & Knitting App
Track knitting and crochet projects with a timer & row counter, Import Patterns from Anywhere, Manage Stash & more all in one place.


Free to start · iOS, Android & Web
Scan to Download the App
Start your next project with confidence