
 Download the App
How to Read Crochet Patterns: A Beginner's Guide
5 Oct, 2026
A crochet pattern is a set of instructions that tells you which stitches to make and in what order. It is written in shorthand like sc, dc and ch, or drawn as a chart of symbols. To read one, learn the common abbreviations, check whether the pattern uses US or UK terms, read the notes before you start, then work one row or round at a time and count your stitches at the end of each.
That is the whole skill. The rest of this guide shows you how, with real examples instead of theory.
If you have ever opened a pattern and met a line like Row 3: Ch 3, dc in next 2 sts, *ch 1, sk next st, dc in next 3 sts; rep from * across, you know the feeling. It looks like a secret code. It is a small code, though. Patterns use shorthand because it saves space and keeps long instructions easy to scan, and once you know about 20 abbreviations plus a few punctuation rules, most patterns open right up.
The short version: how to read any crochet pattern
1. Check the terminology. US or UK is usually stated near the top.
2. Read the header: materials, gauge, finished size and notes.
3. Look up any abbreviation you do not recognize.
4. Work one row or round at a time, in order.
5. Count your stitches at the end of each row or round and compare with the number in brackets.
Below we cover abbreviations, written patterns, charts and symbols, the mistakes that trip people up most, and a first pattern you can actually make.
Read Every Pattern with Confidence
 Download Yarnzy Free
What Exactly Is a Crochet Pattern?
A crochet pattern is a written or charted set of instructions for making a project. It lists the materials and finished size, then gives stitch by stitch directions in a standard shorthand.
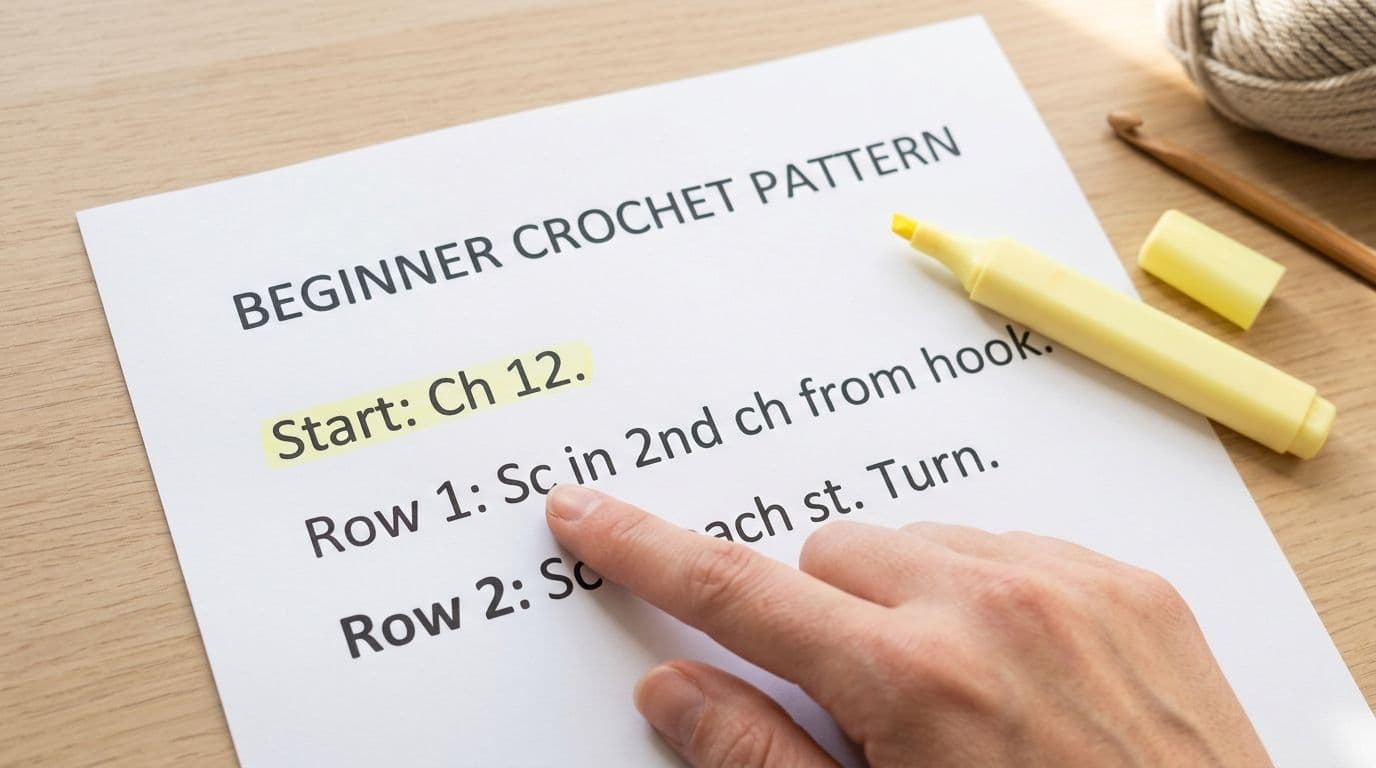
Patterns come in three formats. Written patterns use abbreviations and are the most common. Charted patterns use symbols laid out like a map of the fabric. Many modern patterns include both, so you can use whichever makes more sense to you.
Whatever the format, a well written pattern has the same parts, and the instructions are only one of them:
• Pattern notes: how the designer writes things, such as whether turning chains count as stitches
• Skill level: a rough guide, not a promise
• Materials: yarn weight, fiber, hook size and extras like stitch markers or safety eyes
• Finished size: a single measurement, or several sizes for garments
• Gauge: how many stitches and rows fit in a 4 inch (10 cm) square
• Abbreviations and special stitches: your key to the code
• Instructions: the rows or rounds themselves
Read all of that before you pick up your hook. It takes five minutes and saves you from discovering on row 40 that the pattern wanted a stitch you have never made.
The Two Languages: US vs. UK Terminology
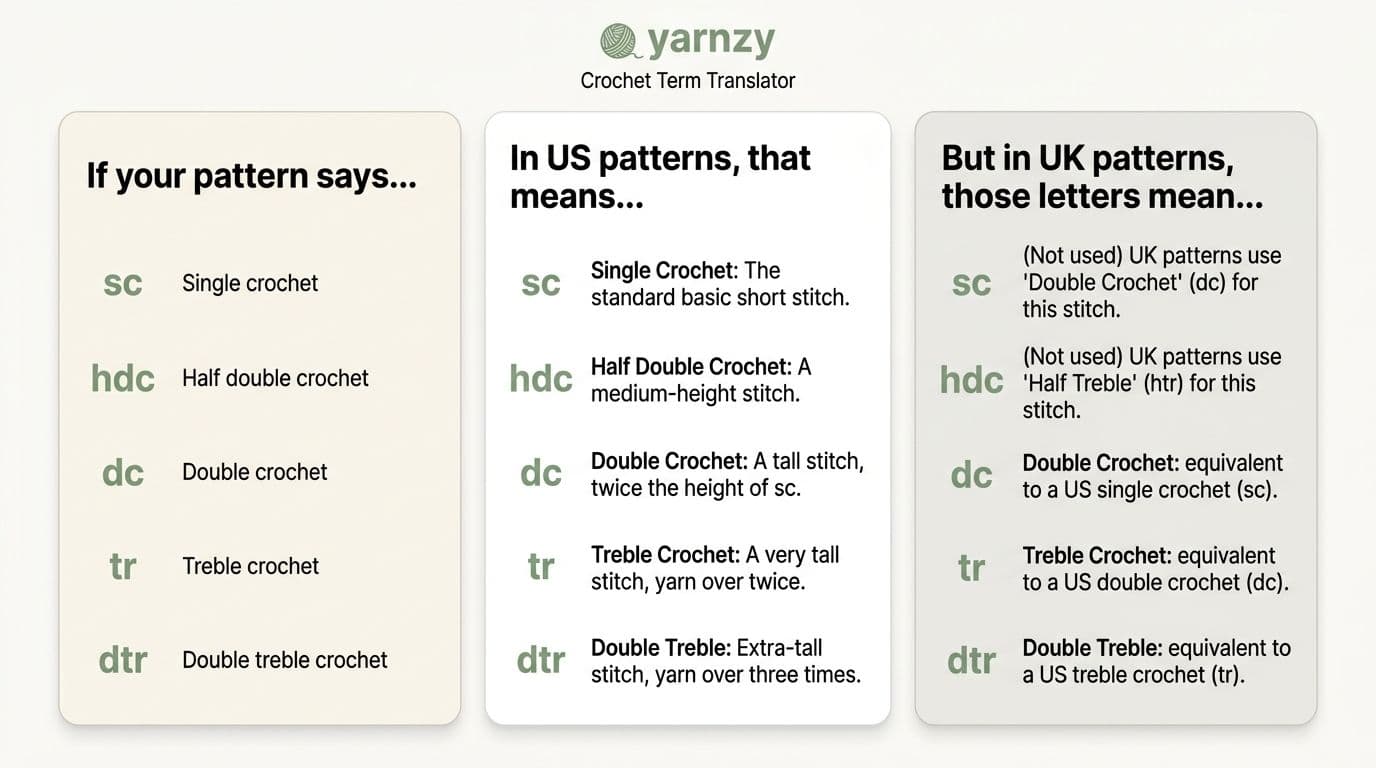
Here is the one trap that catches almost everyone once. The US and the UK use the same stitch names for different stitches, so a pattern written in UK terms will give you the wrong fabric if you read it as US.
| US term (abbreviation) | UK term (abbreviation) |
|---|---|
| slip stitch (sl st) | slip stitch (ss) |
| single crochet (sc) | double crochet (dc) |
| half double crochet (hdc) | half treble (htr) |
| double crochet (dc) | treble (tr) |
| treble crochet (tr) | double treble (dtr) |
| double treble (dtr) | triple treble (trtr) |
Two words that are not stitches differ as well: US gauge is UK tension, and US yarn over (yo) is UK yarn over hook (yoh). The Craft Yarn Council's term differences table lists them all if you want the official reference.
How to tell which one you have:
• Most patterns state it near the top, often in the abbreviations list.
• If you see "single crochet" or sc anywhere, it is US. UK terms have no single crochet.
• The designer's country does not decide it. Plenty of UK designers write in US terms.
When in doubt, make a tiny swatch of the first row and see whether it looks right.
Part 1: Cracking the Abbreviation Code
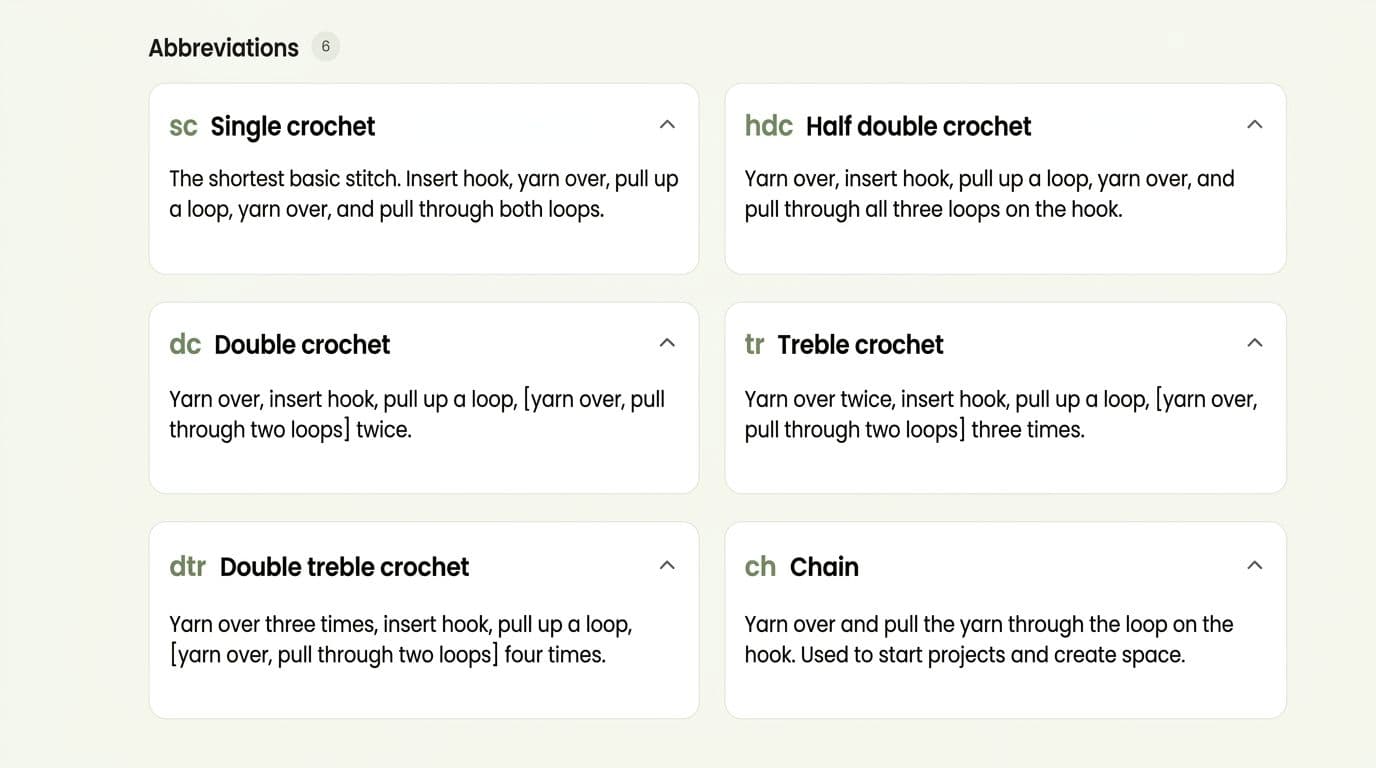
You do not need to memorize a hundred abbreviations. A small core covers the vast majority of beginner patterns, and the rest are defined in the pattern itself. The Craft Yarn Council master list is the industry reference if you want every one.
The 10 Basics You'll See in Almost Every Pattern
| Abbreviation | Means | What it tells you |
|---|---|---|
| ch | chain | Make a chain stitch. Used for foundation chains, turning chains and gaps |
| sl st | slip stitch | A very short stitch used to join, or to move across a row without adding height |
| sc | single crochet | The shortest standard stitch, and the first one most people learn |
| hdc | half double crochet | Medium height, between sc and dc |
| dc | double crochet | A taller stitch, worked after a yarn over |
| tr | treble crochet | Taller again, with two yarn overs |
| yo | yarn over | Wrap the yarn over your hook before pulling through |
| st / sts | stitch / stitches | "Next 3 sts" means the next three stitches |
| rnd | round | One full lap when working in a circle |
| rep | repeat | Do the section again |
One small thing that confuses people: ch 1 means "make one chain stitch." A hyphen changes the meaning. Ch-1 sp (a chain 1 space) means the gap left by a one chain stitch you made on a previous row. The number tells you how many chains made that gap.
What About Modifiers (Inc, Dec, Sk, Sp)?
These are the abbreviations that tell you what to do rather than which stitch to make.
• inc (increase): add stitches by working two or more stitches into the same stitch. "Sc inc" means two single crochets in one stitch.
• dec (decrease): remove stitches. Usually it appears as sc2tog, which means single crochet two stitches together, turning two stitches into one.
• sk (skip): pass over a stitch without working into it. "Sk next 2 sts" means move past the next two.
• sp (space): a gap you work into, usually under a chain from the previous row. Ch sp means chain space.
A few more worth knowing:
| Abbreviation | Means |
|---|---|
| tog | together |
| beg | begin or beginning |
| rem | remaining |
| pm | place marker |
| tch | turning chain |
| RS / WS | right side / wrong side |
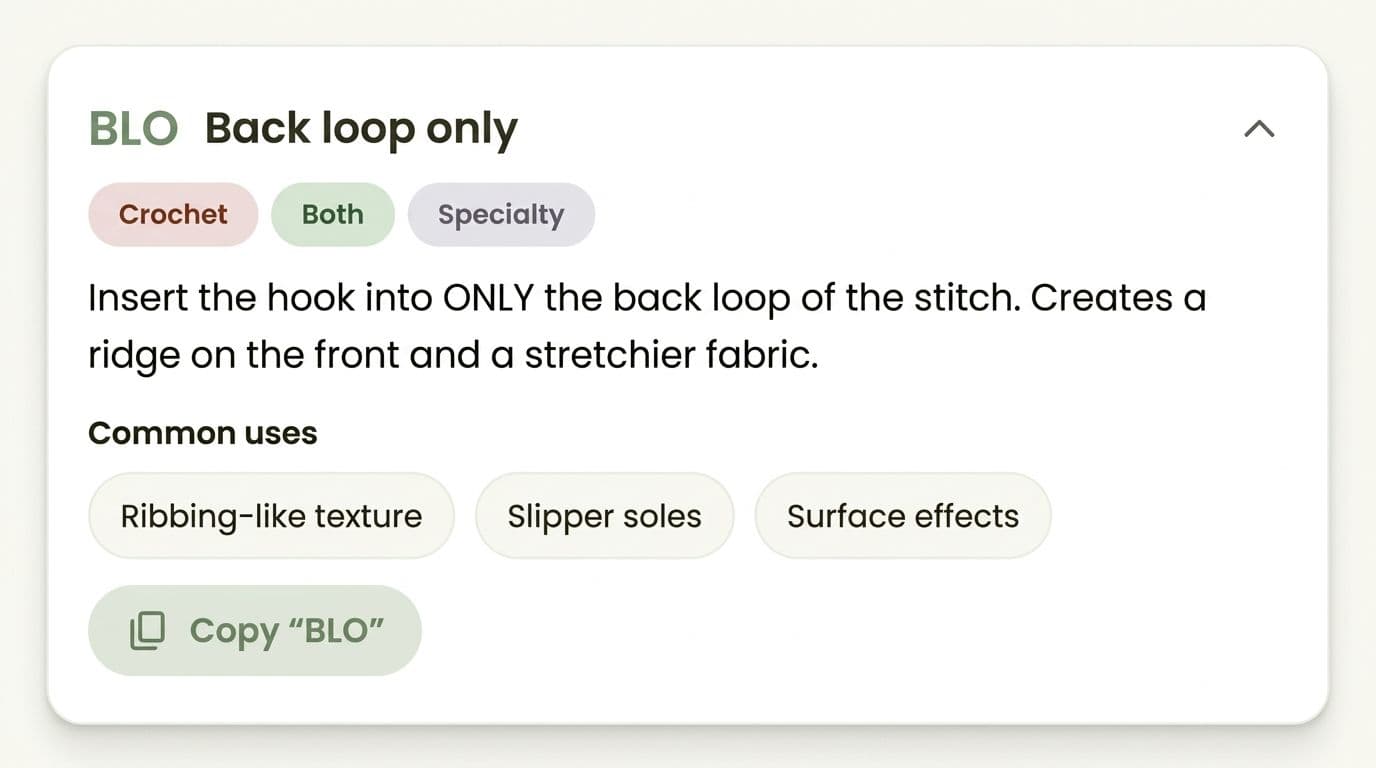
| BLO / FLO | back loop only / front loop only |
| MC / CC | main color / contrasting color |
Part 2: Reading Written Patterns Line by Line
A written pattern is read in order, one line at a time. Each line is usually one row or round, and most end with a number in brackets, the stitch count, which is your safety net.
Here is a simple one, using single crochet:
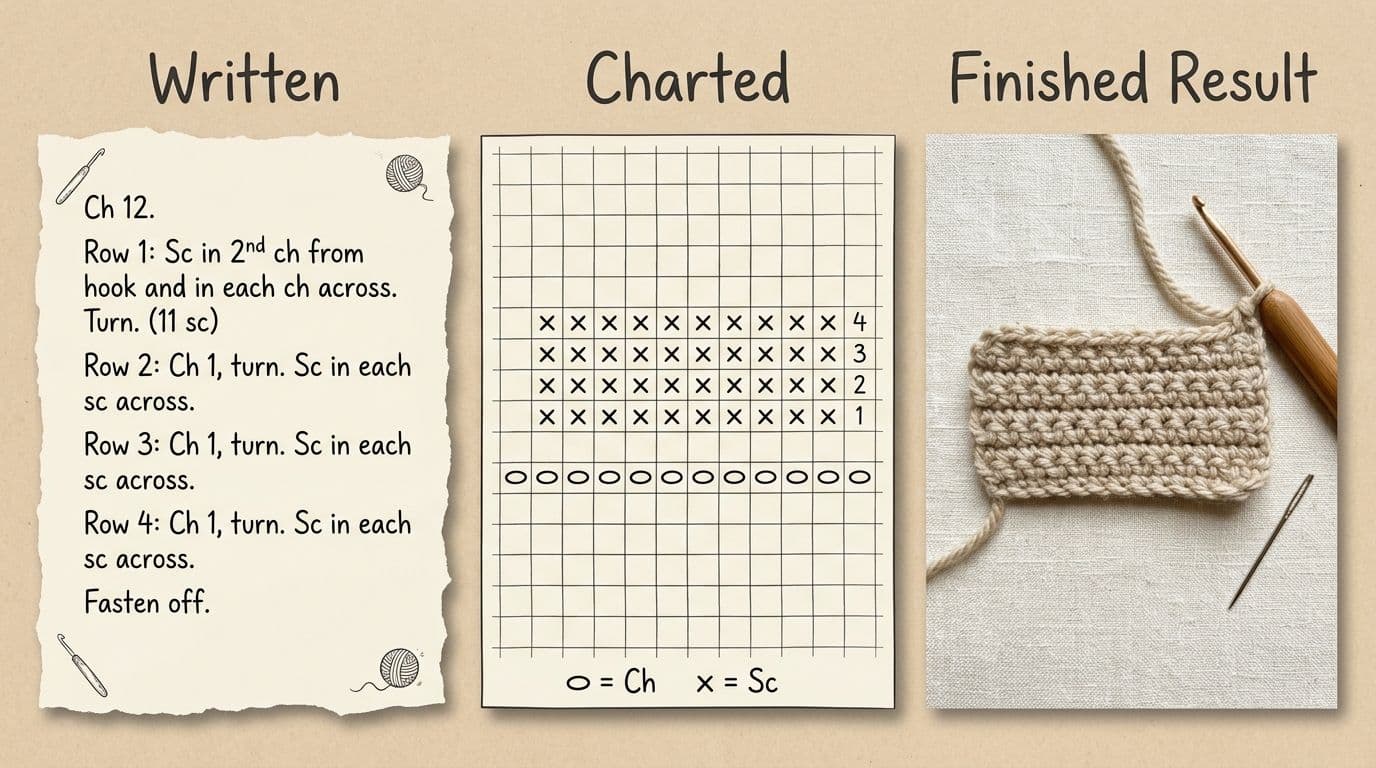
Ch 12. Row 1: Sc in 2nd ch from hook and in each ch across. Ch 1, turn. (11 sc) Row 2: Sc in each st across. Ch 1, turn. (11 sc)
Here is what each piece means:
• Ch 12 means make a slip knot, then 12 chain stitches. Patterns never tell you to make the slip knot. They assume you will. The loop on your hook never counts as a stitch.
• Sc in 2nd ch from hook means skip the chain closest to the hook and put your first single crochet in the next one. That skipped chain is why 12 chains gives you 11 stitches.
• Ch 1, turn means chain one, then turn your work so you can crochet back along the row you just made. That chain lifts your yarn up to the height of the next row.
• (11 sc) is a check, not an instruction. If you count 11, you are on track.
Turning Chains: Do They Count as a Stitch?
This is the question beginners get stuck on most, and the answer depends on the stitch height. As a general rule:
| Stitch | Usual turning chain | Counts as a stitch? |
|---|---|---|
| sc | ch 1 | No |
| hdc | ch 2 | Varies, so check the notes |
| dc | ch 3 | Yes |
| tr | ch 4 | Yes |
Here is the same idea in double crochet:
Ch 14. Row 1: Dc in 4th ch from hook and in each ch across. (12 dc) Row 2: Ch 3 (counts as first dc), dc in next 10 sts and in top of turning ch. (12 dc)
You skip 3 chains in Row 1, and those skipped chains stand in for the first double crochet. That is why 14 chains give 12 stitches: 1 from the chains plus 11 you worked. In Row 2, the ch 3 takes the place of the first stitch, so you skip the stitch right beside it and finish by working into the top of the chain 3 from the row below. Designers differ on this, so when the pattern notes spell it out, trust the notes over any rule of thumb.
Understanding Parentheses, Brackets and Asterisks
Punctuation in a pattern is shorthand for repeating or grouping. Learn these four and you can read almost any written line.
| Symbol | Example | What it means |
|---|---|---|
| * ... rep from * | *Ch 1, sk next st, dc in next st; rep from * across | Do everything after the asterisk, then repeat it until the end of the row |
| [ ] with a number | [Sk next st, 2 dc in next st] 4 times | Do what is inside the brackets, the number of times shown |
| ( ) around stitches | In next sp work (2 dc, ch 2, 2 dc) | Work all of those stitches into the same stitch or space. This one makes a shell |
| ( ) at the end of a line | (24 sts) | The stitch count for that row or round. A check, not an instruction |
Here is a round from an amigurumi pattern so you can see the math:
Rnd 4: [Sc in next 2 sts, inc] 6 times. (24 sts)
Each repeat uses 3 stitches from the round below (two single crochets and one stitch for the increase), and it makes 4 new stitches (2 sc plus 2 from the increase). Six repeats gives 6 x 4 = 24. If you started with 18, you used all 18 up. That is how a stitch count lets you check your own work.
One more thing for garments. Multi size patterns put the numbers for each size in brackets, smallest first, like Ch 60 (64, 68, 72). The first number is the smallest size and the rest are bigger. Highlight your size's numbers before you begin, or you will lose your place.

Making a Garment? Check the Sizes First See standard measurements before you pick a size from the brackets in your pattern, so it fits when you finish.
At a Glance: Abbreviations vs. Symbols vs. Charts
| Format | How it looks | When it is used | Difficulty for beginners |
|---|---|---|---|
| Abbreviations (written) | Lines of text like "Sc in each st across" | Most patterns, especially toys, hats and blankets | Easiest to start, with a learning curve for repeats |
| Symbols (chart) | Small icons for each stitch, laid out in a grid | Lace, motifs, granny squares, doilies | Moderate, until you know the legend |
| Both together | Written steps plus a chart | Modern patterns with detailed stitch work | Easiest overall, since you can cross check |
Part 3: Decoding Charts and Diagrams
A crochet chart is a map of your fabric. Instead of describing each stitch in words, it draws one symbol per stitch, arranged the way the stitches will sit. Most pattern guides skip charts entirely, which is a shame, because once you can read one you can work lace and motifs from any country without a word of translation.
Here is how to read a chart, step by step:
1. Find the legend (the key). It tells you which symbol means which stitch. Never assume.
2. Check whether the chart is worked in rows or rounds. Flat items like scarves are rows. Hats, doilies and granny squares are usually rounds.
3. Find the starting point. Row charts start with a foundation chain along the bottom. Round charts start in the center with a ring or a chain loop.
4. Read in the right direction (explained below).
5. Count the stitches in each row or round and compare with what you have on your hook.
Chart Symbols Explained
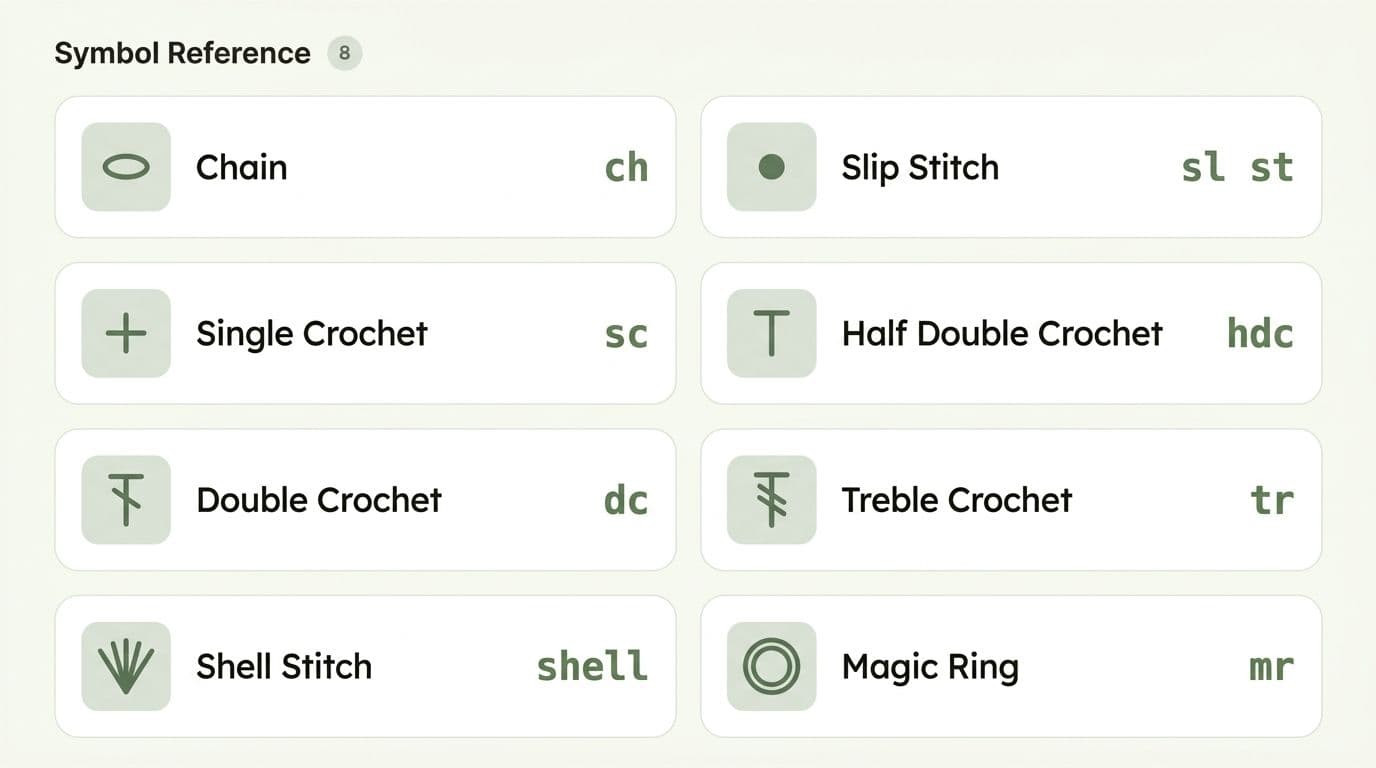
Symbols vary a little between designers, so the legend always wins. These are the shapes you will meet most often:
| Symbol | Stitch |
|---|---|
| Small oval or open circle (○) | Chain (ch) |
| Filled dot (●) | Slip stitch (sl st) |
| Plus sign (+) or X | Single crochet (sc) |
| T shape | Half double crochet (hdc) |
| T with one slash through the stem | Double crochet (dc) |
| T with two slashes | Treble crochet (tr) |
| Two stitches sharing one base | Increase (inc) |
| Two stitches joined at the top | Decrease (dec) |
The slashes on the stem work like a stitch height gauge: the more slashes, the taller the stitch. Because the symbol shows the height, charts avoid most of the US and UK mix ups. Only the label in the legend changes with terminology. If you want a searchable reference for every symbol, try the Pattern Symbols tool.
Reading Direction: A Common Beginner Mistake
Charts follow the way your work moves, which is why the direction feels odd at first.
• Rows: start at the bottom. Read Row 1 from right to left, then Row 2 from left to right, and keep alternating. Odd rows go right to left and even rows go left to right, because you turn your work at the end of each row.
• Rounds: start in the center and work outward. If you are right handed, you read each round counterclockwise.
• Arrows win. If a chart has arrows or a note about direction, follow those instead.
Most charts are drawn for right handed crocheters. If you are left handed, you will usually work the chart as a mirror image, and a good designer will say so in the notes. If yours does not, flip the chart horizontally and follow that.
Written vs. Charted: Which Format Is Right for You?
You do not have to pick a side forever. Many crocheters use charts for the stitch pattern and written lines for everything else. Use this checklist to decide for a particular project.
Choose a written pattern if:
• You are making toys, hats or simple blankets
• You like reading instructions line by line
• The project has lots of shaping, with increases and decreases
• You are brand new and want to learn the abbreviations first
Choose a chart if:
• You are making lace, doilies, granny squares or motifs
• You are a visual learner who likes to see the whole shape
• You want to spot mistakes by comparing your fabric against the picture
• The pattern comes from another country and you would rather skip the language barrier
Choose both if: the pattern offers them. Read the chart to see the shape, then use the written lines to double check.
5 Common Beginner Mistakes (And How to Avoid Them)
Everyone makes these. Spot them early and they cost you ten minutes rather than a whole project.
Mistake #1: Forgetting the Turning Chain
If your edges get wobbly or your piece slowly grows wider, the turning chain is usually the reason. Check whether it counts as a stitch (see the table above) and whether you should work into it on the next row.
Mistake #2: Confusing US and UK Terms
If your first row looks far too loose or far too tight, you are probably working UK terms as US or the other way round. Confirm the terminology before you start, and remember that "single crochet" always means US.
Mistake #3: Miscounting Stitches
Counting only at the end of a project is how you end up frogging 30 rows. Count at the end of every row or round, especially in the first few. Put a stitch marker in the first stitch of each row so you always know where the row starts.
Mistake #4: Skipping the Gauge
If you are making a scarf, gauge hardly matters. If you are making something that has to fit, a sweater, a hat or a bag with a set size, it matters a lot. Make a 4 inch (10 cm) swatch in the stitch the pattern uses. If you have too many stitches in that square, go up a hook size. If you have too few, go down. Check Yarnzy's Hook & Needle Chart to find your starting hook size.
Mistake #5: Not Reading the Pattern Header
The header tells you yarn weight, hook size, finished size and what the designer assumes you know. Skipping it is like starting a recipe without checking you have the eggs. Read it, and read the instructions through once as well, so nothing surprises you halfway.

Next: Decode the 20 Most Common Abbreviations Once you have the basics down, dive deeper into the abbreviations that show up in almost every pattern.
Your First Pattern: A Beginner Friendly Example
Let us read a complete pattern together. This is a practice dishcloth, written in US terms, with nothing you have not already seen above.
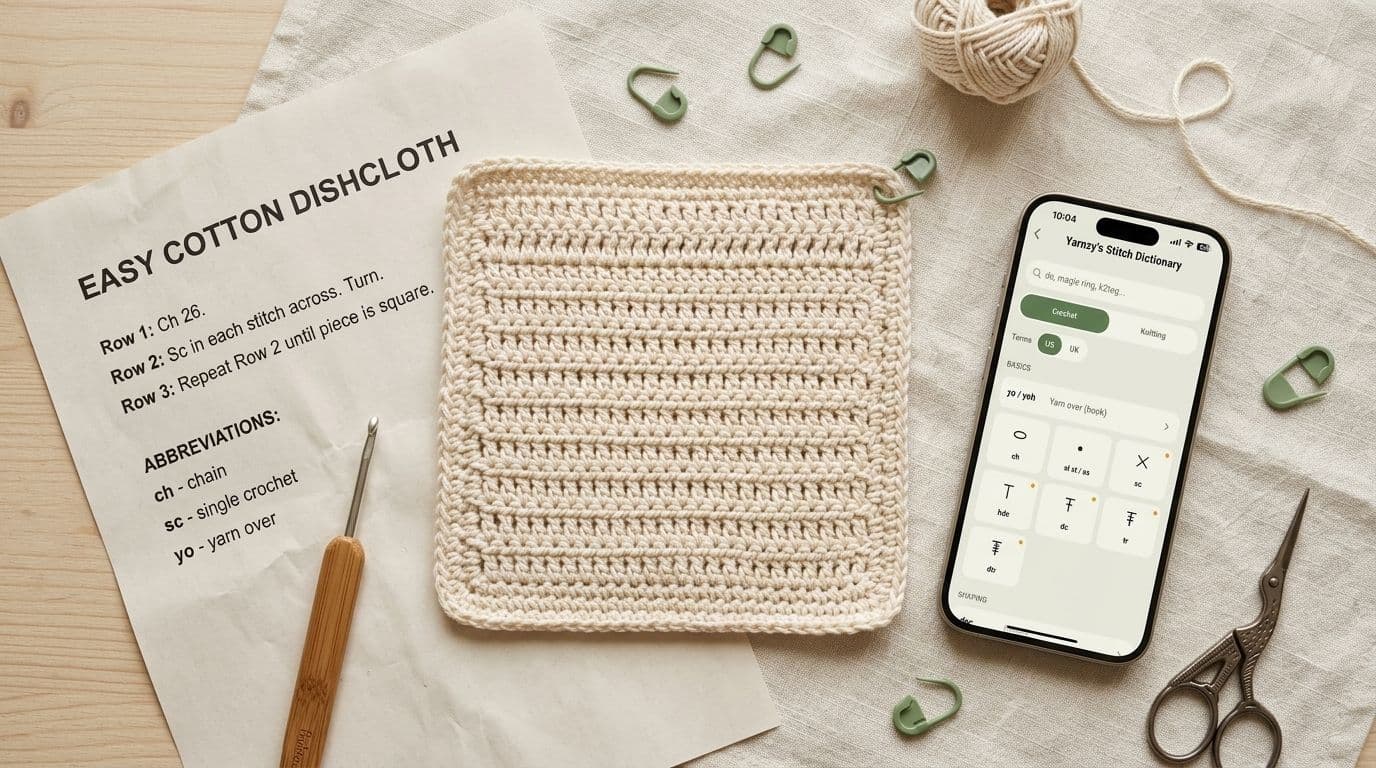
Simple Practice Dishcloth (US terms) Materials: worsted weight cotton yarn, 5 mm hook, tapestry needle Finished size: about 7 in (18 cm) square, depending on your yarn Gauge: not important for this project Abbreviations: ch = chain, sc = single crochet, st(s) = stitch(es)
Ch 21. Row 1: Sc in 2nd ch from hook and in each ch across. Ch 1, turn. (20 sc) Rows 2 to 19: Sc in each st across. Ch 1, turn. (20 sc) Row 20: Sc in each st across. (20 sc) Fasten off and weave in the ends.
Here is the walkthrough:
• The header tells you everything you need to gather and confirms you are in US terms. Gauge does not matter here, which the pattern says outright.
• Ch 21 makes 21 chains. Count them carefully and do not count the loop on your hook.
• Row 1 skips the first chain and puts a single crochet in each of the remaining 20. That is why you end with 20 sc, not 21.
• Rows 2 to 19 is shorthand for "do this same row 18 times." Count each row as you go, and check you still have 20 stitches.
• Row 20 is the last one, so there is no turning chain. You fasten off instead.
Once that feels easy, move on to a pattern with increases or a simple chart. You already know the language.
Conclusion
Reading patterns is a skill that grows every time you use it. Pick a small project, read the header, keep your stitch counts honest, and treat each unfamiliar abbreviation as a thirty second lookup rather than a roadblock. When you are ready for more, our Stitch Dictionary and Pattern Symbols tool are free, and they are built for exactly this moment.
Frequently Asked Questions
Ch sp means chain space. It is the gap left under a chain you made on a previous row, usually after skipping a stitch. When a pattern says to work "in next ch sp," put your hook into that gap rather than into the chain stitches themselves.
Share this page
 X / Twitter
 Facebook
 Reddit
Related articles
Bernat Yarn Substitutes: What to Use Instead of Blanket, Maker, Pipsqueak & Bundle Up

How to Crochet a Pumpkin: Free Patterns for Fall & Halloween Decor
Temperature Blanket Crochet: The Complete Beginner's Guide to Planning Your Year in Yarn

Yarnzy: #1 Crochet & Knitting App
Track knitting and crochet projects with a timer & row counter, Import Patterns from Anywhere, Manage Stash & more all in one place.


Free to start · iOS, Android & Web
Scan to Download the App
Start your next project with confidence