
 Download the App
How to Fix a Dropped Stitch in Knitting: Step-by-Step for Every Stitch Type
23 Sep, 2026
A dropped stitch looks like a disaster, but it almost never is. Knitting has no knots holding it together, which means a stitch that's slipped off your needle is still sitting right there in your fabric, waiting to be picked back up. With a crochet hook (or even without one) and a couple of minutes, you can fix it and keep going.
This guide covers every version of the problem: a knit stitch, a purl stitch, garter stitch, a stitch that's run several rows down, a repair with no hook on hand, and even a dropped stitch you didn't notice until after you bound off.
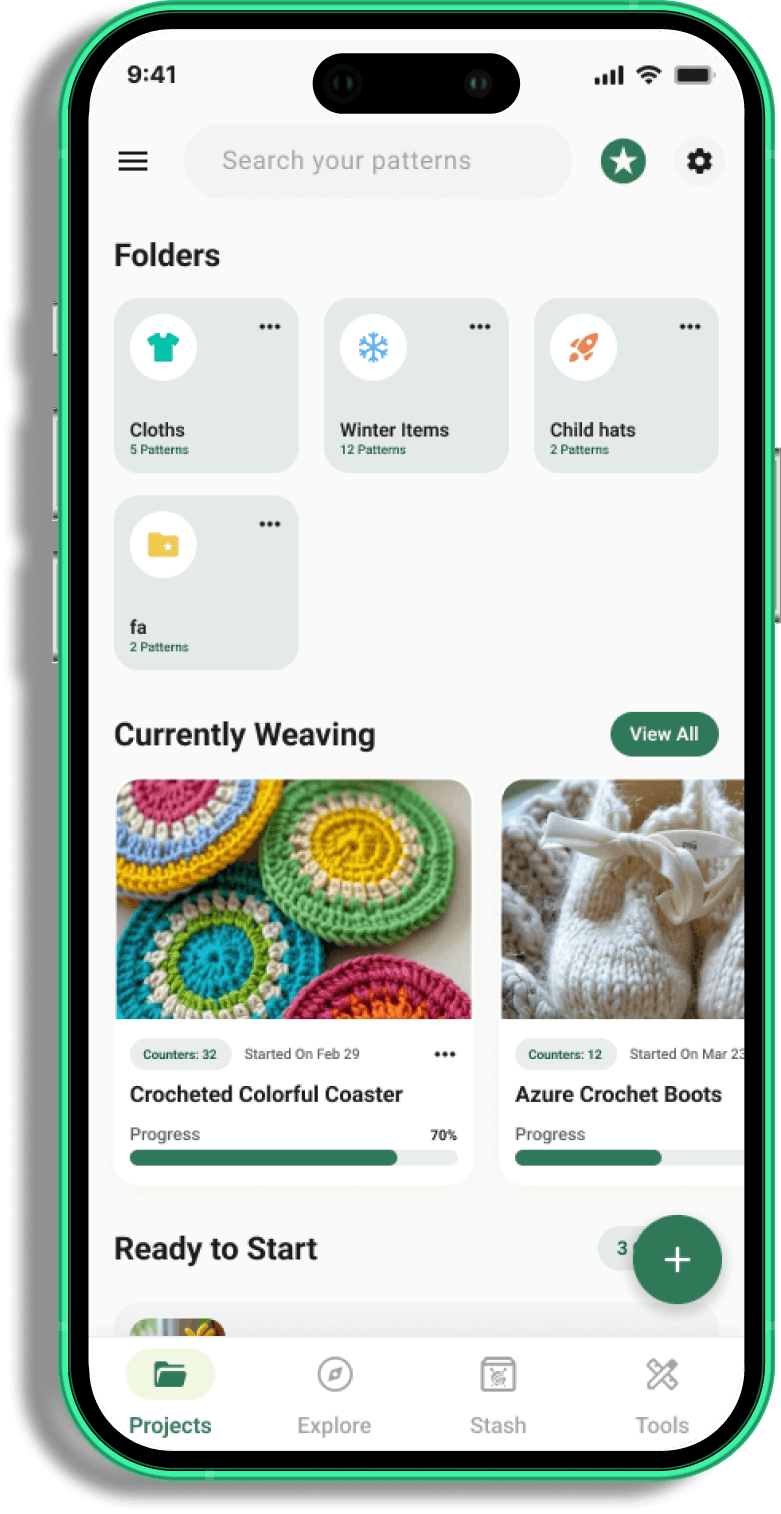
Never Lose Track of a Stitch Type Again
 Download Yarnzy
What Is a Dropped Stitch in Knitting?
A dropped stitch is a loop that has slipped off your needle without being worked. Left alone, it unravels downward one row at a time, leaving a ladder of loose horizontal strands called a "run." The stitch itself doesn't disappear, it just falls to the bottom of the run, which is exactly why it's fixable.
What You'll Need to Fix a Dropped Stitch
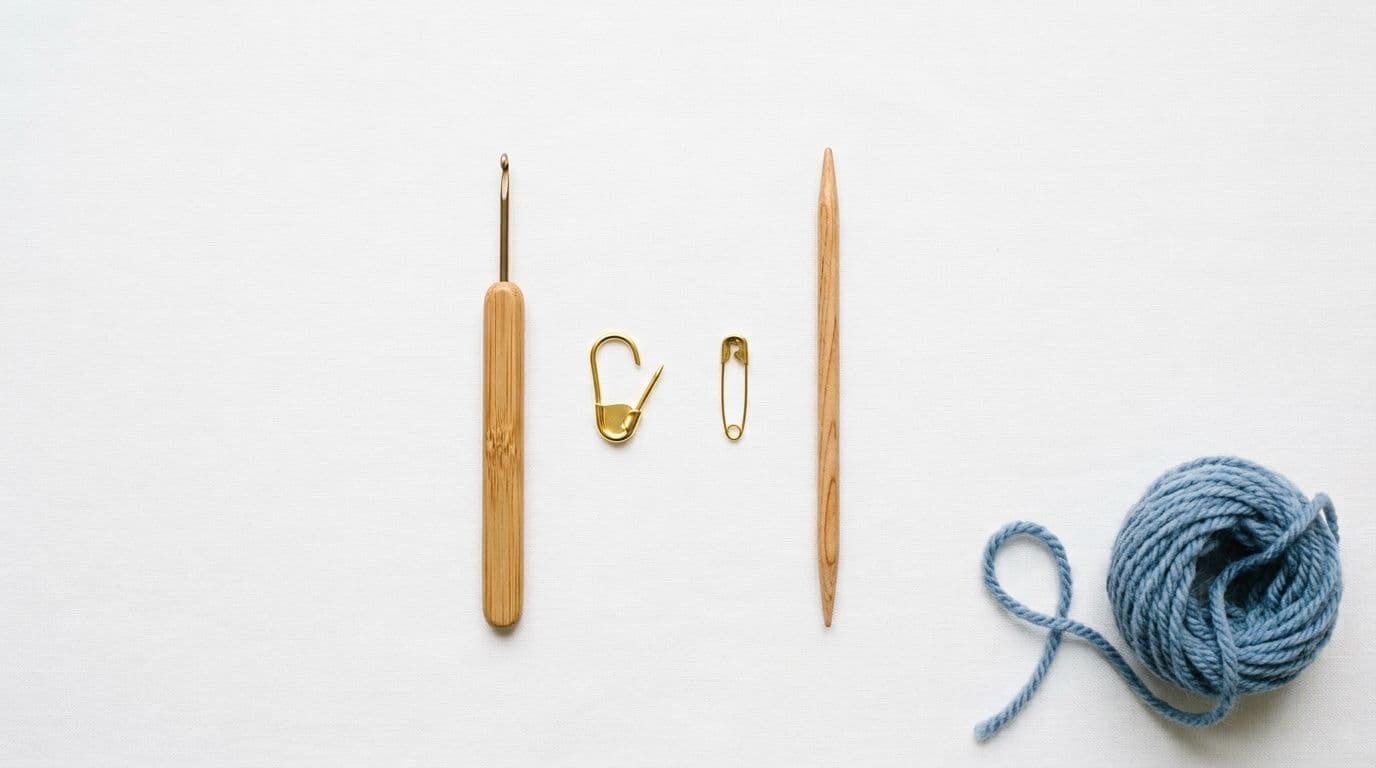
• A crochet hook, ideally close to your working yarn's weight. A hook that's too small won't grab the strand cleanly; too large and it'll stretch the stitch. Check the hook and needle size chart if you're not sure which size to grab.
• A stitch marker, safety pin, or scrap yarn to hold the stitch still while you find your hook.
• A spare double-pointed needle, useful for the no-hook method below.
First: Secure the Stitch Before You Do Anything Else
Before you hunt for a hook, stop the damage. Slide a stitch marker, a safety pin, or even a bobby pin through the dropped loop so it can't run any further. Then check the stitches still on your needle. It's common to lose a second stitch while fumbling to fix the first one, so slide everything snugly toward the needle tips or add a needle stopper.
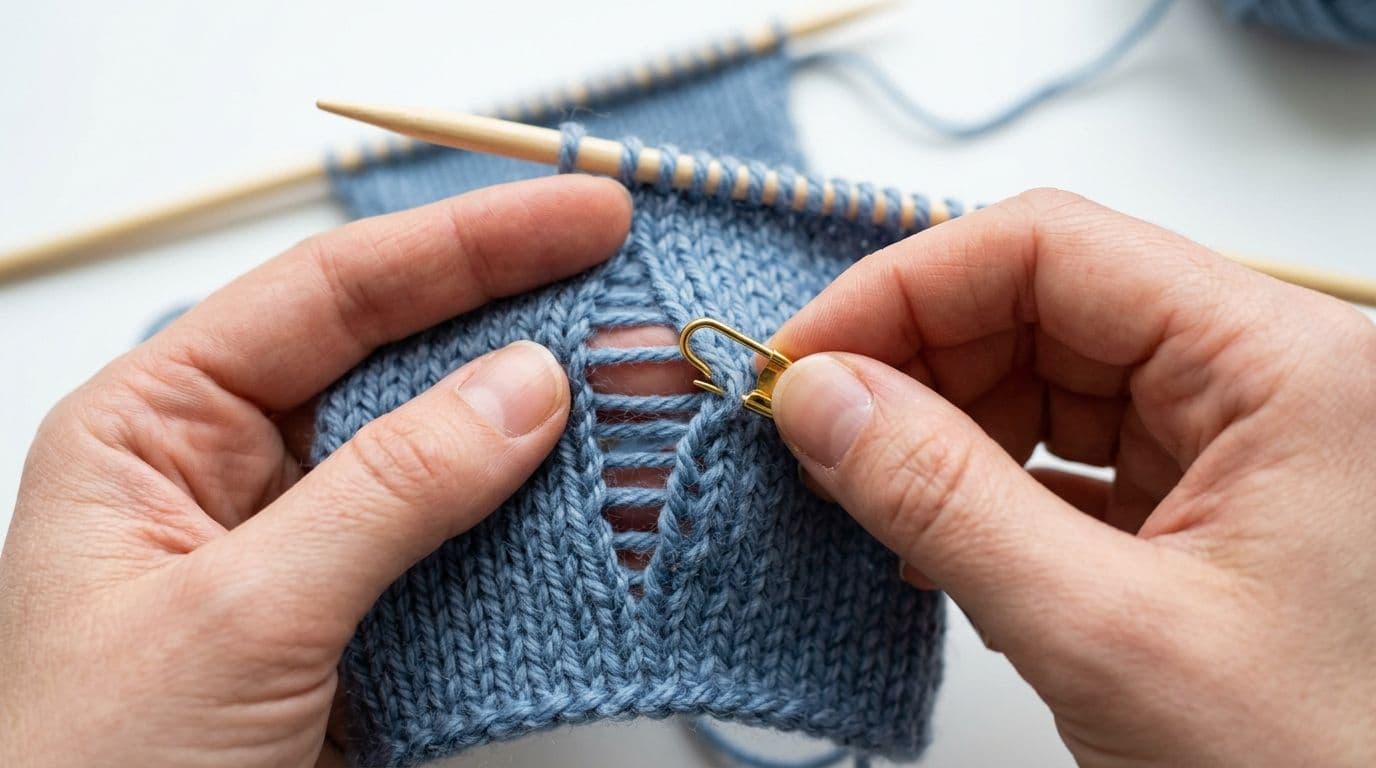
Don't tug the fabric sideways while it's unsecured. That's how one dropped stitch turns into three.
How to Fix a Dropped Knit Stitch (Stockinette)
This is the core technique, and once you have it, every other version in this guide is a variation on it.
Step 1: Secure and locate the dropped stitch
Find the loop and make sure the loose strands running above it are all sitting behind it, facing the back of your work. If the loop is twisted, gently untwist it so the two "legs" sit evenly.
Step 2: Insert your hook from front to back
With the right side of the fabric facing you, push your crochet hook through the dropped loop from front to back.
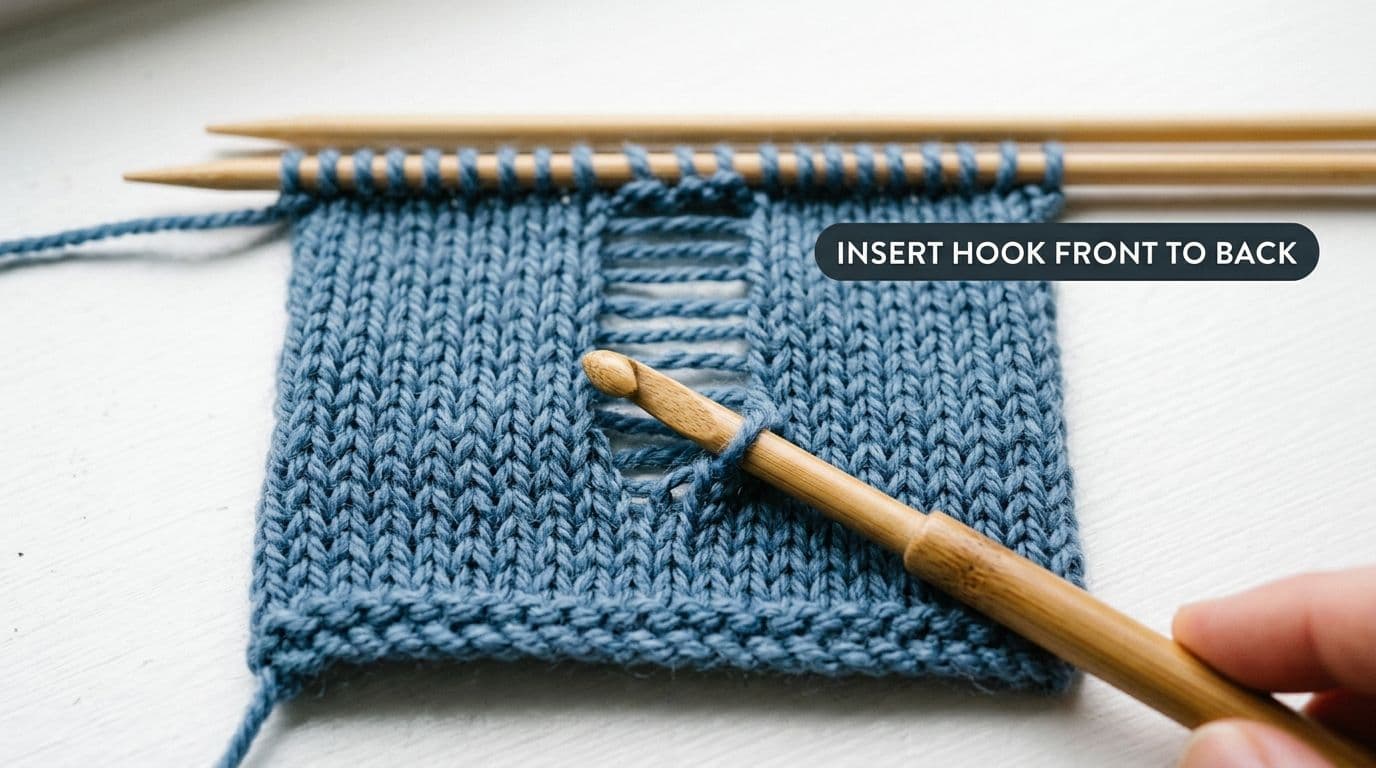
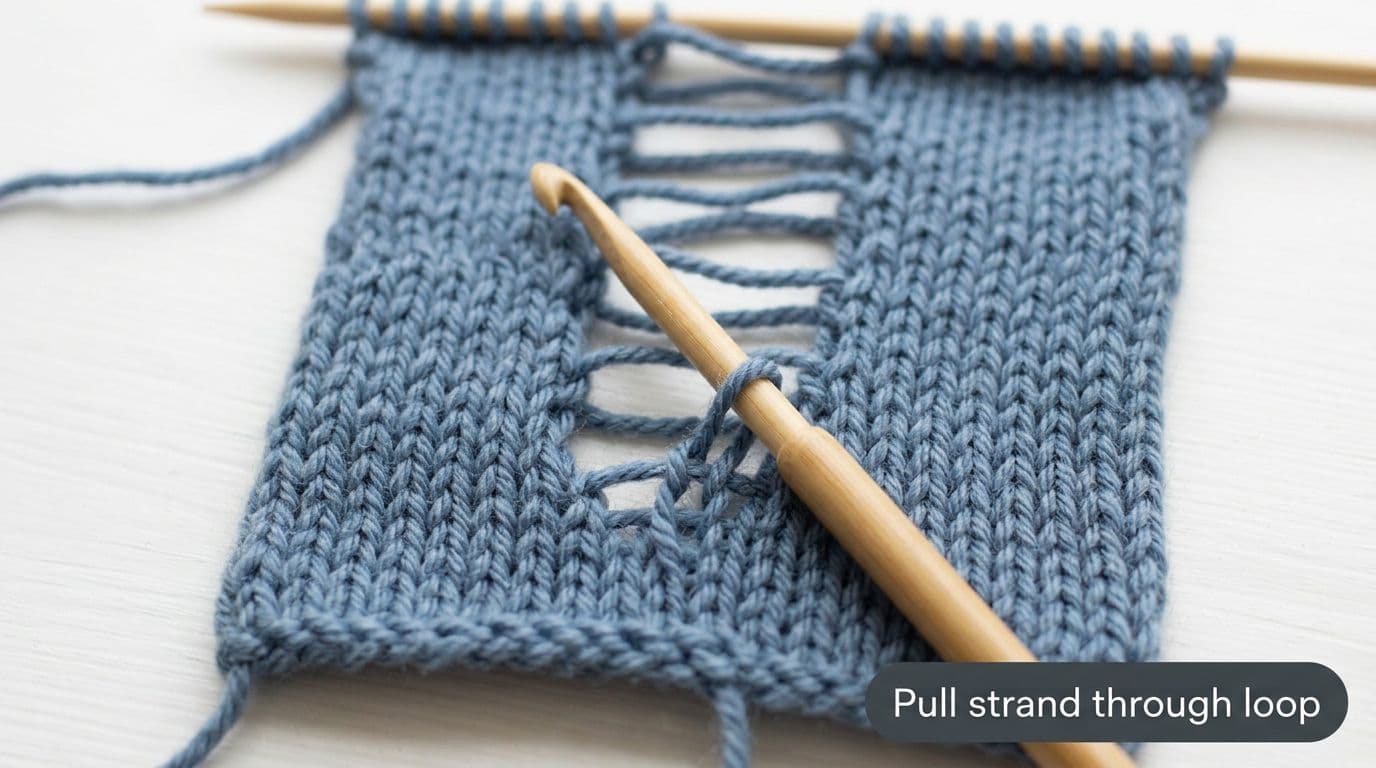
Step 3: Pull through the ladder strand
Look just above the loop for the lowest loose strand. Hook it and pull it through the loop sitting on your hook. This creates a new stitch and uses up one rung of the ladder.
Step 4: Repeat up each row
Keep hooking the next strand up and pulling it through, one row at a time, until you've used every strand in the run and you're back at your current row.
Step 5: Slip the stitch back onto the needle
Move the stitch from your hook onto the left needle, inserting the needle the same way you would to knit it, so it isn't twisted. Continue working as normal.
How to Fix a Dropped Purl Stitch
The mechanics are the same, but purl bumps sit on the other side of the fabric, so the loose strands need to be in front, and you insert the hook from back to front instead.
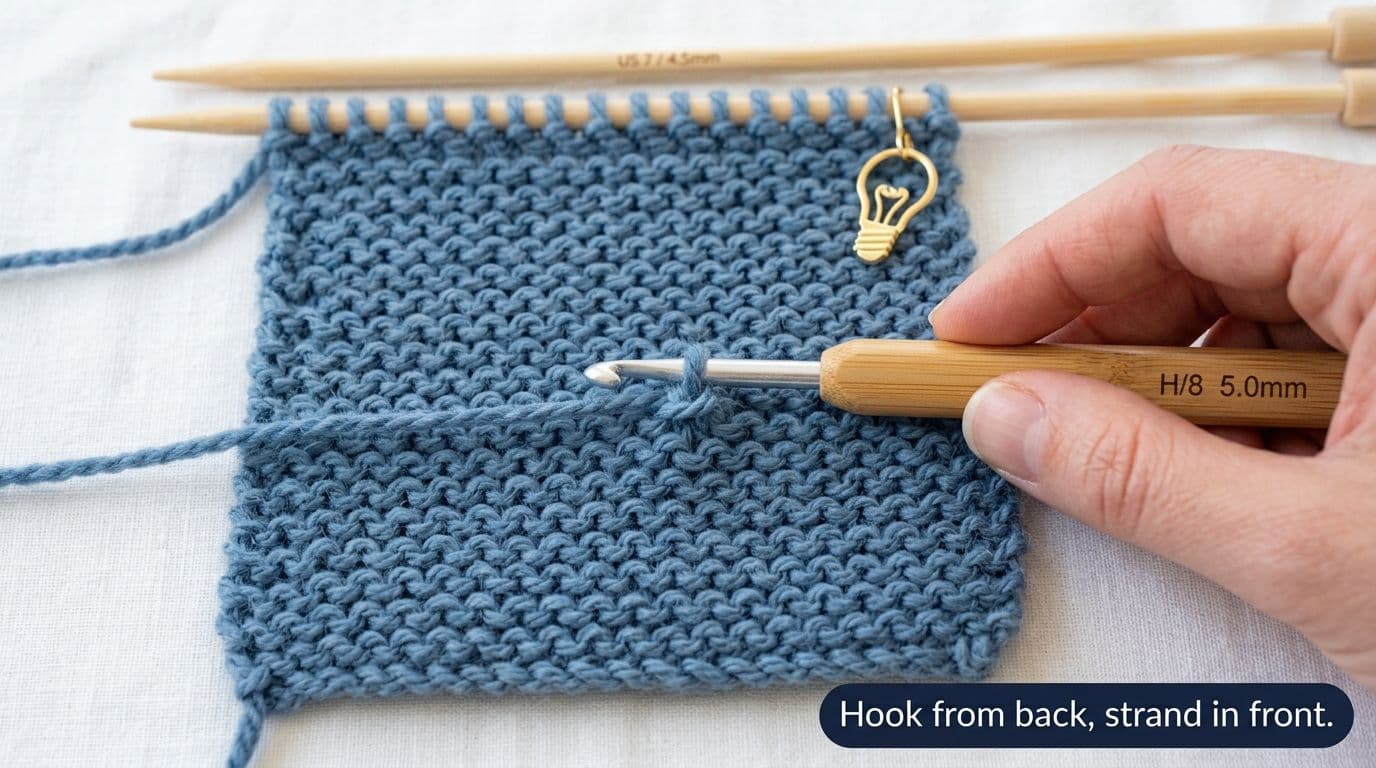
There's an easier route, though: a knit stitch looks exactly like a purl stitch from the opposite side. If a purl stitch drops, just turn your work around and fix it using the knit method above from what is now the "right side" to you. Turn it back when you're done. This one trick saves you from learning a second motion entirely.
How to Fix a Dropped Stitch in Garter Stitch
Garter stitch is trickier because every row alternates between looking like a knit row and a purl row, even though you may have knit every row to get there. That means the strands you need to grab switch from front to back every single row of the run.
Work one row at a time and check which side is facing you before each pull-through: if the row you're fixing shows knit bumps, bring the strand to the back and use the knit method; if it shows purl bumps, bring the strand to the front and use the purl method. Go slowly and check your work after every row garter punishes guessing more than stockinette does, because a stitch pulled through the wrong way is immediately visible as a flat spot instead of a ridge.

Not Sure What Stitch You're Looking At? Yarnzy's Stitch Dictionary shows you exactly what knit and purl stitches look like from both sides, so you always know which fix to use. Browse the Stitch Dictionary
How to Fix a Dropped Stitch Several Rows Down
A run that's gone several rows deep looks alarming, but the method doesn't change, it just repeats more times. Before you start, count the loose strands in the ladder; that's exactly how many times you'll repeat the pull-through step.
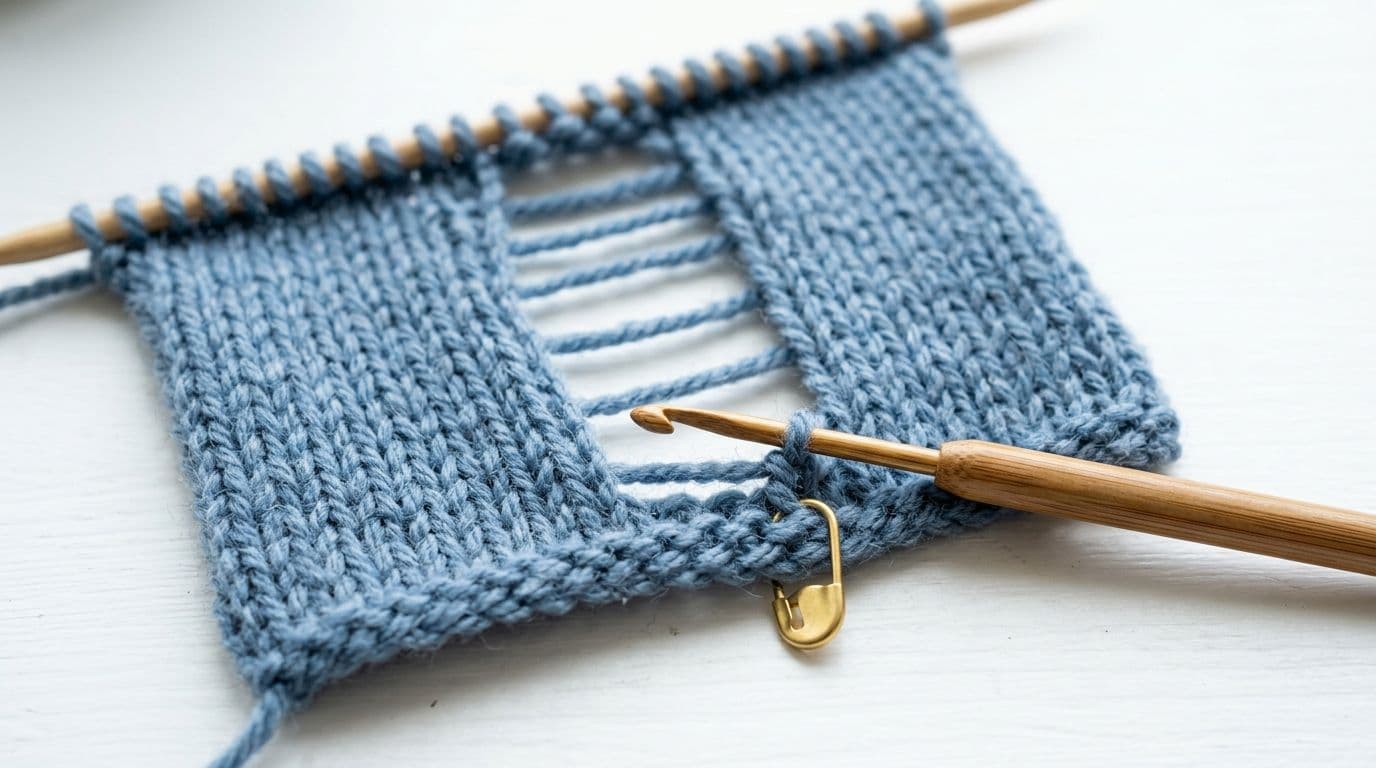
Work through the run one strand at a time, from the bottom up, using the knit or purl method depending on what each row calls for. Don't skip a strand or go out of order; the strands can look tangled near the top, so double-check you're grabbing the next one in sequence, not one further up. If you lose track, gently tug the fabric to separate the strands and start again from the bottom of the run.
How to Fix a Dropped Stitch Without a Crochet Hook
If you're knitting somewhere without your tool kit, a spare knitting needle does the same job.
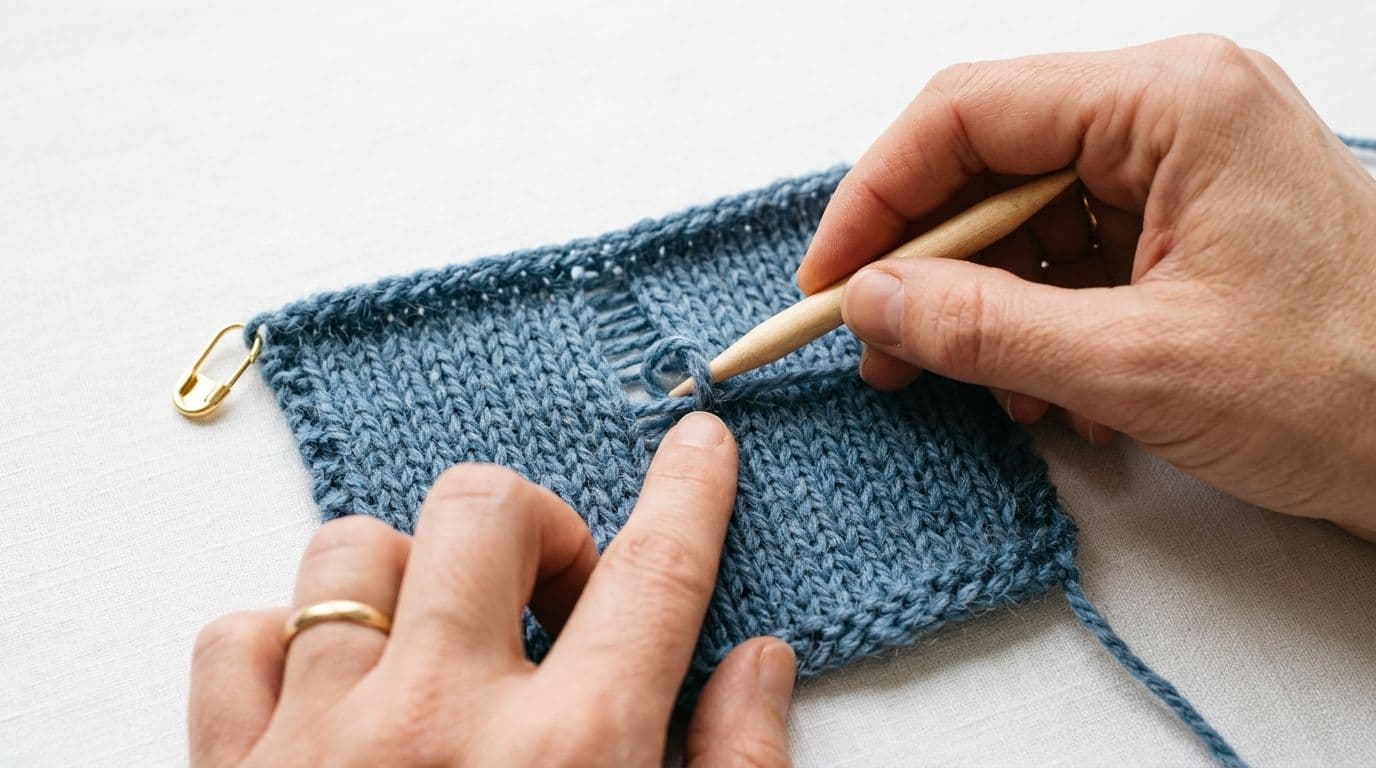
Secure the dropped stitch first, exactly as above. Then insert the tip of a spare needle (or your right-hand needle) into the loop from back to front, under the lowest strand, and use your index finger to help scoop that strand through the loop, creating a new stitch. Slip the resulting stitch back to your left needle knitwise so it doesn't twist, and repeat up the run. It takes a little longer than a hook, mostly because your finger is doing the hook's job, but the mechanics are identical.
How to Fix a Dropped Stitch in a Finished Project
Finding a dropped stitch after you've already bound off feels like the worst-case scenario, but it's still fixable, because unraveling the bind-off itself would only pull things tighter, not looser.
Use a crochet hook to scoop up the dropped stitch from underneath, then work up through each ladder strand the same way you would mid-project. When you reach the top strand, instead of slipping the final loop onto a needle, pull it through to the back of the work. Thread a short length of spare yarn through that final loop, pull one end through so a single strand secures it, and weave both ends in as if you were joining a new ball of yarn at that spot. The repair leaves one stitch slightly different in size at that spot, but it flattens out once the piece is worn or blocked, and it's very hard to spot unless someone's looking closely.

Keep Your Stitch Count Accurate Every Time Use Yarnzy's free Stitch Calculator to track your stitch counts before and after a repair, so you're not left second-guessing whether your fix threw off the pattern.
When Should You Frog Instead of Fixing?
Not every dropped stitch is worth hand-repairing. Use these checkpoints:
• One stitch, one technique, a run you can count, fix it in place. This covers the vast majority of drops.
• Multiple stitches dropped in different columns, or a cable/lace pattern crossed through the run frogging (unraveling back to before the mistake) is often faster and cleaner than trying to reconstruct a pattern stitch by stitch.
• You're not sure the stitch dropped as a knit or a purl tink instead (undo stitch by stitch, one at a time, with your needles) until you're back to a point you understand, then continue normally.
• The run has gone through a section with increases or decreases these change the stitch count row to row, so a straight pull-up will throw off your count. Frogging back to before the shaping is usually safer than fixing.
If you're already using intentional dropping to fix a different mistake several rows down, that's called laddering down: you deliberately drop a stitch, unravel it down to the row with the error, fix that row, then rebuild the ladder back up using the same techniques in this guide.
How to Prevent Dropping Stitches in the Future
• Use needle stoppers or point protectors any time you set your project down, especially mid-row.
• Place a stitch marker every 10–20 stitches so a drop only threatens a small section, not the whole row.
• Keep consistent tension. Stitches that are too loose slip off the needle tip more easily than snug ones.
• Count your stitches at the end of every row, at least until the habit is automatic. Catching a drop within one row makes it a 10-second fix.
• Avoid knitting when you're exhausted or distracted, if you can help it. Most drops happen at the edges of attention, not skill.
Conclusion
A dropped stitch is one of the most common things that happens in knitting, and one of the most fixable. Secure it, work out which stitch type you're dealing with, and follow the matching method above. Whether it's mid-row, several rows down, or hiding in a project you already bound off, you very rarely need to rip out your work to fix it.
Frequently Asked Questions
It's a loop that has slipped off your needle unworked. If it's not caught, it unravels downward one row at a time, leaving loose horizontal strands called a run.
Share this page
 X / Twitter
 Facebook
 Reddit
Related articles
How to Join Granny Squares: 7 Easy Methods for Every Project

Why Is My Crochet Curling? 6 Causes, Easy Fixes, and How to Stop It for Good
How Much Yarn Do I Need? Yardage Chart + Free Yarn Calculator

Yarnzy: #1 Crochet & Knitting App
Track knitting and crochet projects with a timer & row counter, Import Patterns from Anywhere, Manage Stash & more all in one place.


Free to start · iOS, Android & Web
Scan to Download the App

Start your next project with confidence