
 Download the App
Easy Crochet Bookmark Pattern: A Beginner's Guide to the Lace Shell Stitch
18 Aug, 2026
This free crochet bookmark pattern uses a repeating lace shell stitch, no sign-up needed, and it's genuinely beginner-friendly: once you learn one shell repeat, you're just repeating it until the piece is the length you want. Most beginners finish one in well under an hour. Finished with a scalloped edge and a tassel, it's a realistic first lace project even if you've never worked a shell stitch before. If you've been searching for a simple crochet bookmark pattern free of confusing shorthand, this crochet bookmark tutorial spells out every row in plain language, not just stitch codes. It's one of several free crochet bookmark patterns on Yarnzy, and the one we'd hand a first-timer.
Quick Facts About This Pattern
| Skill level | Beginner |
|---|---|
| Stitches used | Chain (ch), single crochet (sc), double crochet (dc), half double crochet (hdc), increase (inc), decrease (dec), slip stitch (sl st) |
| Construction | Worked flat in rows, turning at the end of each row |
| Repeat structure | A repeating shell (3 dc, ch 2, 3 dc) worked into the previous row's chain-2 space |
| Hook size | 2.5mm |
| Yarn | cotton recommended for stitch definition |
| Edging | Scalloped shell border, full shell at each corner and the rounded end |
| Finish | Tassel at one end |
Drag Get this pattern and hundreds more free in the Yarnzy app. No sign-up required to start.
 Download Yarnzy for Pattern
What You'll Need
This is a crochet bookmark pattern for beginners in the truest sense, the materials list is short and nothing here is specialty:
• 2.5mm crochet hook
• Yarn, cotton is recommended for the cleanest stitch definition on a lace design like this)
• Tapestry needle
• Scissors
Not sure your hook size is right for your yarn? A quick check against our Hook & Needle Chart takes about ten seconds if you want to confirm before you start.
Abbreviations & Stitches Used
| Abbreviation | Meaning |
|---|---|
| MR | Magic ring |
| CH | Chain |
| SC | Single crochet |
| INC | Increase (2 sc in the same stitch) |
| DEC | Invisible decrease |
| SL ST | Slip stitch |
| DC | Double crochet |
| ST(S) | Stitch(es) |
| FO | Fasten off |

Look Up Any Stitch Instantly Forget what a stitch abbreviation means mid-row? Our Stitch Dictionary has every one used in this pattern, with a definition and photo for each.
Pattern Notes Before You Begin
A handful of things are worth knowing before your hook touches yarn, since they explain why the instructions read the way they do:
• This pattern is written in US crochet terminology.
• The turning chain (ch 3) at the start of each row counts as your first double crochet. Don't work an extra dc into that same spot, or your stitch count will creep up row by row.
• The bookmark is worked flat in rows, turning your work at the end of each one, not in continuous rounds.
• The main body of the bookmark is simply the same row repeated until you reach your desired length. There's no separate "middle section," rows 3 and onward are one repeating unit.
• The decorative shell, (3 dc, ch 2, 3 dc) worked into the previous row's chain-2 space, is the one motif that defines this entire design. Every row from row 1 onward is built around placing this shell correctly.
How to Crochet This Bookmark (Step by Step)
Here's exactly how to crochet this bookmark, broken down row by row so you always know what you're building and why, not just which stitches to make next.
Foundation Chain & Row 1
Foundation: Ch 10.
Row 1: Skip the first 5 chains. Working into the 6th chain from your hook, make 3 double crochet, chain 2, then 3 more double crochet, that's your first shell. Skip the next 3 chains. Work 1 double crochet into the very last chain.
Row 2
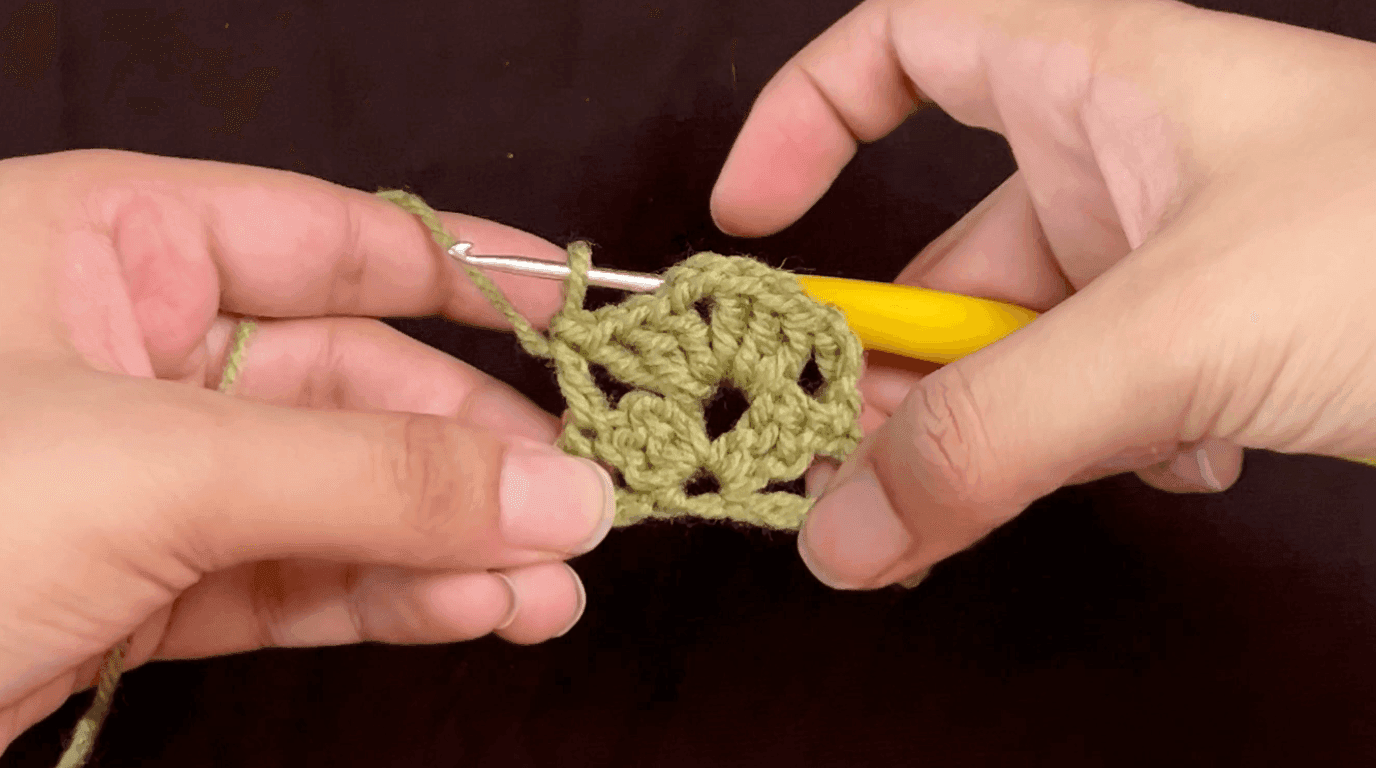
Row 2: Ch 3, turn. In the ch-2 space, work 3 dc, ch 2, 3 dc. Work 1 dc in the dc from the previous row.
Remember, that ch 3 at the start counts as your first dc for this row, don't add a separate stitch on top of it. Everything else in row 2 is just repeating the same shell placement you made in row 1, now built on top of the chain-2 space you left behind.
Rows 3 and Onward (Building Your Length)
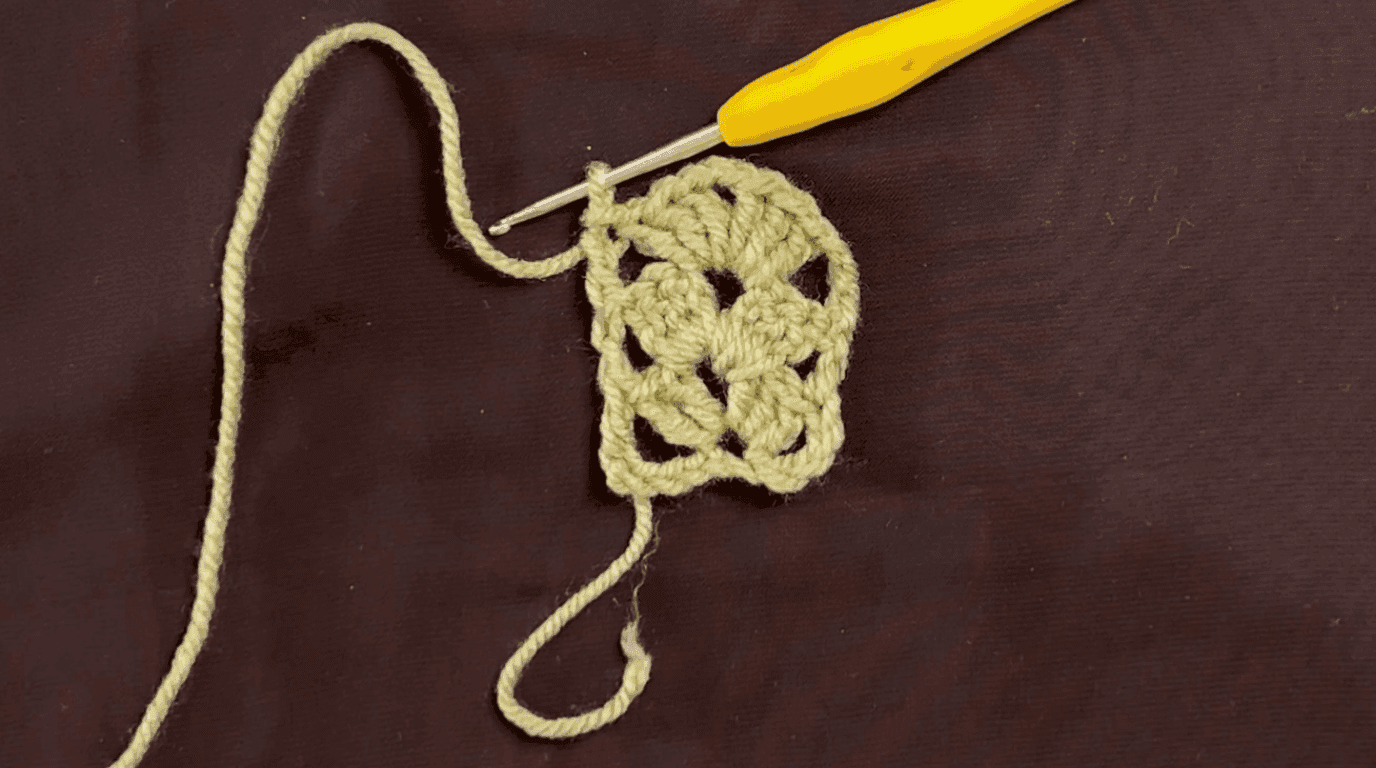
Rows 3+ (repeat until your desired length): Chain 3, turn. Work 3 double crochet, chain 2, 3 double crochet into the previous row's chain-2 space. Work 1 double crochet into the double crochet stitch from the previous row.
This is the entire rest of the bookmark, one repeating row, worked as many times as you want the piece to be long. The sample shown was worked for 13 repeats.

Not Sure How Much Yarn You'll Need? Not sure how much yarn a longer version will take? Check our Yarn Calculator before you commit a whole skein to it
How to Resize This Bookmark
Since this pattern is just one row repeated, resizing it is genuinely simple, longer or shorter is purely a matter of how many times you repeat rows 3 and onward before you move on to the edging.
A couple of practical notes regardless of exact length:
• Keep your repeat count odd or even consistently if you want the two ends of your bookmark to look visually balanced, since the shell pattern reads slightly differently depending on where it lands relative to the edging.
• A thicker yarn and larger hook will produce a longer bookmark from the same repeat count than a fine cotton and 2.5mm hook will, since the shell motif itself grows with your gauge, not just your row count.
Adding the Decorative Shell Edging
Once your body is the length you want, the edging is what turns a plain strip of shells into a finished, framed piece.
Starting the Edging & Corner Shell
Edging: Ch 6. Turn. Sl st into nearest ch-2 space. Ch 3. Work 1 dc, this starts the edging.
Corner shell (in the first ch-2 space): 1 sc, 1 hdc, 1 dc, 1 dc, 1 hdc, 1 sc.
Every corner of the bookmark, and the rounded end, gets this same full shell. It's what gives the finished piece its smooth, rounded corners instead of sharp, boxy ones.
Side Edging
Side edging: work the shell over every two adjacent spaces, first space: 1 sc, 1 hdc, 1 dc; next space: 1 dc, 1 hdc, 1 sc. Repeat evenly around both sides.
Corners: full shell (1 sc, 1 hdc, 1 dc, 1 dc, 1 hdc, 1 sc) at every corner and the rounded end.
Working the shell across two spaces at a time, rather than one, is what keeps the edging looking continuous and even rather than choppy. If your side edging comes out looking uneven, it's almost always because one section got a full shell where it should have gotten a half, double-check you're pairing spaces correctly as you go.
Finishing: Weaving In Ends & Adding a Tassel
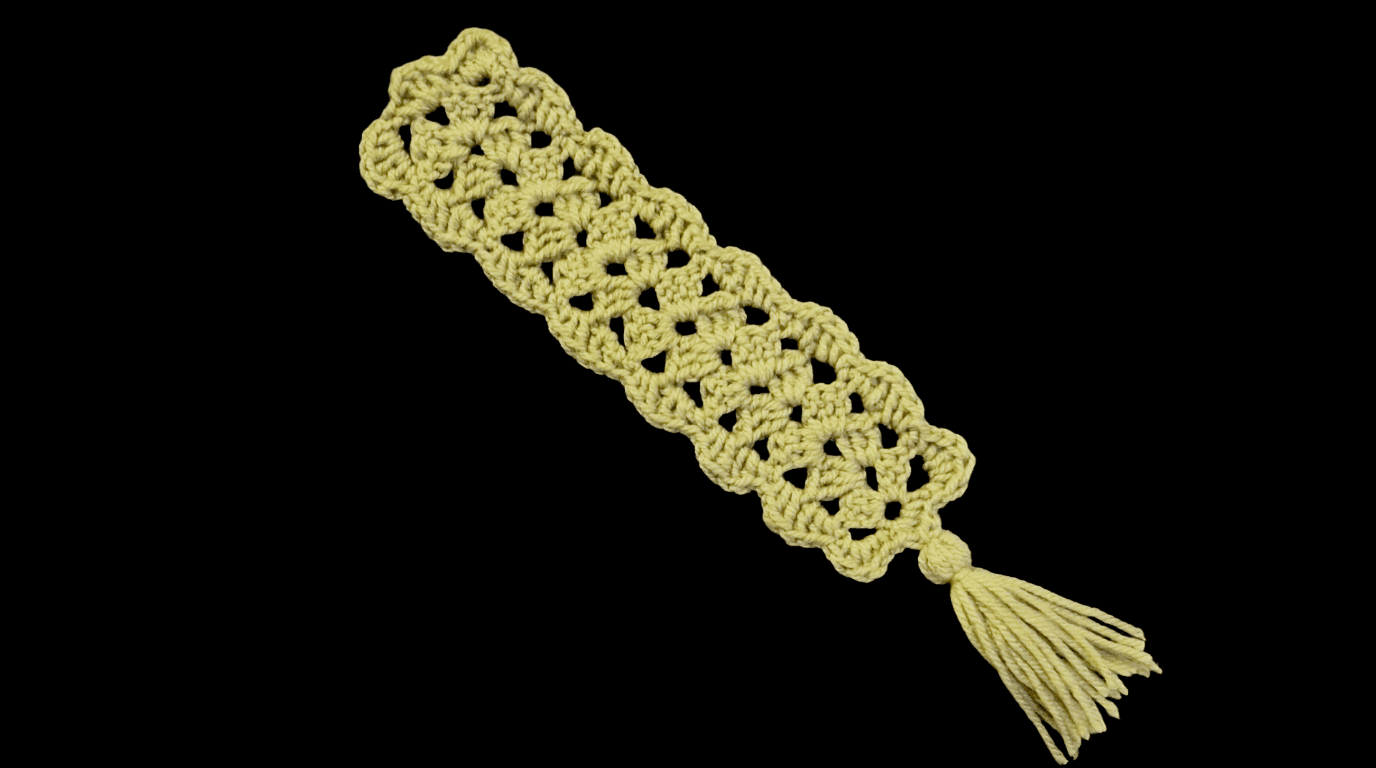
Fasten off. Weave in all ends. Attach a tassel to one end of the bookmark.
A tassel is what turns this from "a crocheted lace strip" into an unmistakable bookmark, and it doesn't need to be complicated. Wrap yarn around a few fingers a dozen or so times, tie it off at the top, snip the loop at the bottom, and trim the ends even. Attach it through the rounded end of your finished piece and you're done.
Common Mistakes to Avoid
A few things trip up first-timers on a lace shell pattern like this one more than anything else:
• Forgetting the turning chain counts as your first dc. This is the single most common lace-pattern mistake, and it compounds row after row if it's not caught early. If your stitch count keeps creeping up, this is almost always why.
• Curling or wavy edges. Open lace stitches like this shell pattern are naturally prone to curling, especially before the edging is added. A light steam block once the piece is finished (never a hot iron directly on the yarn) will flatten it out and hold the shape.
• Uneven shell counts along the edging. It's easy to lose track of which chain-2 space you're on partway around, especially on a longer bookmark. Use a stitch marker on every fourth or fifth space as you go if you find yourself losing count.
• Tension too loose for a lace design. A lace bookmark relies on visible, defined stitches to look intentional rather than sloppy. If your tension runs loose, consider going down half a hook size specifically for this pattern.
Bookmark Variations to Try
Once you've made one, this crochet bookmark pattern is easy to adapt into a few genuinely different-feeling pieces without changing the core construction:
• A daintier version: work the same pattern in a finer thread weight with a smaller hook for a more delicate, heirloom-style crochet lace bookmark.
• No tassel: finish with just the edging for a cleaner, more minimalist look, this version also lies flatter inside a book.
• Ombre or color-blocked shells: change yarn color every few repeats for a gradient effect running the length of the bookmark.
• Shorter, wider proportions: fewer repeats with a bulkier yarn makes a stubbier, more substantial bookmark rather than a long, narrow one.
None of these require a different pattern, just a different yarn, hook, or finishing choice layered onto the same shell repeat.
More Quick Beginner Projects to Try
If you enjoyed this quick make, try the heart basket pattern next, it's a similarly fast, beginner-friendly project with its own repeating shaping logic to practice.
Conclusion
A bookmark is one of those projects that's small enough to finish in an evening but still teaches you something real, in this case, how to read and repeat a shell motif, which shows up constantly across lace crochet once you know what to look for. Make one for yourself, make a stack of them as gifts, or use it as a low-stakes way to try a finer thread weight for the first time. Either way, you'll have a finished, useful thing in your hands well before most projects even get past the materials list.
Frequently Asked Questions
Start with a short foundation chain and repeat a single shaping row until you reach your desired length, then finish with an edging. This pattern specifically uses a repeating shell stitch (3 dc, ch 2, 3 dc), which makes it a genuinely approachable first lace project, since you're really only ever learning one repeating unit.
Share this page
 X / Twitter
 Facebook
 Reddit
Related articles
Bernat Yarn Substitutes: What to Use Instead of Blanket, Maker, Pipsqueak & Bundle Up

How to Crochet a Pumpkin: Free Patterns for Fall & Halloween Decor
How to Read Crochet Patterns: A Beginner's Guide

Yarnzy: #1 Crochet & Knitting App
Track knitting and crochet projects with a timer & row counter, Import Patterns from Anywhere, Manage Stash & more all in one place.


Free to start · iOS, Android & Web
Scan to Download the App

Start your next project with confidence