
 Download the App
Crochet Duck Pattern: A Complete Beginner-Friendly Guide (Free, No-Sew)
5 Aug, 2026
If you've been looking for a crochet duck pattern that won't leave you fighting a magic ring or threading a needle at the end, this one's for you. This free, beginner-friendly pattern uses a simple chain start instead of a magic ring, and the beak and wings are crocheted directly onto the body, so there's no sewing required anywhere in the build. Grab your hook and a ball of velvet yarn, and let's make a duck.
Quick Facts About This Pattern
| Skill level | Beginner |
|---|---|
| Starting technique | Chain start (no magic ring) |
| Assembly | No-sew, beak and wings are crocheted directly onto the body |
| Number of pieces | 1 (body/head is one continuous piece; beak and wings are worked onto it, not made separately) |
| Stitches used | Chain (ch), single crochet (sc), increase (inc), invisible decrease (dec), slip stitch (sl st), double crochet (dc) |
| Construction method | Continuous rounds (spiral, no joining slip stitch), plus two short flat rows each for the beak and wings |
| Hook size | 4mm |
| Yarn | Velvet yarn (main color yellow, small amount of orange for the beak) |
| Eyes | 9mm safety eyes (or embroidered as a substitute) |
Get this pattern (and hundreds more) free in the Yarnzy app.
 Download Yarnzy
What You'll Need: Materials & Abbreviations
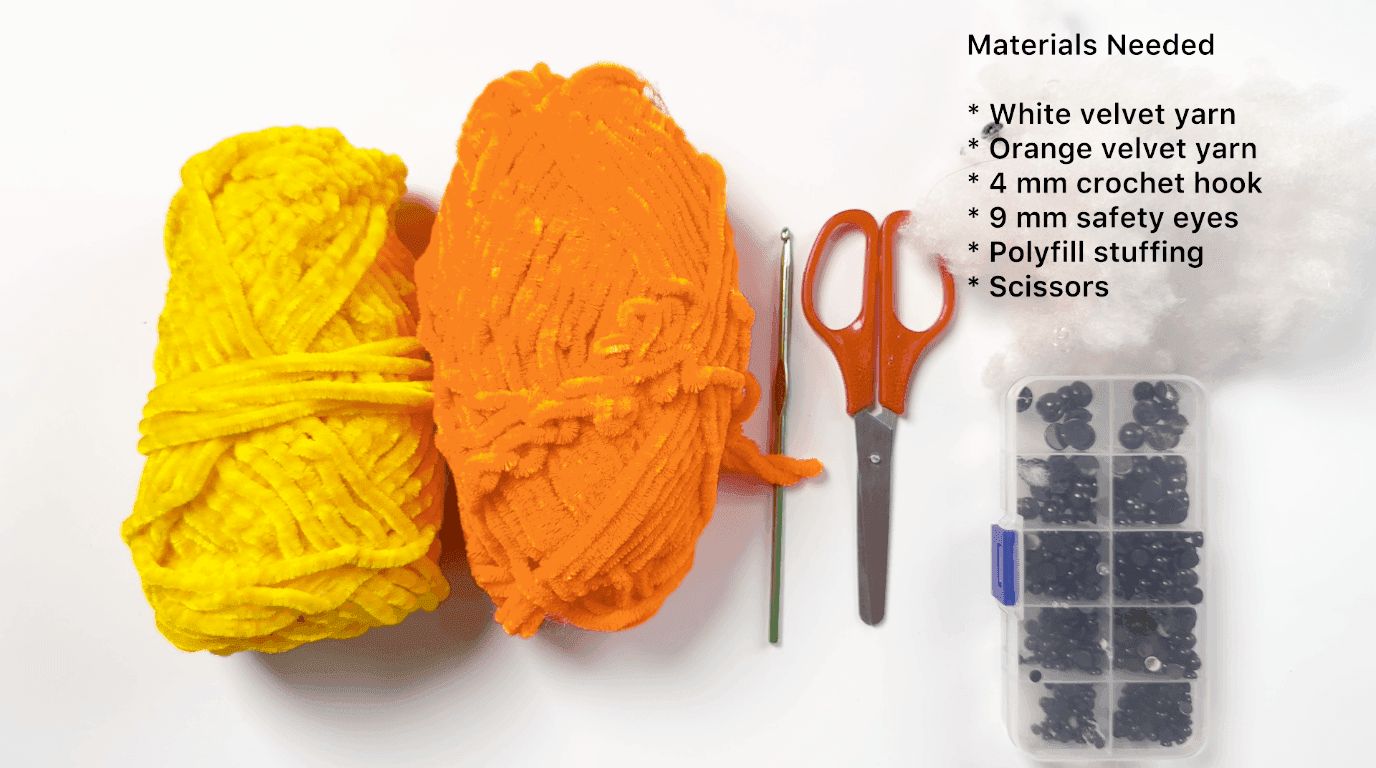
This is a small project, so the materials list is short. Everything below comes straight from the original pattern:
• Yellow velvet yarn (main body color)
• Small amount of orange velvet yarn (beak)
• 4mm crochet hook
• Fiberfill stuffing
• 9mm safety eyes (or the closest size you have)
• Stitch marker
• Yarn needle
• Scissors
Finished size: Yarn weight: This pattern is written for velvet yarn specifically, which doesn't map neatly onto a standard numbered weight category. If you do use a different yarn or hook size, keep in mind your duck will come out a different size than the sample, that's expected, not a mistake.
Abbreviations Used in This Pattern
| Abbreviation | Meaning |
|---|---|
| MR | Magic ring |
| CH | Chain |
| SC | Single crochet |
| INC | Increase (2 sc in same stitch) |
| DEC | Invisible decrease |
| SL ST | Slip stitch |
| DC | Double crochet |
| ST(S) | Stitch(es) |
| FO | Fasten off |
You'll notice MR is listed here even though this pattern doesn't actually use it, more on that below.
Basic Techniques Before You Start
Before you pick up your hook, it helps to know two things about how this pattern is built: it works in continuous rounds, and it starts with a chain instead of a magic ring. Both choices make this an easier first project than most amigurumi patterns you'll find.
Working in Continuous Rounds
This pattern doesn't join rounds with a slip stitch. Instead, you crochet in a continuous spiral, using a stitch marker to mark the beginning of each round so you don't lose track of where you started. Move the marker up into the first stitch of each new round as you go. If you've never worked in continuous rounds before, this is genuinely the easiest way to learn there's no joining seam to worry about, and the spiral shape is forgiving of small counting slips as long as you keep your stitch counts roughly on track.

Need a refresher on any of these terms as you go? Look up any abbreviation instantly Use our Stitch Dictionary
Magic Ring vs. Chain Start, Why This Pattern Skips the Magic Ring
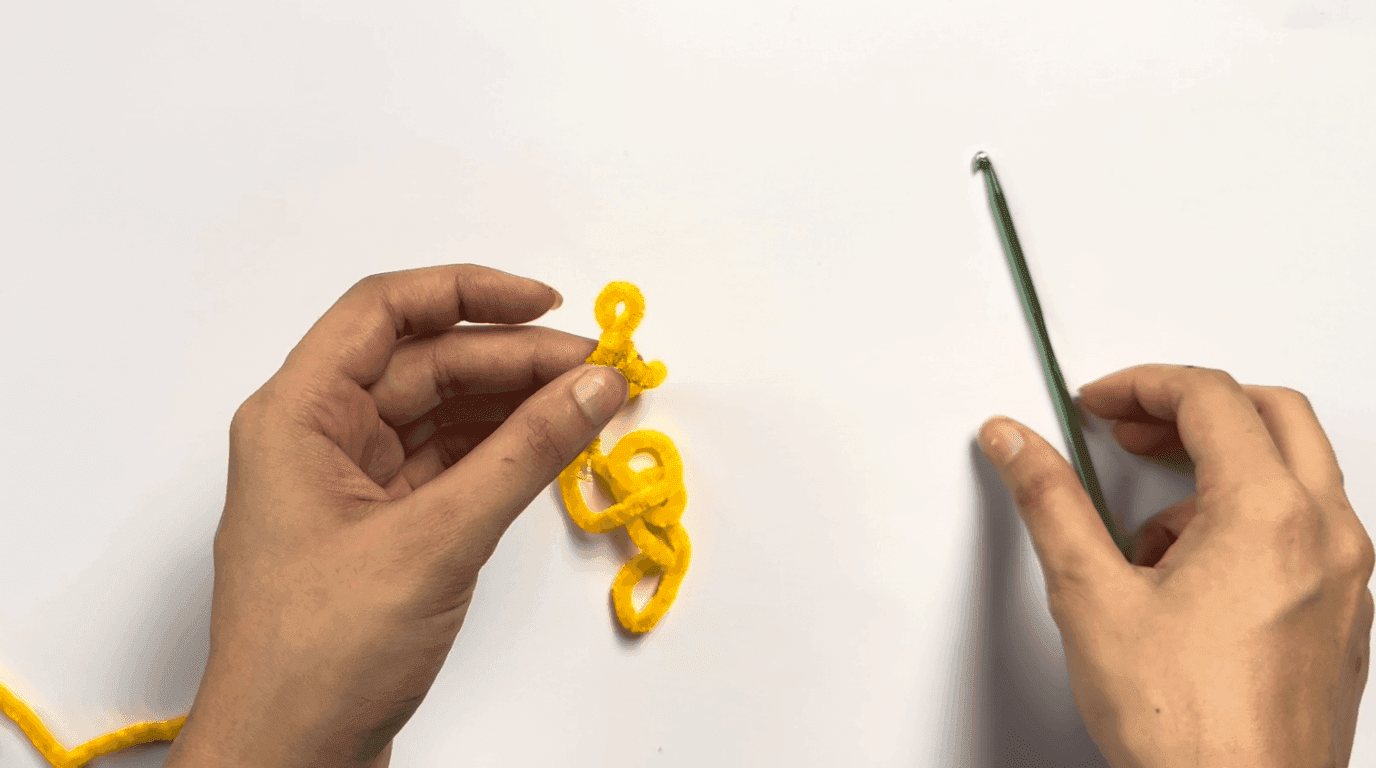
Most amigurumi patterns start every piece with a magic ring (MR): a loop of yarn you crochet into and then cinch closed, leaving no hole in the center. It's a useful technique, but it's also the single biggest stumbling block for first-time amigurumi crocheters: getting the tension right and cinching it closed without a gap takes practice.
How to Crochet the Duck's Body & Head (Step by Step)
The body and head are worked as one continuous piece, starting at the tail end and finishing at the top of the head. You'll increase steadily through the first several rounds to shape the base of the body, work even for a few rounds, then shape the head with a mix of decreases and increases before closing it off. Attach a stitch marker to round 1 and keep it moving up with you the whole way through.
Round-by-Round Instructions
Each round below includes the exact stitch pattern followed by a plain-language note on what that round is actually doing to the shape, useful if you want to check your work matches the picture in your head, not just the stitch count.
Round 1, starting ring: Ch 2. Work 8 sc in the 2nd chain from the hook. (8) What this does: this is the very start of the duck, a small ring of 8 stitches, made with a simple chain instead of a magic ring.
Round 2, first widening: Inc in each stitch around. (16) What this does: every single stitch doubles, so the ring widens quickly into a small flat circle.
Round 3, gradual widening: (Sc, inc) around. (24) What this does: now only every other stitch increases, so the circle keeps growing but more gently, and starts curving upward instead of staying flat.
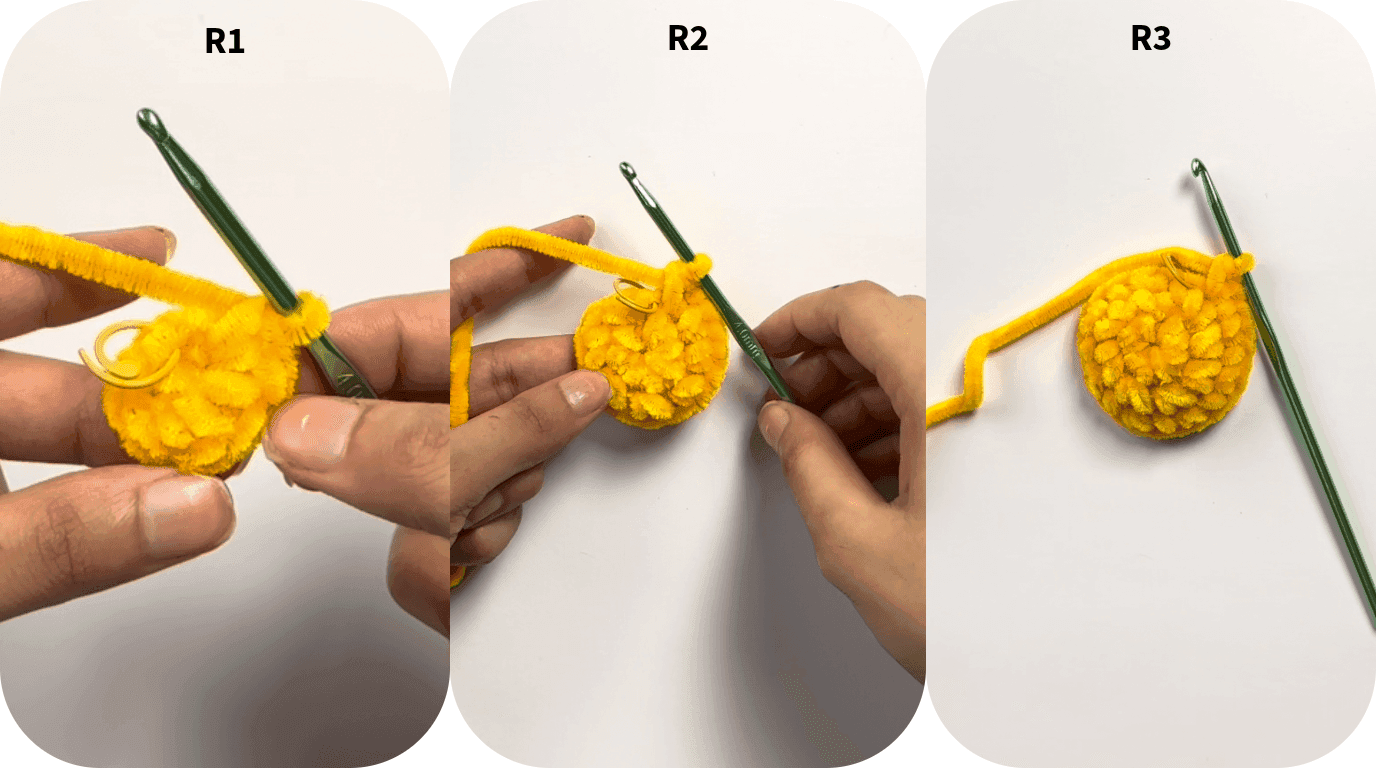
Rounds 4–7, building the base: Sc in each stitch around. (24 sts each round) What this does: no increase here, four plain rounds build straight "walls," forming the lower body of the duck.
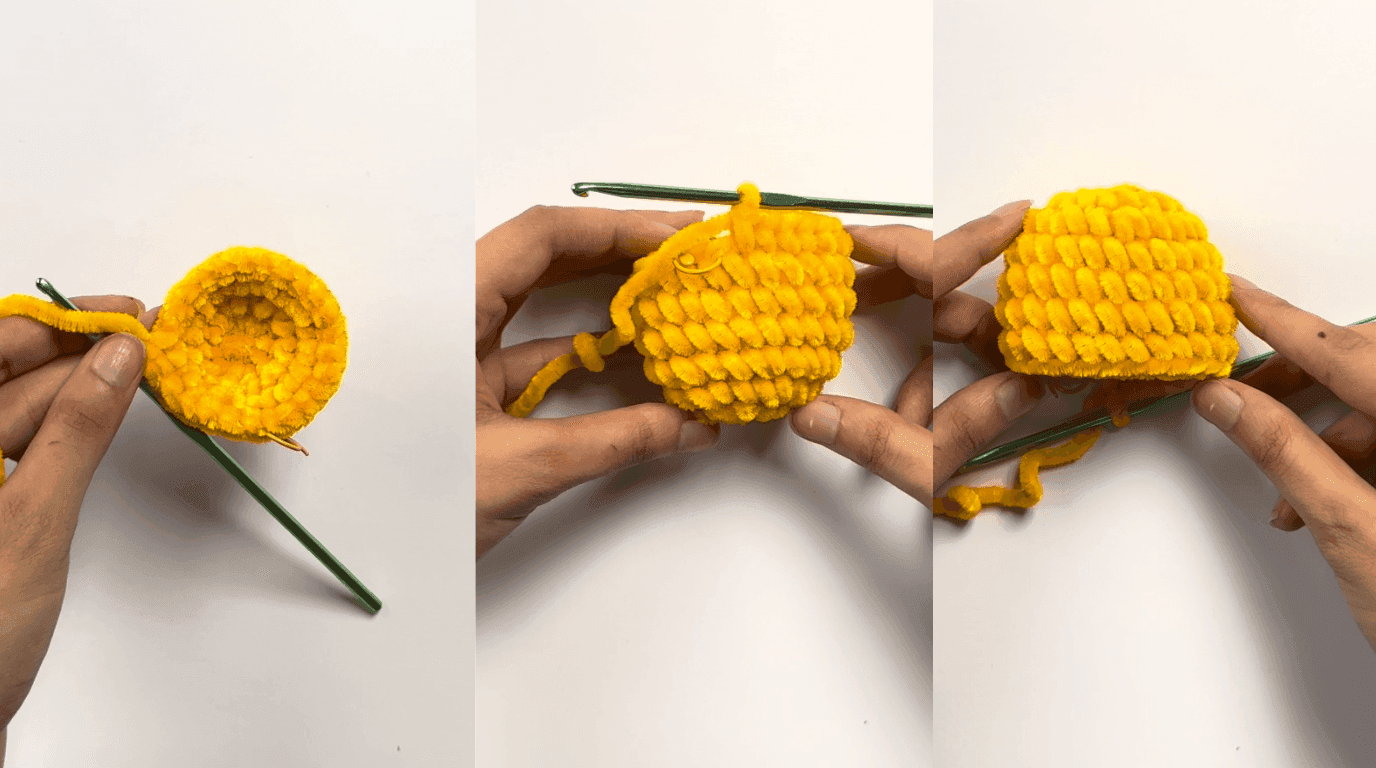
Round 8, narrowing the waist: Dec around. (12) What this does: the tube pulls in sharply, creating a narrower point, this is the "waist" between the lower body and the head.
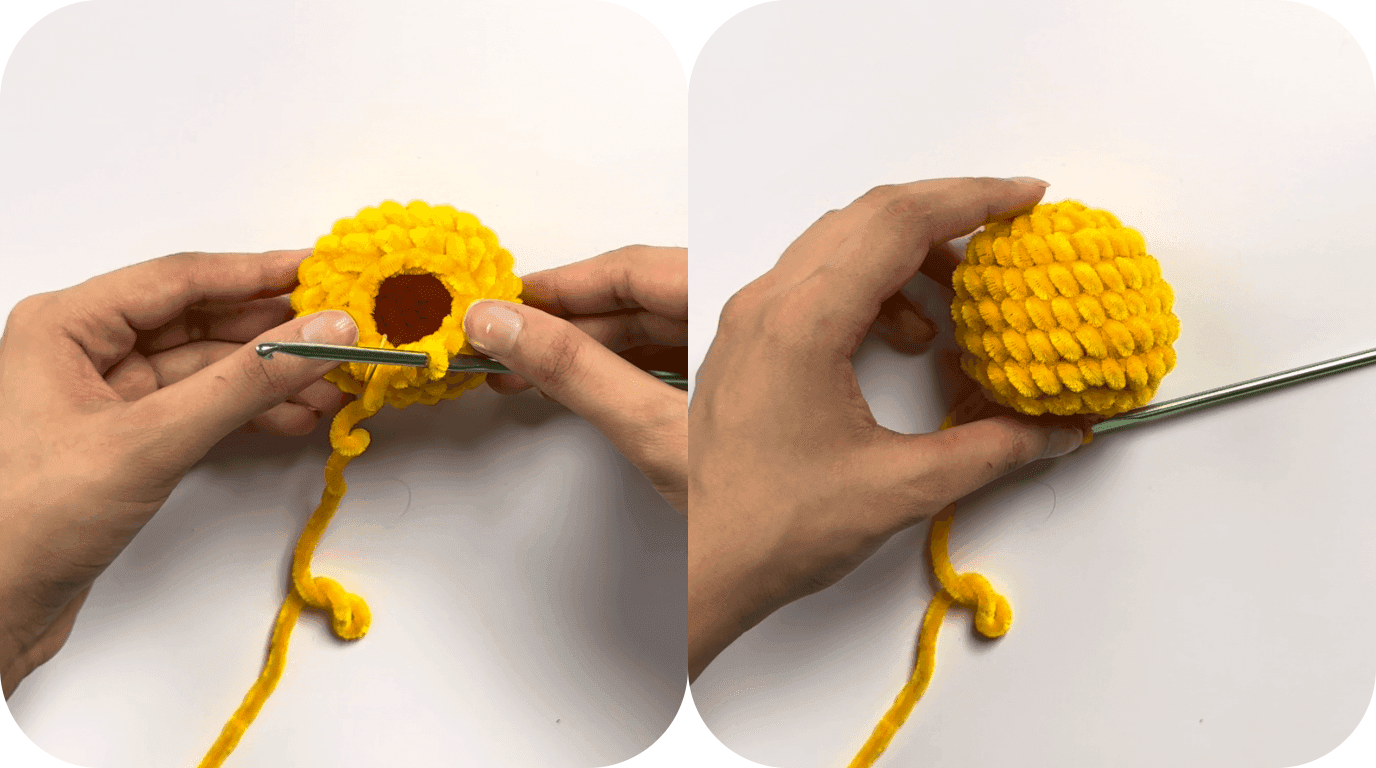
Round 9, flaring back out: Inc in each stitch around. (24) What this does: right after narrowing, the stitch count doubles again, flaring the shape back out to form the base of the head, sitting just above the narrow waist from round 8.
Round 10, shaping begins: 22 sc, inc in the last 2 stitches. (26) What this does: only 2 stitches increase this round, and they're placed at the end rather than spread evenly this starts shaping the head asymmetrically (rounder toward the face) rather than as a plain circle.
Round 11: 23 sc, inc in the next 2 stitches, sc in last stitch. (28) What this does: the same 2-stitch increase continues, shifted slightly, gradually building out the rounded shape of the head.
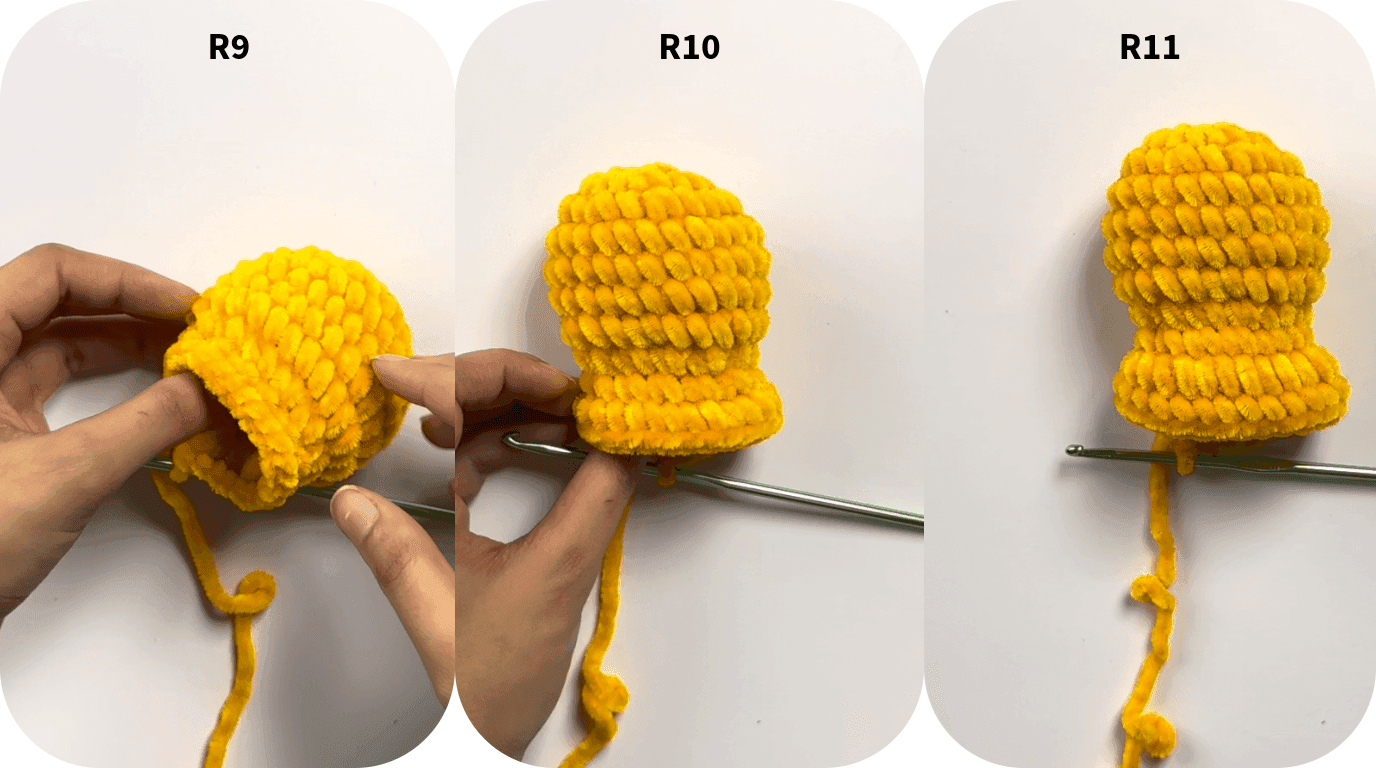
Round 12: 24 sc, inc in the next 2 stitches, sc in last 2 stitches. (30) What this does: continues the same gradual, shifted increase pattern from rounds 10–11.
Round 13: 25 sc, inc in the next 2 stitches, sc in last 3 stitches. (32) What this does: the last of this shaping sequence, by the end of this round the head has reached its widest point, 32 stitches around.
Round 14, settle round: Sc around. (32) What this does: one plain round with no shaping, letting the head sit at its widest point before you start narrowing it back in for the top of the head.
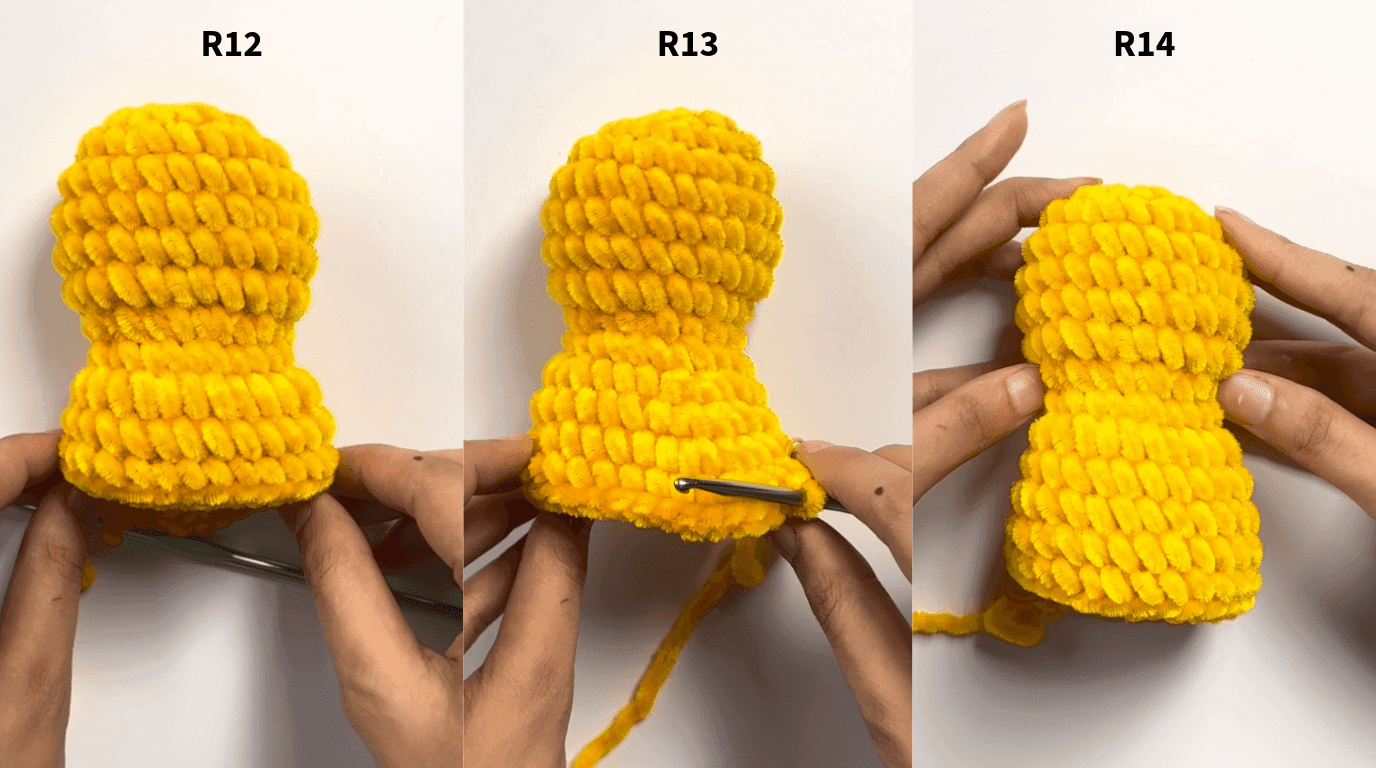
This is a good point to pause and attach the beak and safety eyes before you continue, see the next two sections. Both are placed between rounds 5 and 6, so it's easier to get the placement right while the body is still open and stretchy.
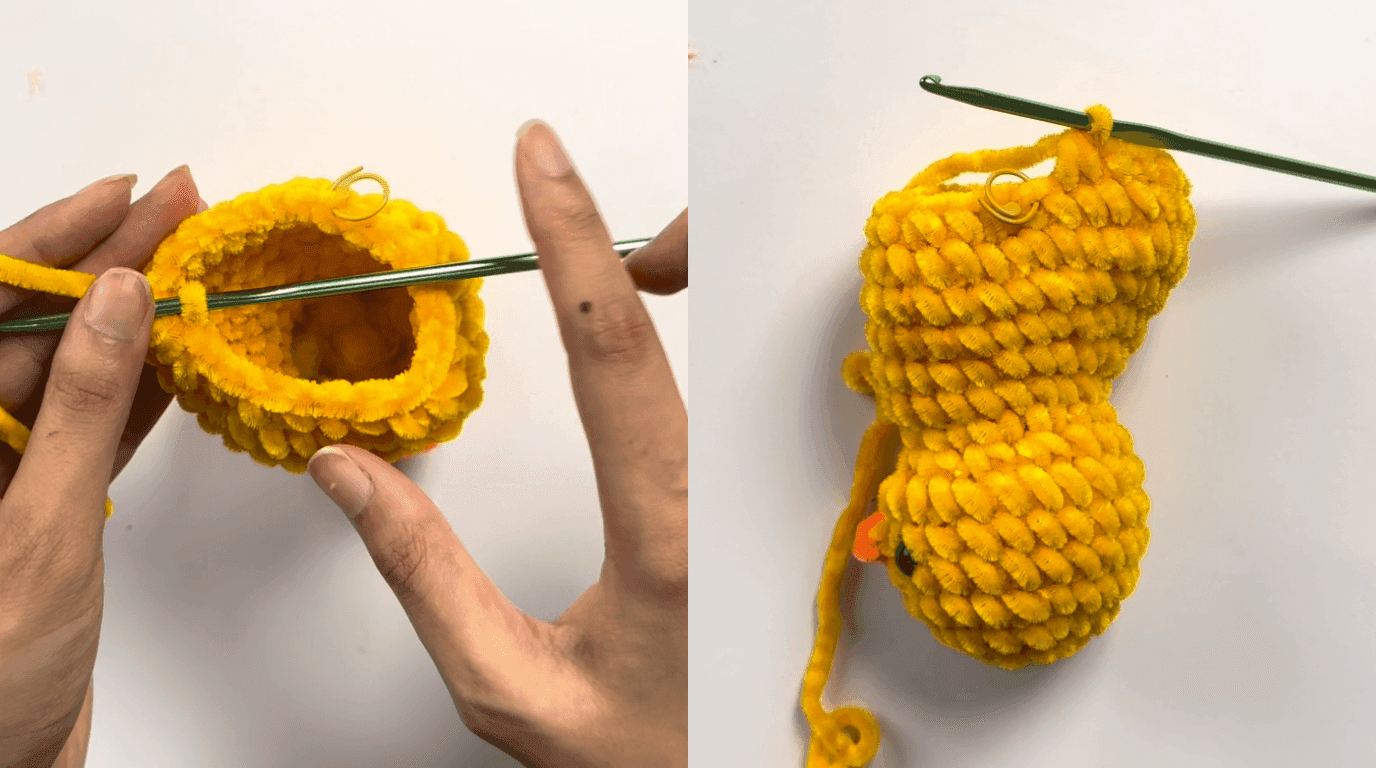
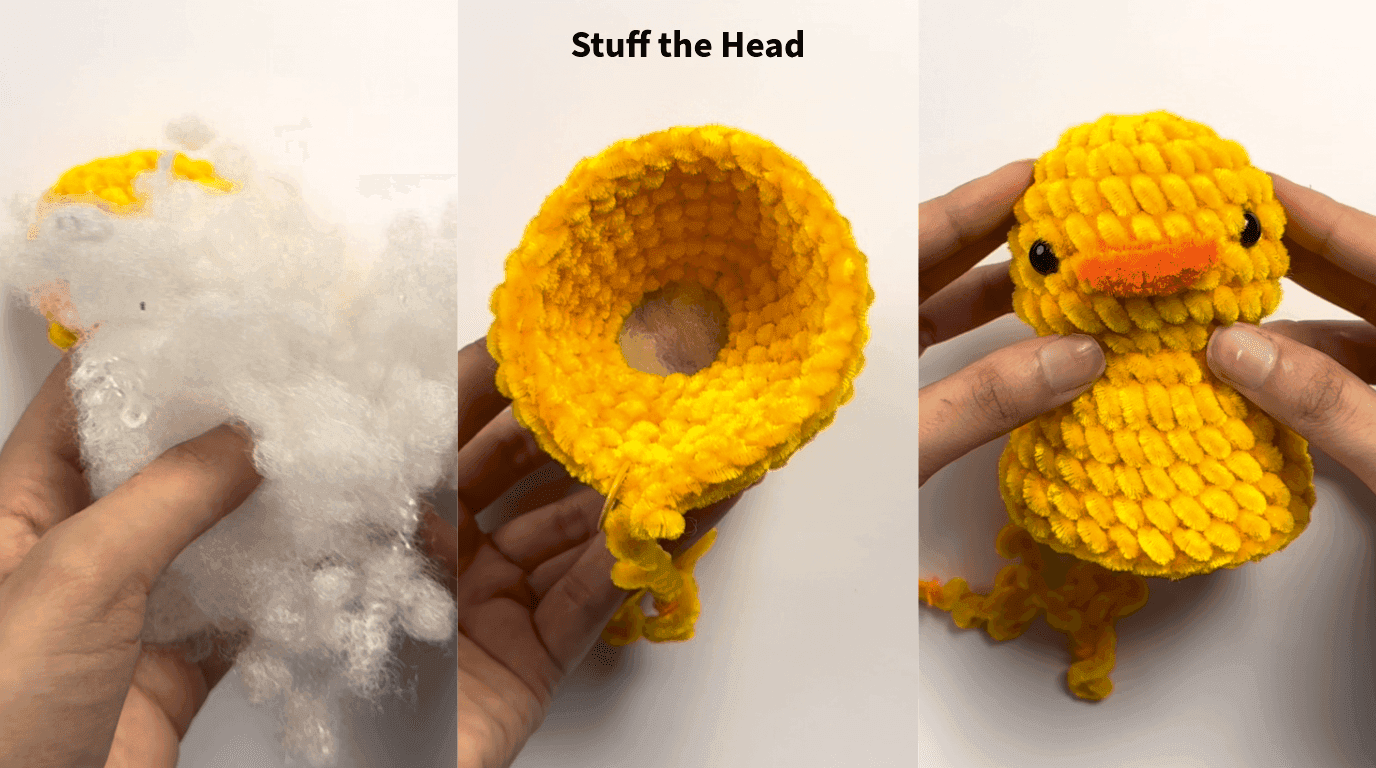
Round 15, shaping the top of the head: Repeat: (sc, dec) ×2, 10 sc, (dec, sc) ×3, dec, dec, sc, dec. Stuff the head firmly before continuing. (24) What this does: several decreases placed unevenly around the round pull the top of the head in without making it pointy this is what gives the head its rounded top rather than a cone shape. Stuff now, before it closes further.
Round 16, closing in: (Sc, dec) around. (16) Continue stuffing the body firmly. What this does: a steady, even decrease continues narrowing the opening at the top of the head.
Round 17, final closure: Dec around. (8) Fasten off, leaving a long tail. What this does: this is the last round, the opening is now small enough to cinch shut completely in the next step.
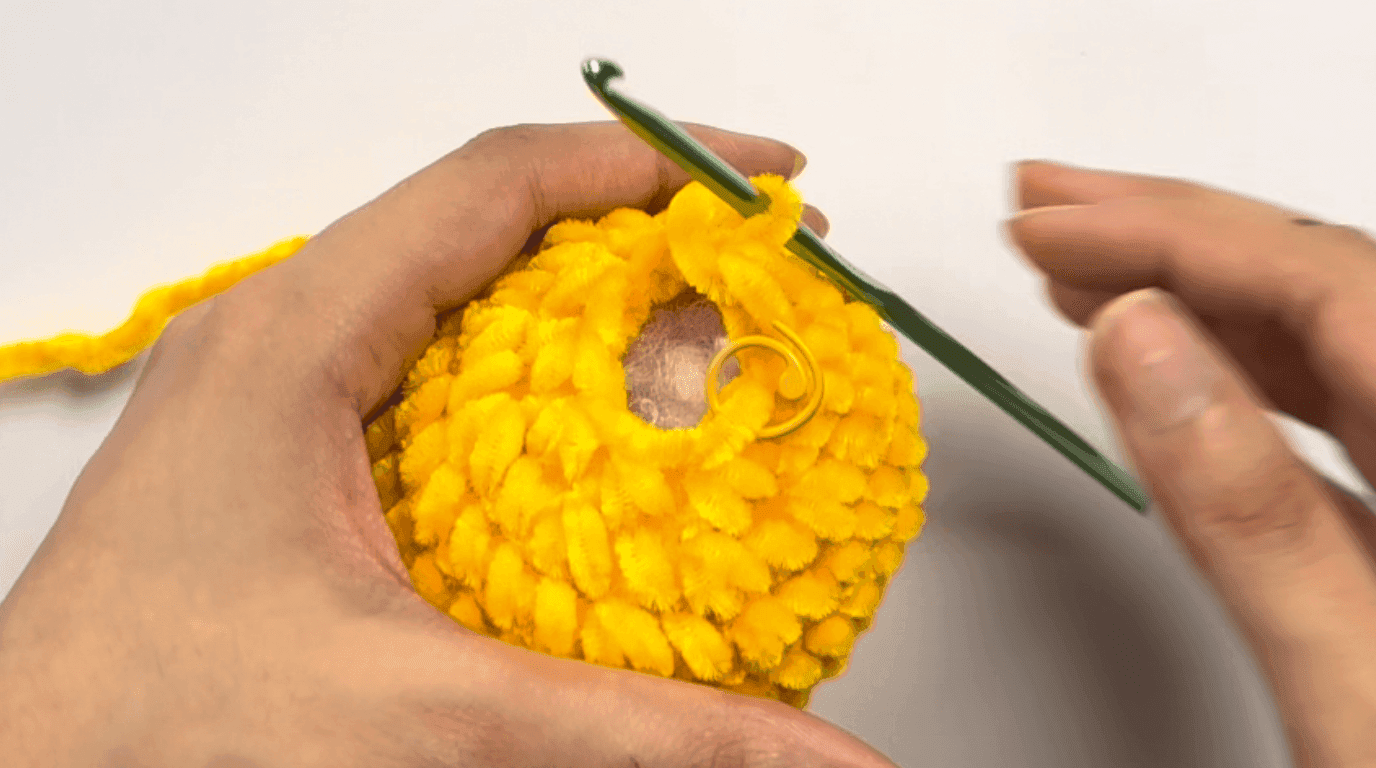
Thread the tail through the front loops of the remaining stitches, pull tightly to close the opening, and weave in the end.
Stuffing as You Go (Why It Matters)
Notice that this pattern asks you to stuff twice, once during round 15, before the head closes, and again while working round 16, rather than waiting until the whole piece is finished. That's deliberate. Once the top of the head closes at round 17, you won't be able to reach back down into the neck to add more filling. Stuffing progressively, in small handfuls, also gives you a rounder, more even shape than cramming stuffing in at the very end, which tends to leave lumps and stretched stitches near the closing round. If a section feels under-filled once you've finished, it's much harder to fix after the fact,so it's better to add a little extra as you go, rather than too little. Just keep it firm enough to hold its shape without visibly stretching the stitches.
Crocheting the Beak, No Sewing Required
Unlike most duck patterns, this beak isn't made separately and stitched on afterward, you crochet it directly into the body, so there's no sewing step at all.
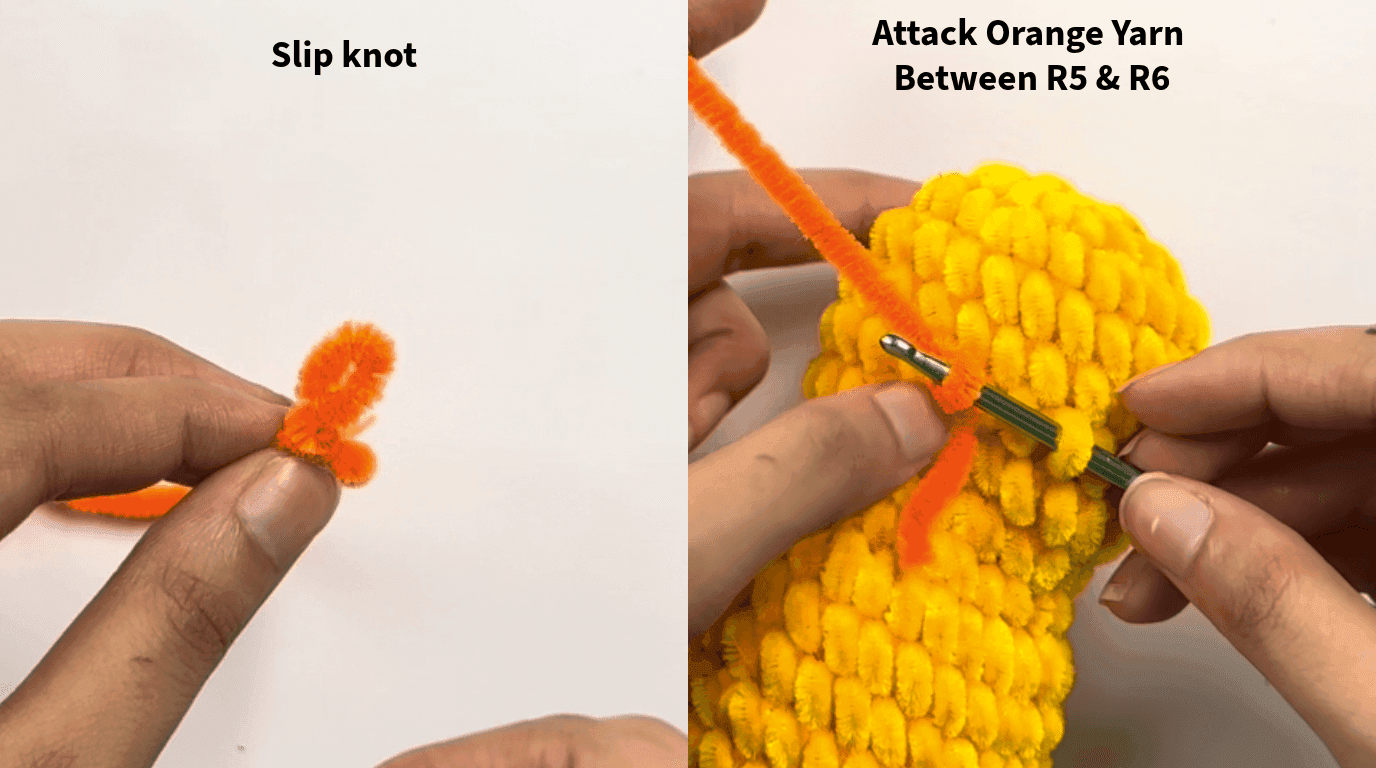
Row 1:
• Attach yarn.
• Ch 1.
• Sc in next 2 sts.
• Sl st in next st.
• Ch 1 and turn.
What this does: this lays down the first, narrower edge of the beak, directly into the body stitches, 2 single crochets flanked by a starting chain and a slip stitch to anchor it.
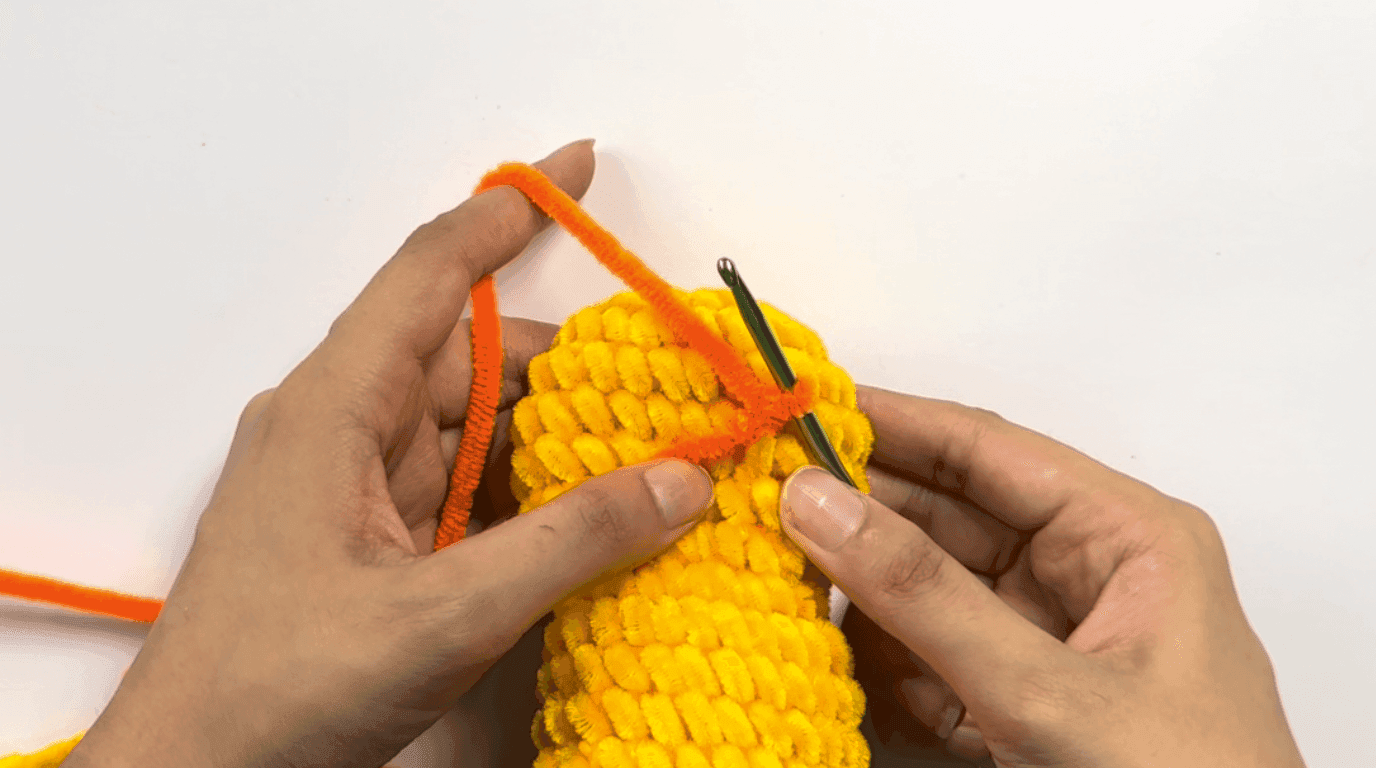
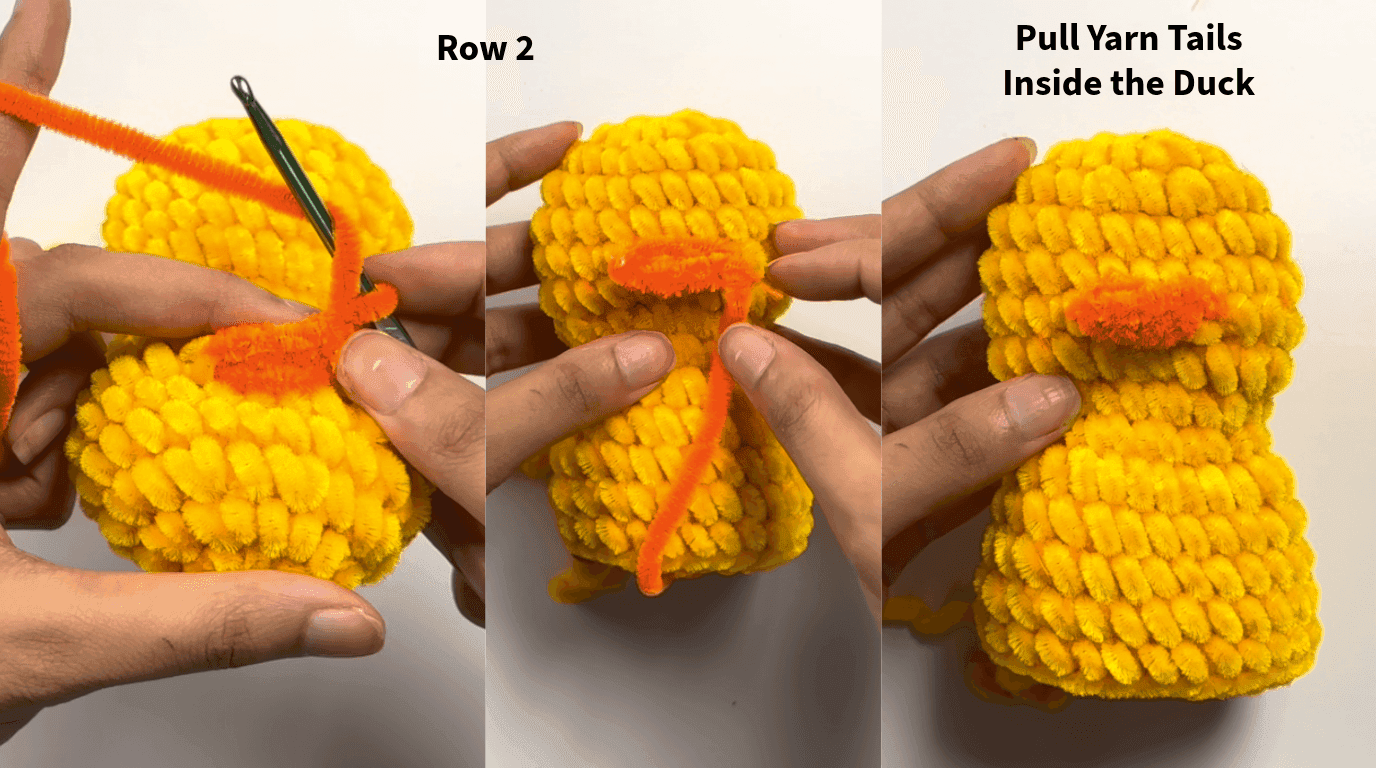
Row 2:
• Skip the slip stitch.
• Sc in next 2 sts.
• Sl st into the beginning chain.
• FO, leaving a long tail.
What this does: this second short row builds the beak up to its full 2-row depth and closes it off with a slip stitch, giving the beak a small amount of dimension rather than lying totally flat.
Pull both yarn tails inside the duck and knot securely if desired.
Attaching the Safety Eyes
With the beak in place, you can now position the eyes accurately relative to it:
• Insert the eyes between rounds 5 and 6.
• Place each eye 2 stitches away from the beak, on either side.
• Secure the safety backs before continuing.
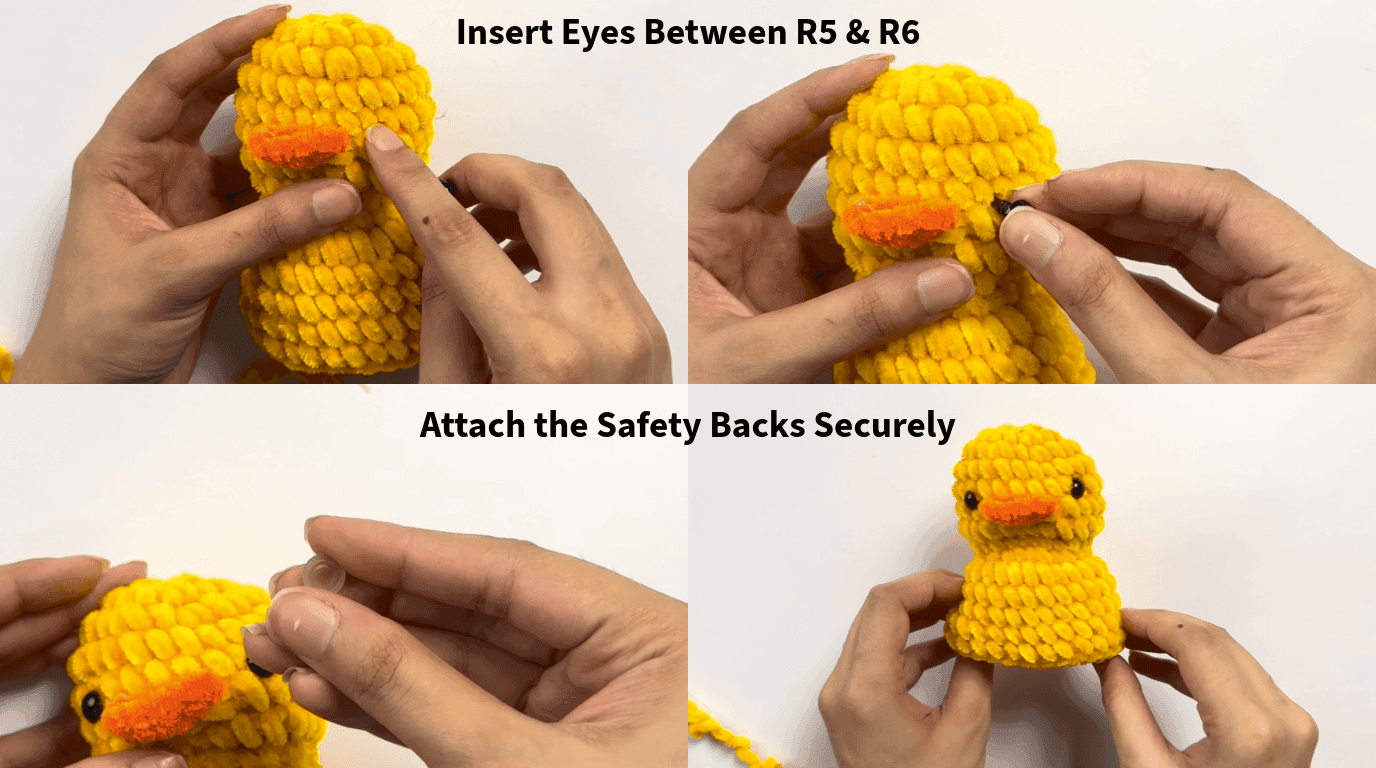
This placement, 2 stitches out from the beak on each side, on the same rounds as the beak itself, is what keeps the finished face symmetrical. If you eyeball the placement instead of counting stitches, this is the single easiest spot for a duck to end up looking slightly cross-eyed or lopsided, so it's worth taking the extra thirty seconds to count.
Finishing the Body
Once the beak and eyes are secured, continue with Round 15 above to shape and close the head. Stuff firmly as you go through rounds 15 and 16, then close the opening at round 17 as described. At this point your duck's body and head are fully complete, all that's left is the wings and any finishing details.
Crocheting the Wings, Also No Sewing Required
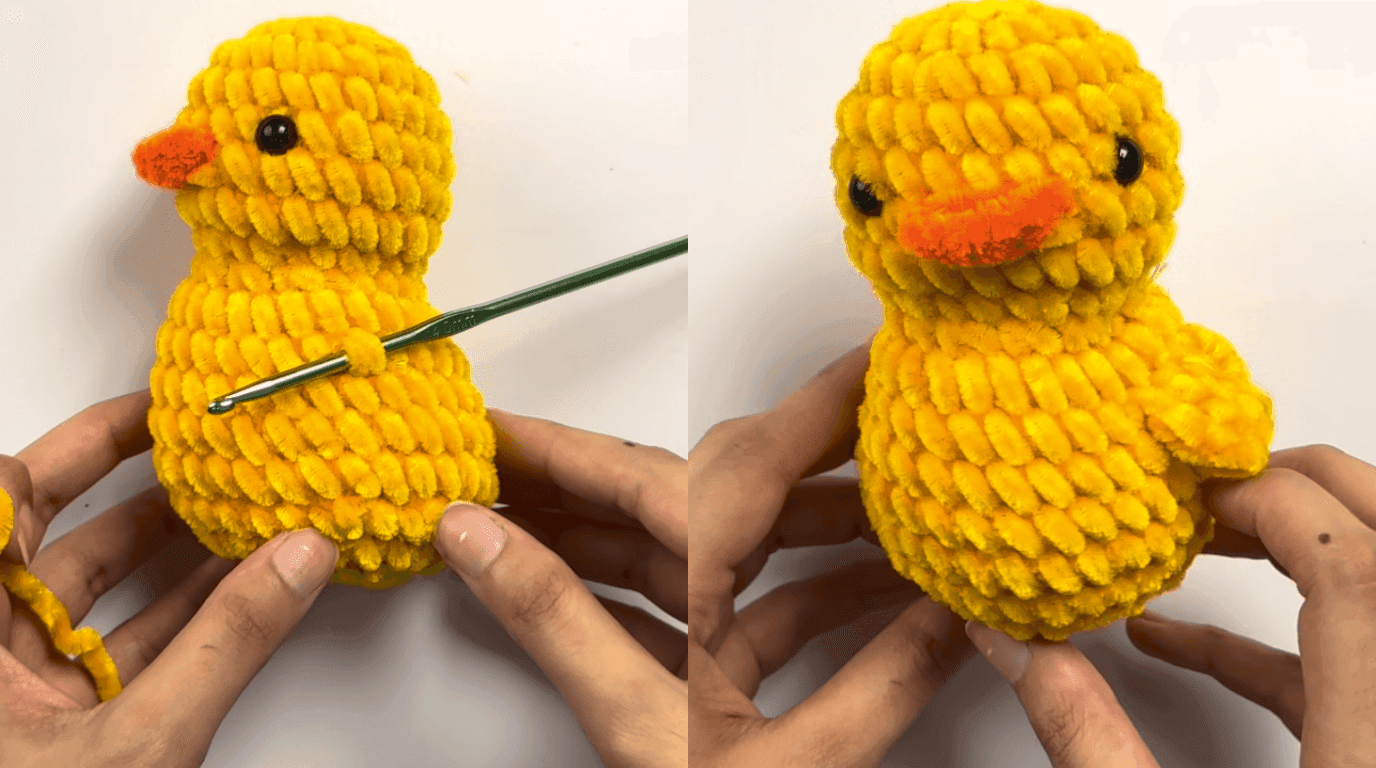
Like the beak, the wings are worked directly onto the body, no sewing here either. Each wing spans 4 stitches, and you'll repeat the whole process on both sides.
Row 1:
• Attach yarn in round 10–11.
• Ch 2.
• Dc in same stitch.
• Dc in each of the next 3 stitches.
• Ch 1 and turn. (4 dc total)
What this does: double crochet is taller than single crochet, so this first row gives the wing some height and a slightly ruffled edge right from the base, rather than a flat strip.
Row 2:
• Skip first stitch.
• Sc in next 2 sts.
• Sl st in last stitch.
• FO with a long tail.
What this does: a shorter second row of single crochet caps the wing, tapering it and giving it a defined edge instead of leaving the tall double-crochet edge exposed.
Pull the yarn tails into the body to hide them. Repeat on the opposite side.
Using a different yarn weight or hook size than the one called for? Find the right substitute before you start the wings
Finishing Touches: Shaping & Optional Details
• Weave in any remaining yarn ends.
• Shape the duck gently with your hands, smoothing the stuffing, rounding out the head, and setting the wings into a natural resting position.
• Add optional blush or embroidered details if you'd like a little extra personality. A small pink or peach stitch on each cheek is a common finishing touch on amigurumi animals and works well here too.
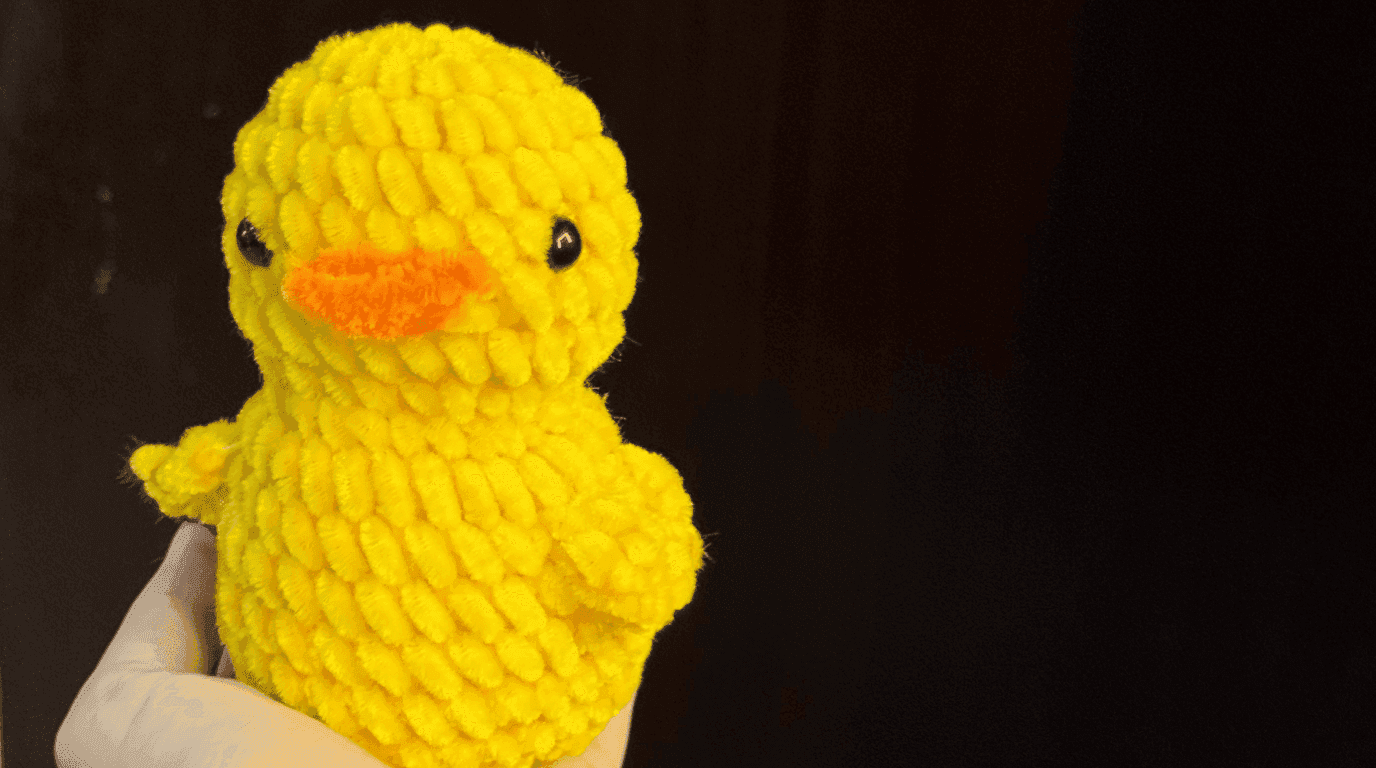
That's it, your duck is complete.
No Magic Ring, No Sewing: What Makes This Pattern Different
Most free duck crochet patterns you'll find online start with a magic ring and finish with a needle sewing the beak, wings, and sometimes feet onto the body as a separate step once all the pieces are done. That's a perfectly good way to build amigurumi, but it adds two of the more error-prone parts of the craft (magic ring tension, and matching up sewn pieces symmetrically) to a project aimed at beginners.
This pattern sidesteps both. The body starts with a simple chain instead of a magic ring, and the beak and wings are crocheted straight into the body as you go, rather than made separately and attached afterward. There's genuinely no sewing step anywhere in this pattern what you crochet is what you finish with. If you've tried amigurumi before and gotten stuck on either of those two techniques, this is a good pattern to pick back up with.
Common Mistakes to Avoid
A few things trip up first-timers on patterns like this one more than anything else:
• Losing track of the beginning of the round. Because this pattern works in a continuous spiral with no joining slip stitch, it's easy to lose the start of a round, especially through the increase rounds early on. Keep your stitch marker moving up every single round, no exceptions, even if the count seems obvious.
• Miscounting through the increase rounds. Rounds 10 through 13 each add stitches in a slightly different place than the round before. If your stitch count comes out even slightly off at the end of one of these rounds, stop and recount before moving on, a small error here compounds through every later round.
• Placing the beak or eyes off-center. Both are placed relative to rounds 5 and 6, and the eyes are placed relative to the beak. If you eyeball either placement instead of counting stitches and folding the body to find center front first, the face is the first thing to end up asymmetrical and it's the hardest thing to fix once the yarn is secured.
• Wings that look uneven or twisted. Since the wings are worked in rows rather than rounds, it's easy to forget the turn at the end of Row 1, which throws off the shape of Row 2. Double-check that you're turning your work after the chain 1, not before.
If your duck comes out looking a little lopsided on your first attempt, that's genuinely normal for this technique, amigurumi shaping is one of those skills that clicks on the second or third try more than the first.
Conclusion
That's your finished duck, one continuous piece from tail to head, a beak and wings that never touched a sewing needle, and not a single magic ring along the way. If this was your first time trying amigurumi, or your first time getting past the magic ring, that's genuinely a win worth sitting with for a second before you move on to the next project. Save this pattern for the next time you want a quick, satisfying make, and if you run into a lopsided round or two along the way
Frequently Asked Questions
Yes, It uses only a single crochet, increases, decreases, and a small amount of double crochet for the wings with no advanced stitches. The chain start and no-sew construction also remove two of the trickier parts of amigurumi that usually trip up first-timers.
Share this page
 X / Twitter
 Facebook
 Reddit
Related articles
Bernat Yarn Substitutes: What to Use Instead of Blanket, Maker, Pipsqueak & Bundle Up

How to Crochet a Pumpkin: Free Patterns for Fall & Halloween Decor
How to Read Crochet Patterns: A Beginner's Guide

Yarnzy: #1 Crochet & Knitting App
Track knitting and crochet projects with a timer & row counter, Import Patterns from Anywhere, Manage Stash & more all in one place.


Free to start · iOS, Android & Web
Scan to Download the App

Start your next project with confidence